Installing System Components 109
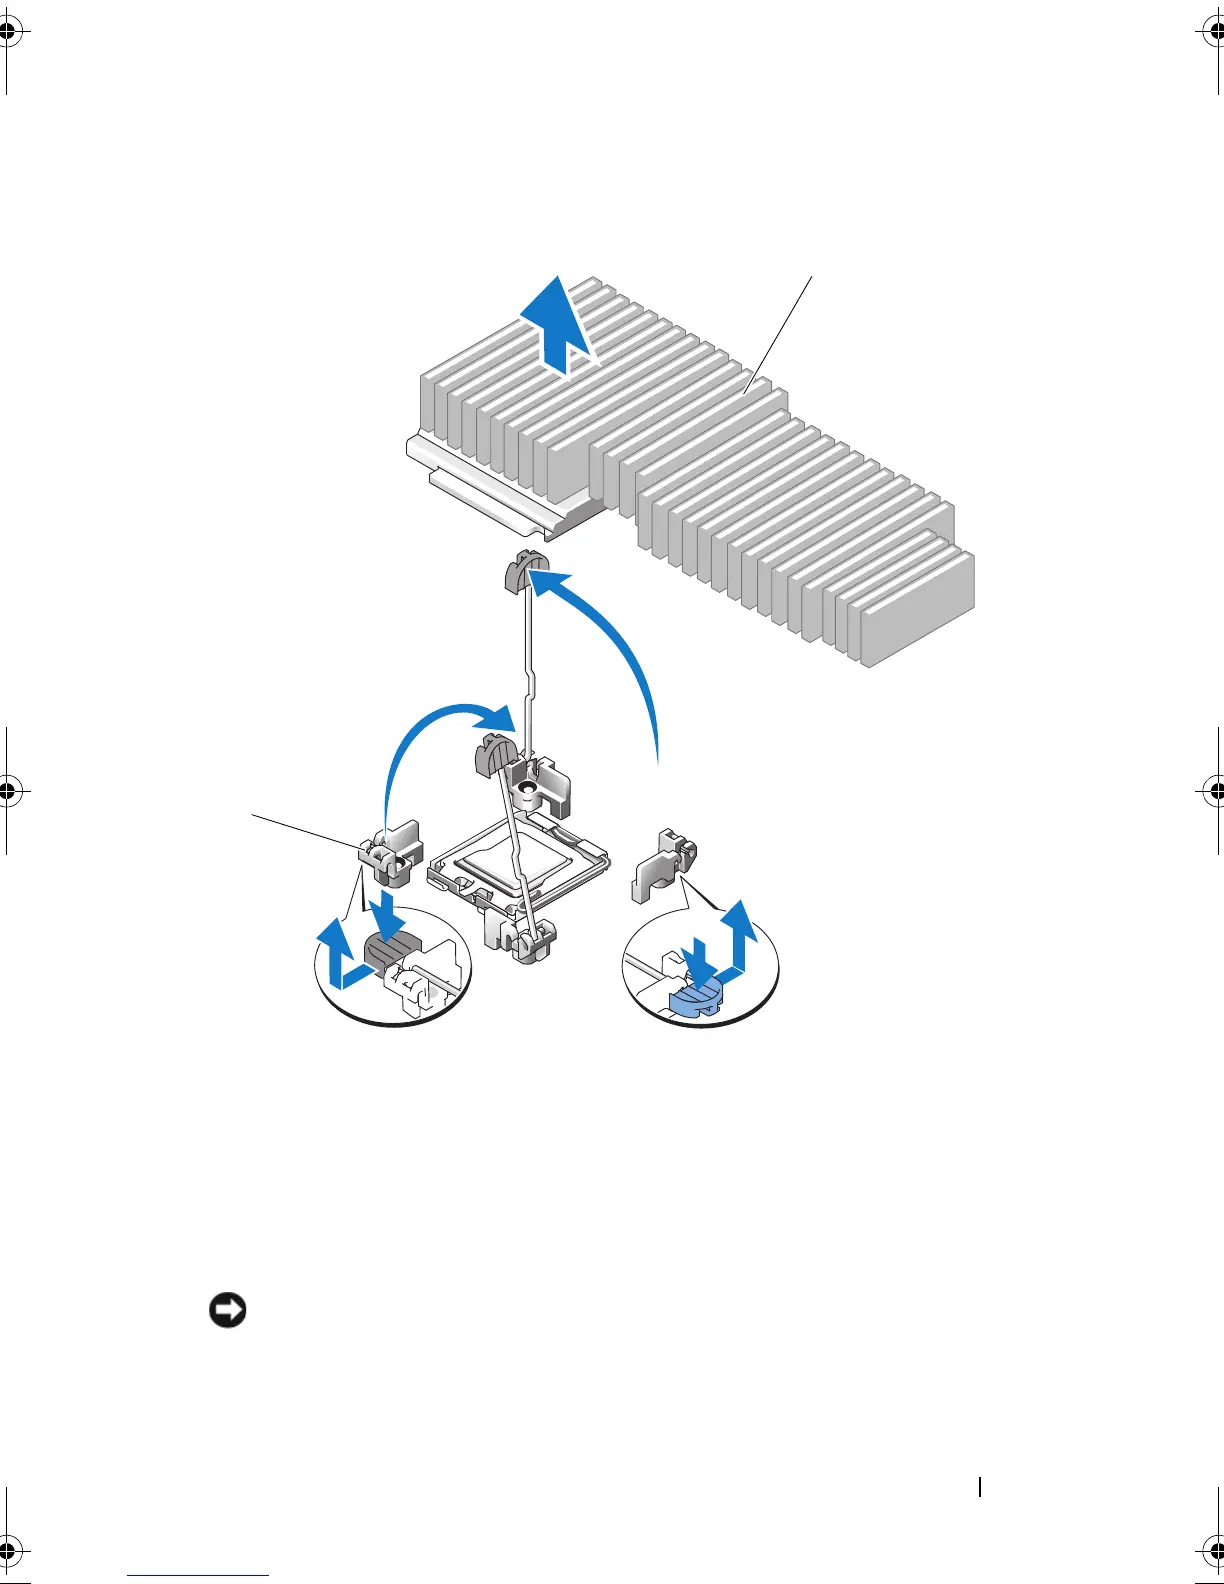
Figure 3-19. Installing and Removing the Heat Sink
8
Release the socket-release lever before opening the processor shield.
9
Rotate the processor shield upward and out of the way.
10
Lift the processor out of the socket and leave the release lever up so that
the socket is ready for the new processor.
NOTICE: Be careful not to bend any of the pins on the ZIF socket when removing
the processor. Bending the pins can permanently damage the system board.
1 release levers (2) 2 heat sink
book.book Page 109 Sunday, June 21, 2009 5:16 PM
 Loading...