90 Installing System Components
NOTE: For nonredundant power supplies, remove the power cord retention bracket
that secures the system cables. See the Getting Started Guide that ships with your
system for more information.
4
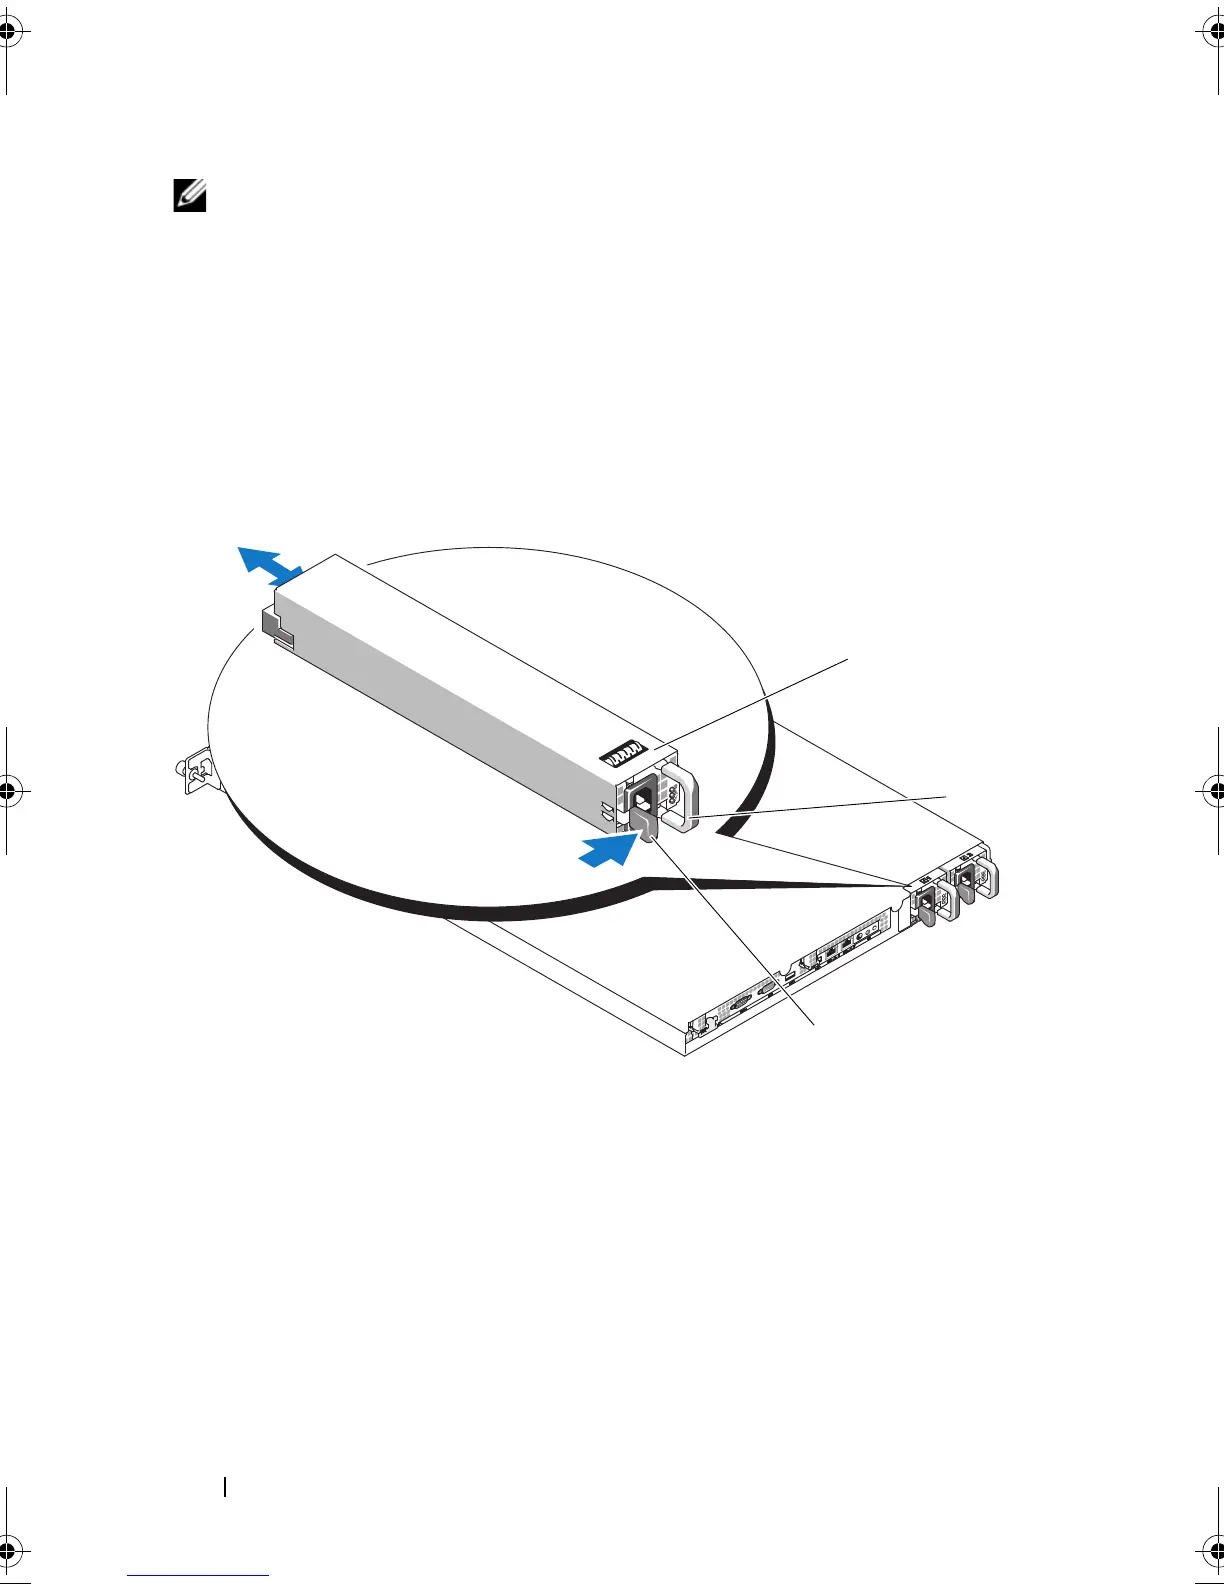
Release the locking tab on the left side of the power supply by pressing in
toward the right.. See Figure 3-12.
5
Pull the power supply straight out to release it from the power distribution
board and clear the chassis.
Figure 3-12. Installing and Removing the Power Supply
Replacing a Power Supply
1
Slide the new power supply straight into the chassis. See Figure 3-12.
2
Push the handle all the way down until it is completely flush with the
power-supply faceplate and the orange locking tab engages. See
Figure 3-12.
1 redundant power supply (2) 2 power-supply handle
3 locking tab
book.book Page 90 Sunday, June 21, 2009 5:16 PM
 Loading...