EasyManuals Logo

Dell PowerEdge R300 User Manual

Dell PowerEdge R300
186 pages
To Next Page IconTo Next Page
To Previous Page IconTo Previous Page
Page #77 background imageLoading...
Page #77 background image
Installing System Components 77
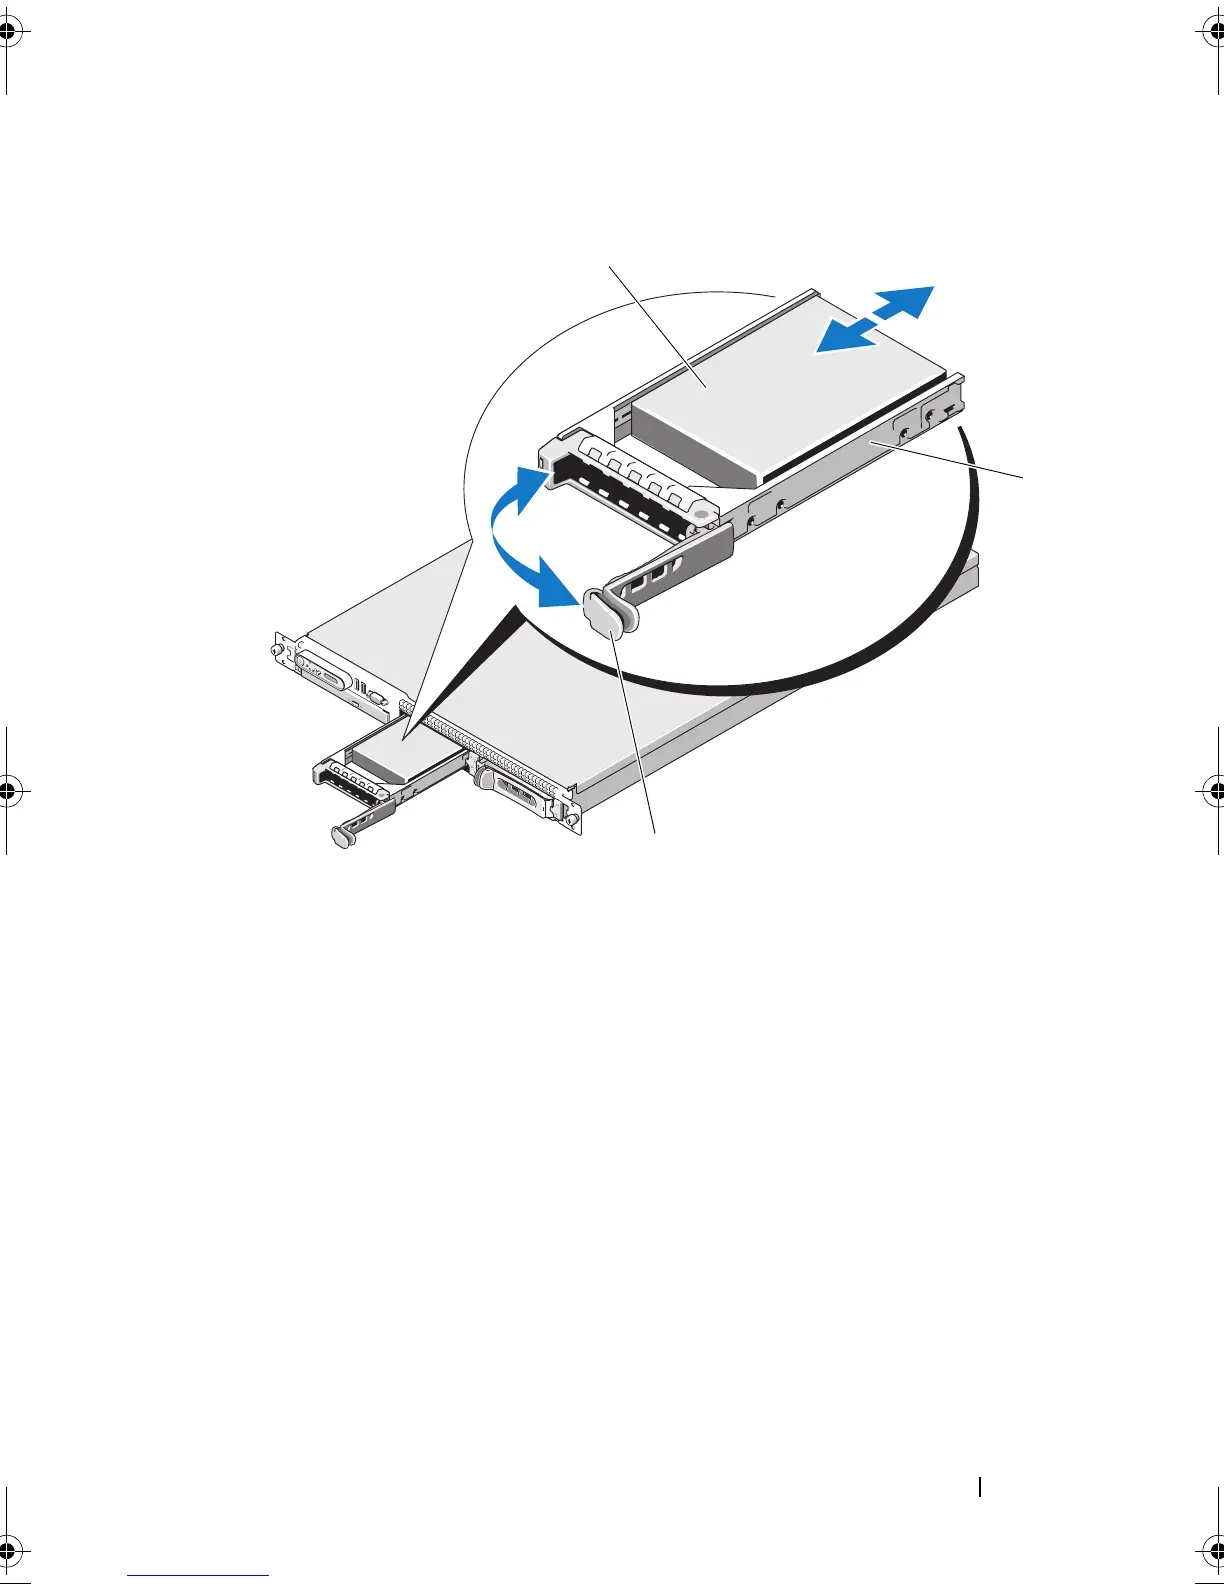
Figure 3-6. Installing a Hot-Plug Hard Drive
3
Install the hot-plug hard drive.
a
Open the handle on the hard-drive carrier.
b
Insert the hard-drive carrier into the drive bay until the carrier
contacts the backplane.
c
Close the handle to lock the drive in place.
4 Replace the front bezel, if it was removed in
step 1. See "Front Bezel" on
page 69.
1 hard drive 2 drive carrier
3 drive carrier release handle
1
2
3
book.book Page 77 Sunday, June 21, 2009 5:16 PM

Table of Contents

Other manuals for Dell PowerEdge R300

Questions and Answers:

Question and Answer IconNeed help?

Do you have a question about the Dell PowerEdge R300 and is the answer not in the manual?

Dell PowerEdge R300 Specifications

General IconGeneral
BrandDell
ModelPowerEdge R300
CategoryServer
LanguageEnglish

Related product manuals