Next steps
1 Install the expansion card riser 1.
2 Install the air shroud.
3 Follow the procedure listed in After working inside your system.
Related link
Installing expansion card riser 1
Installing the air shroud
Drive backplane
Depending on your system conguration, the drive backplanes supported in PowerEdge R740XD are listed here:
Table 45. Supported backplane options for PowerEdge R740XD systems.
System Supported backplane options
PowerEdge R740xd
2.5 inch (x24) SAS/SATA/NVMe backplane or
2.5 inch (x24) SAS/SATA/NVMe backplane, 2.5 inch (x4) SAS/SATA backplane on the mid drive
tray and 2.5 inch (x4) SAS/SATA backplane (back) or
2.5 inch (x24) SAS/SATA/NVMe backplane which supports 12 SAS/SATA drives and 12 NVMe
drives, or
3.5 inch (x12) SAS/SATA backplane, or
3.5 inch (x12) SAS/SATA backplane, 3.5 inch (x4) SAS/SATA backplane on the mid drive tray and
3.5 inch (x2) SAS/SATA backplane (back), or
3.5 inch (x12) SAS/SATA backplane, 3.5 inch (x4) SAS/SATA backplane on the mid drive tray and
2.5 inch (x4) SAS/SATA backplane (back) or
2.5 inch (x24) NVMe backplane
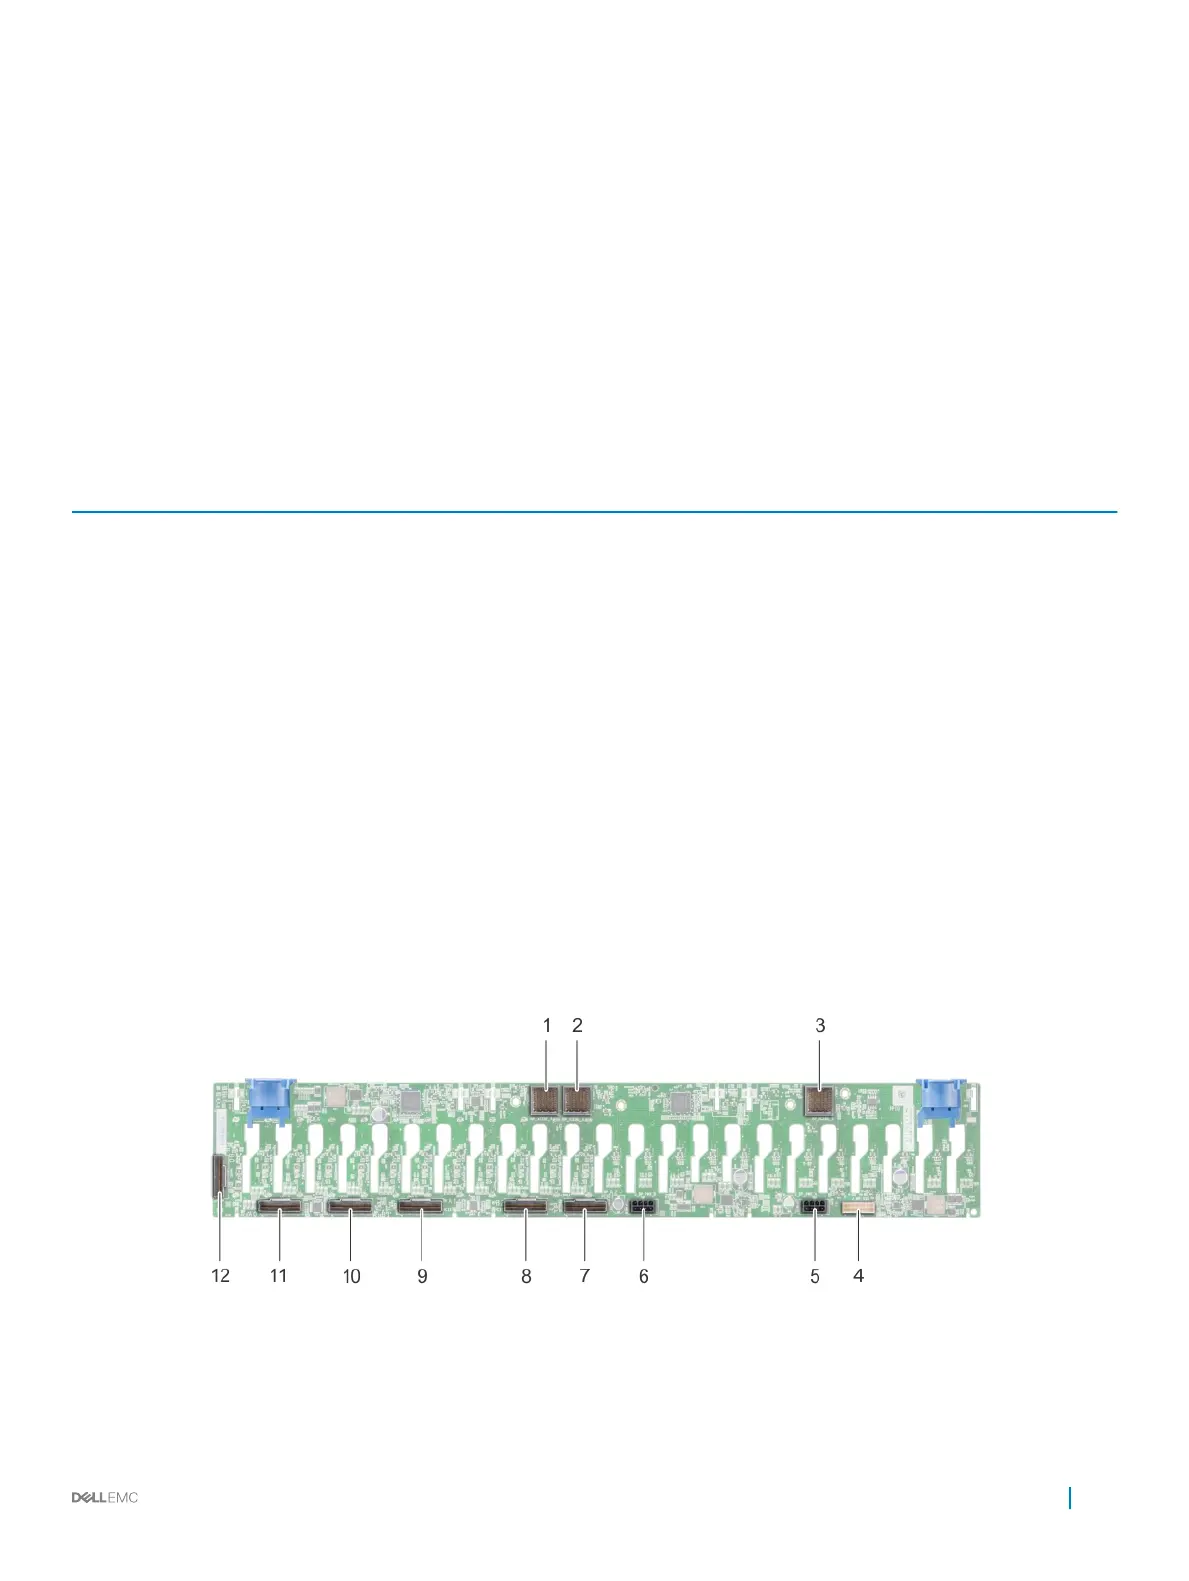
Drive backplane connectors
Figure 115. Back view of 24 x 2.5 inch backplane
1
backplane to expander board connector (BP_XCEDE_3) 2 backplane to expander board connector (BP_XCEDE_2)
3 backplane to expander board connector (BP_XCEDE_31) 4 signal connector (J_BP_SIG)
Installing and removing system components 161

 Loading...