Safety and operating instructions
© Construction Tools GmbH | 3390 5203 01 | 2019-08-06
Original Instructions
29
5.8.2 Installation
n
Place the hydraulic breaker on timber support blocks.
NOTICE The working tool may break
There is an increased risk of the working tool breaking if
it has not been stored in frostfree conditions.
u Store the working tool in a frostfree environment for
one day before installing it. or
u Heat up the working tool for several hours, e.g. with
a heating blanket, until it has warmed up thoroughly.
Wiper installed (only hydraulic breakers with DustProtec-
tor):
When installing the working tool for the first time after it
has been delivered, you first have to remove the
wiper(H) from the DustProtector.
n
Remove the wiper(H) from the DustProtector (see
chapter DustProtector/Removal).
NOTICE Damage to the wiper
If the wiper is not removed it will bend back when in-
stalling the working tool. The wiper can then no longer
be used.
u Remove the wiper before installing the working tool.
Retainer bar installed:
When installing the working tool for the first time after it
has been delivered, you must remove the protective cap
and the retainer bars.
n
Remove the protective cap from the aperture for the
working tool.
n
Store the protective cap for future use.
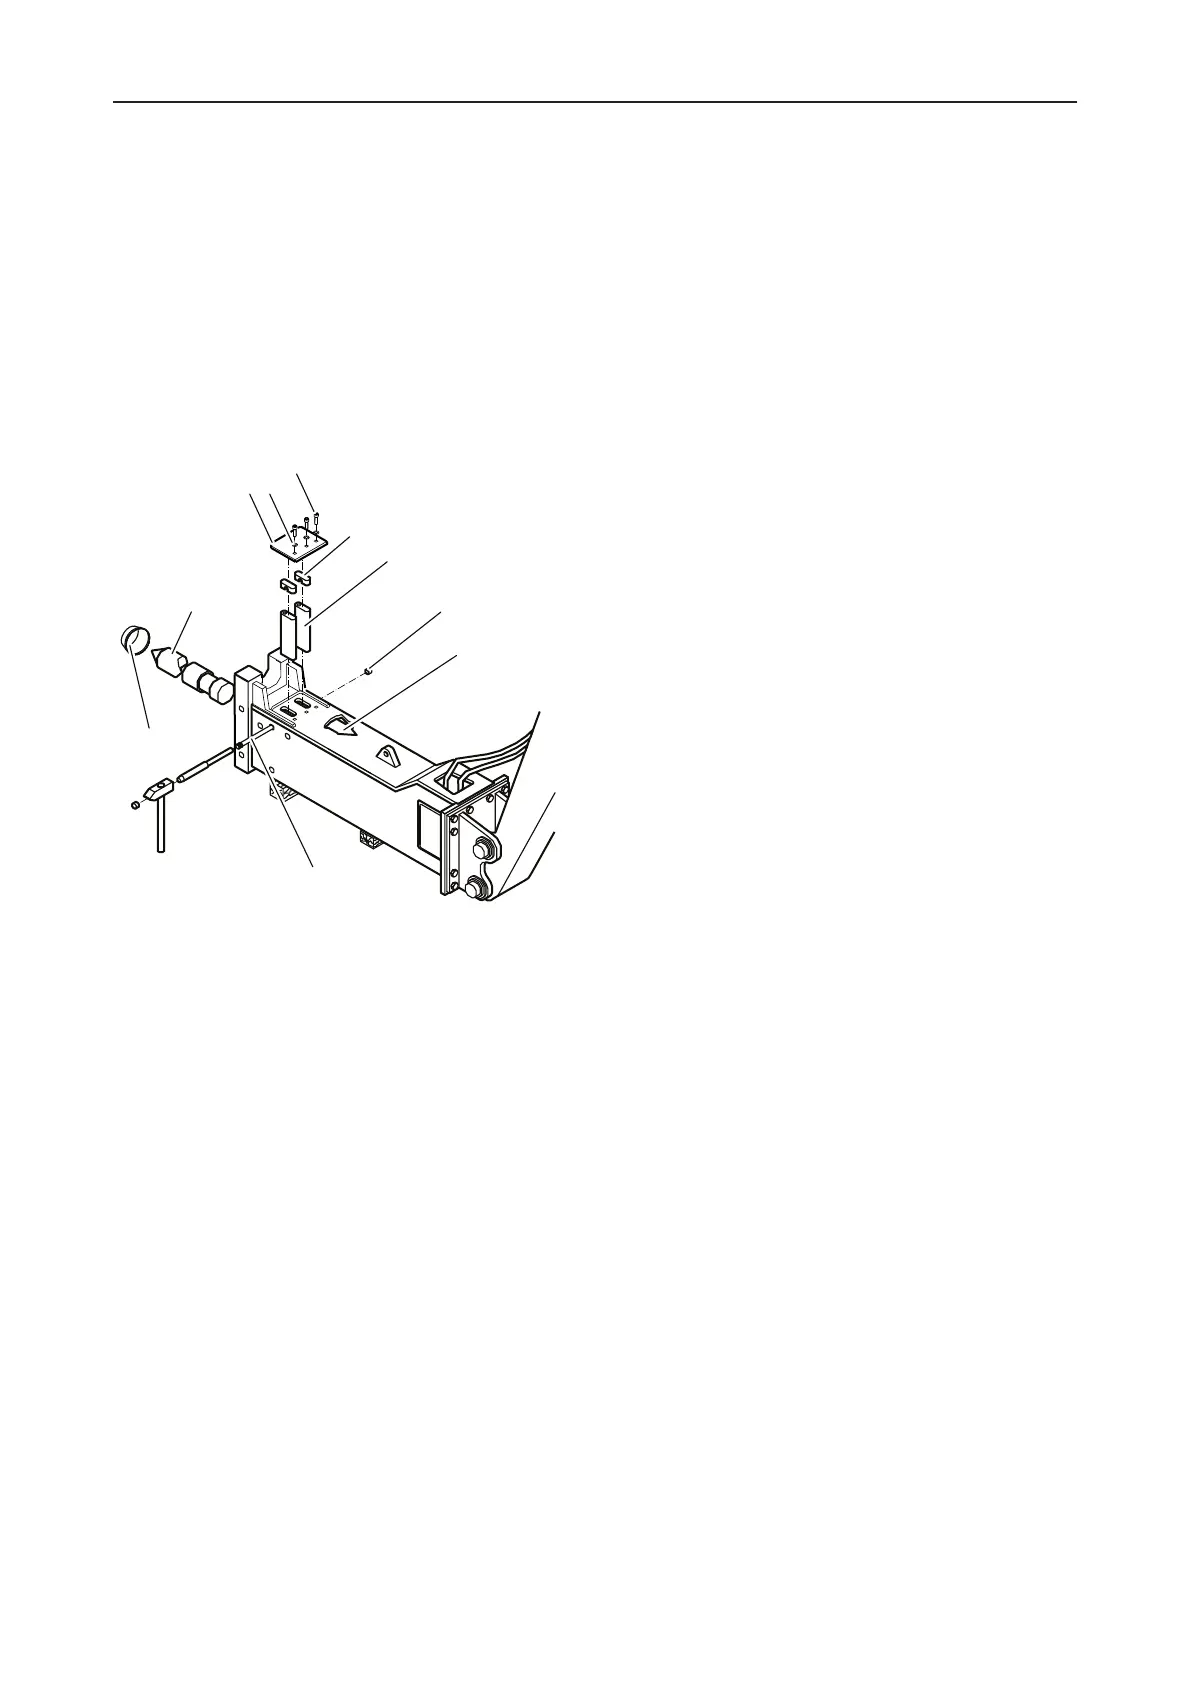
n
Remove the screws(Z), washers(Y), plate(X), and
plugs(E).
n
Use a pin punch and a hammer to drive the bolt(G)
for the retainer bars(D) out of the lower breaker
part(F) from the side.
n
Remove the two plugs(C) from the slotted holes for
the retainer bars(D).
n
Screw one screw (M12) into the bore on the front
side of the retainer bars.
n
Pull out the retainer bars by the screw.
Retainer bar and wiper removed:
If the retainer bars and the wiper (only on hydraulic
breakers with DustProtector) have been removed, pro-
ceed as follows:
n
Clean the insertion area of the working tool(A).
n
Grease the insertion area of the working tool(A) with
chisel paste.
n
Grease both retainer bars(D) with chisel paste.
n
Install the working tool(A).
n
Put the retainer bars(D) in place.
n
Turn the working tool(A) until the retainer bars(D)
slide into place in the slotted holes of the lower
breaker part(F).
n
Remove the screw from the retainer bars(D).
n
Install the sealing plugs(C).
n
Drive the bolt(G) into place using a pin punch and a
hammer.
n
Install the plate(X), washers(Y), screws(Z), and the
plugs(E).
n
If the hydraulic breaker is a DustProtector type, install
the wiper(H) (see chapter DustProtector/In-
stalling).
 Loading...