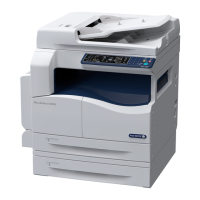
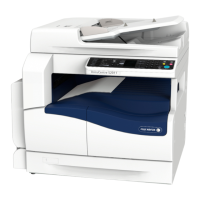
Control Panel
69
Product Overview
2
7 <Interrupt> button Press this button to suspend a copy or print job in progress to have the
machine process another job. During the Interrupt mode, the <Interrupt>
button lights up. Pressing the <Interrupt> button again exits the Interrupt
mode and resumes the suspended job.
For notes and restrictions on the Interrupt mode, refer to "16 Appendix" > "Notes and
Restrictions" > "Notes and Restrictions on the Interrupt Mode" in the Administrator Guide.
8 <Clear All> button Returns the settings you made to the default values. The machine returns to
the same state as when it is powered on.
9 <Stop> button Press this button to pause the current job or communications.
10 <Start> button Press this button to start scanning a document.
11 <Main Power> indicator Lights up when the main power is switched on.
Note • If the main power is not switched on, the machine will not be powered on
even when the power is switched on.
12 <Error> indicator Blinks if a system error occurs.
This indicator lights up when a problem other than a system error occurs
with the machine, including paper jams and running out of paper or toner.
If the <Error> indicator blinks, contact our Customer Support Center.
If the <Error> indicator lights up, refer to "15 Problem Solving" > "Machine Trouble" in the
Administrator Guide.
13 <Data> indicator Blinks when the machine is sending or receiving data to or from a client.
This indicator lights up when data is stored in the machine's memory, when
received faxes are waiting to be printed, or when faxes are stored in a folder.
You can check stored scan files in a Folder List. For information on the Folder List, refer to "4
Machine Status" > "Machine Information" > "Print Reports" > "Folder List" in the
Administrator Guide.
You can check stored fax files in a Stored File List. For information on the Stored File List, refer
to "4 Machine Status" > "Machine Information" > "Print Reports" > "Job Status/Activity
Report" > "Stored File List" in the Administrator Guide.
You can change the lighting pattern of the <Data> indicator. For more information, refer to
"5 Tools" > "Common Service Settings" > "Other Settings" > "Data Indicator" in the
Administrator Guide.
14 <Speed Dial> button Press this button to specify a recipient with an address number when
sending a fax or e-mail.
15 <C (Clear)> button Press this button to cancel a numerical value you have entered with the
numeric keypad.
16 <Dial Pause> button Press this button to insert a pause into a destination number.
17 Numeric keypad Use the numeric buttons on the keypad to enter the number of copies,
passcodes, and other numerical values.
18 <Custom Button 1> (Copy) "Copy" is assigned to this button by default.
Press this button to display the [Copy] screen.
For information on how to assign a service to the button, refer to "1 Before Using the
Machine" > "Customizing the Control Panel" > "Assigning Services to the Custom Buttons" in
the Administrator Guide.
19 <Custom Button 2> (Fax) "Fax" is assigned to this button by default.
Press this button to display the [Fax] screen.
Note • The Fax Kit (optional) must be installed to use this button for Fax service.
For information on how to assign a service to the button, refer to "1 Before Using the
Machine" > "Customizing the Control Panel" > "Assigning Services to the Custom Buttons" in
the Administrator Guide.
No. Component Function

 Loading...


