4 Fax
146
Fax
4
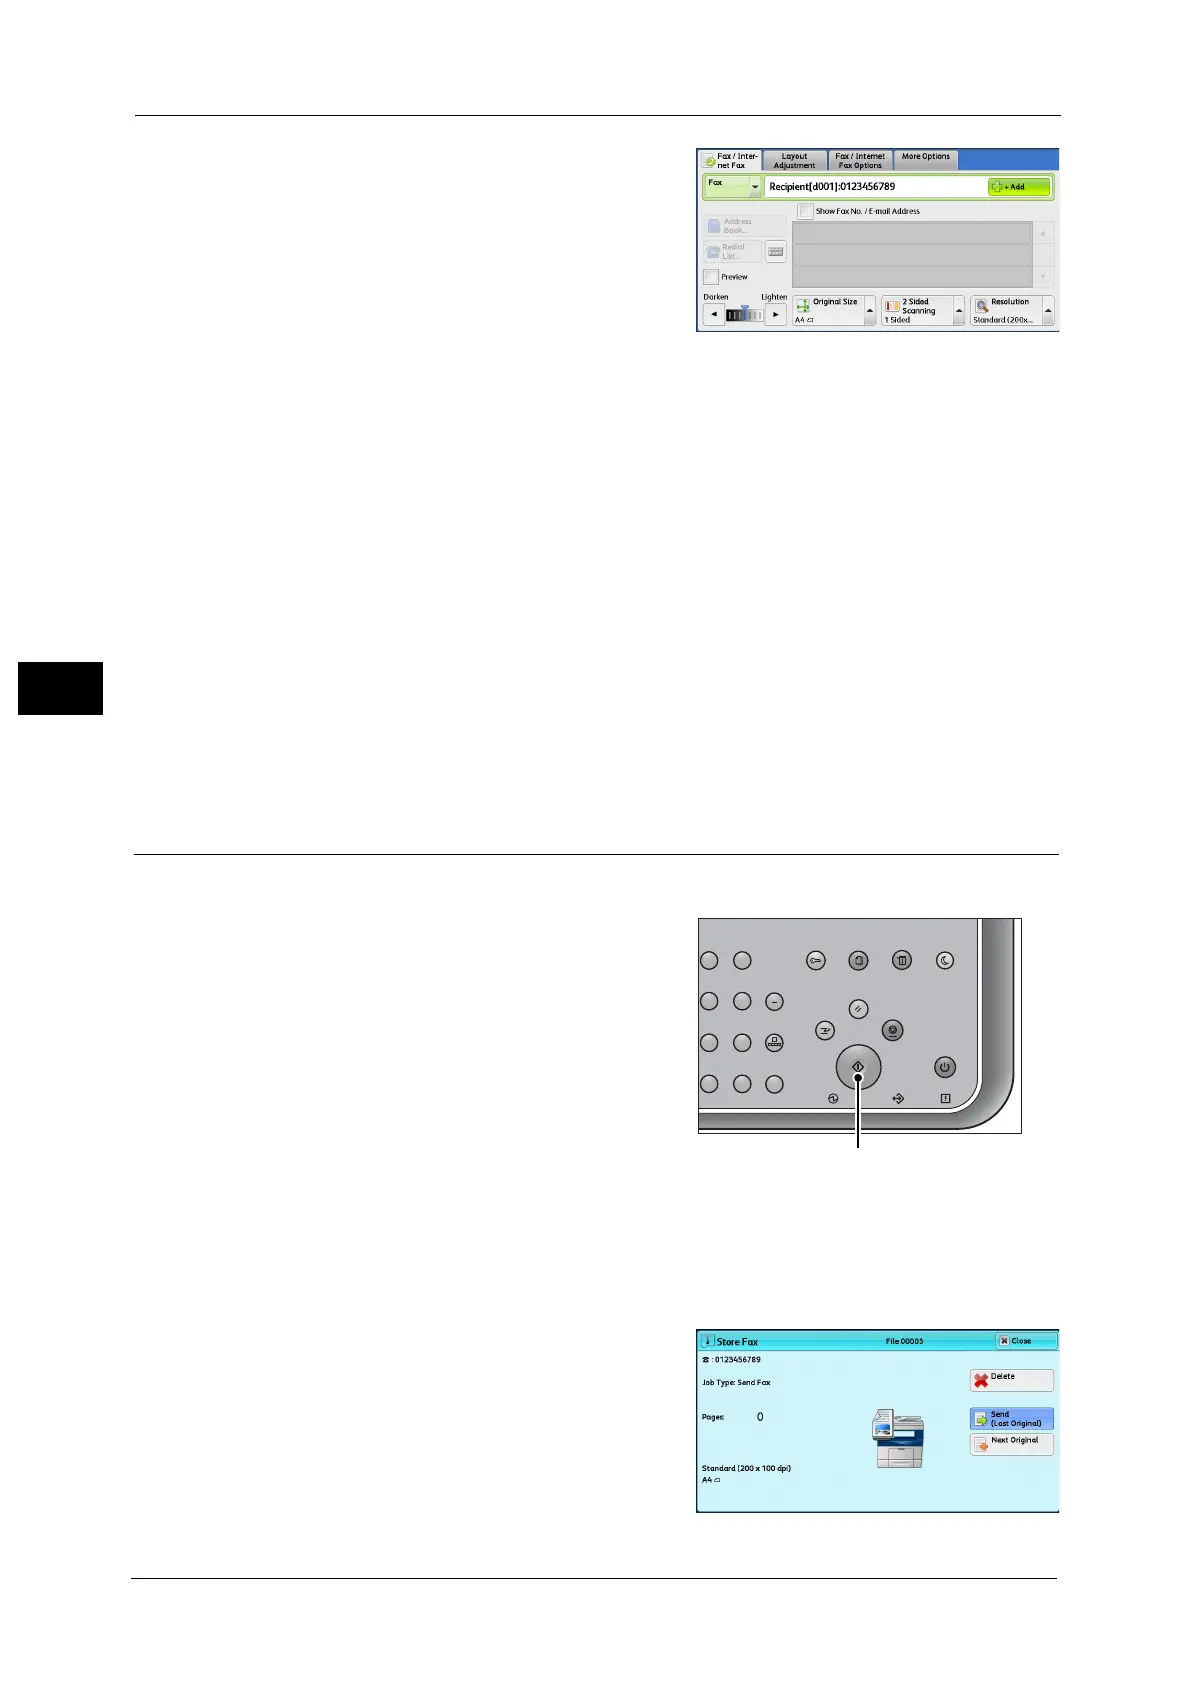
2 To specify multiple recipients, select [+ Add] on
the touch screen.
Note •Select [Reconfirm Recipients] in the message
field to check the entered value. You can hide
[Reconfirm Recipients] to show the remaining
memory capacity. For more information, refer
to "5 Tools" > "Common Service Settings" >
"Screen/Button Settings" > "Reconfirm Fax/
Internet Fax Button" in the Administrator
Guide.
• If you have entered an incorrect value, press the <C (Clear)> button and enter the correct value.
• Depending on the settings, a screen to re-enter the recipient may be displayed after you specify the
recipient and then select [+ Add]. In such case, re-enter the recipient.
• You can combine the fax numbers registered in the speed dial and the Address Book respectively
and the numbers entered using the numeric keypad to specify as one recipient. This is called Chain
Dial. Select [+ Add] when you finish combining. You can set whether the chain dial is used or not in
the System Administration mode. For more information, refer to "5 Tools" > "Fax Service Settings" >
"Fax Control" > "Chain Dial" in the Administrator Guide.
• When the [Preview] checkbox is checked, you can preview the read images while reading. For more
information, refer to "Previewing the Read Images during a Fax Job" (P.149).
For information on how to specify a fax number using the Address Book, refer to "Specifying a Destination Using the Address
Book" (P.167).
For information on how to specify a fax number using the speed dialing, refer to "Speed Dialing (Specifying a Destination
Using an Address Number)" (P.172).
For information on the Internet Fax, refer to "About Internet Fax" (P.153).
Step 4 Starting the Fax Job
The following describes how to start a fax job.
1 Press the <Start> button.
Important • If the document has been loaded in the
document feeder, do not hold down the
document while it is being conveyed.
Note •Depending on the settings, the screen to re-
enter the recipient may be displayed after
pressing the <Start> button. In this case, re-
enter the recipient.
• If a problem occurs, an error message appears
on the touch screen. Solve the problem
according to the message.
If you have more documents
If you have more documents to fax, select [Next Original] on the touch screen while the
current document is being scanned. This allows you to send the documents as one set of
data.
2 While documents are being scanned, select
[Next Original].
Note •When using the document feeder, load the
next document after the machine has
finished scanning the first document.
• You can change the scan settings of the next
document by selecting [Resolution], [Original
Size] and [Lighten/Darken] that are displayed
after selecting [Next Original].
23
56
89
0
#
C
Power
Saver
Power Data Error
Clear All
Interrupt Stop
Start
Log In / Out
Job
Status
ABC
Dial
Pause
Speed
Dial
TUV WXYZ
JKL MNO
DEF
Machine
Status
 Loading...