▶
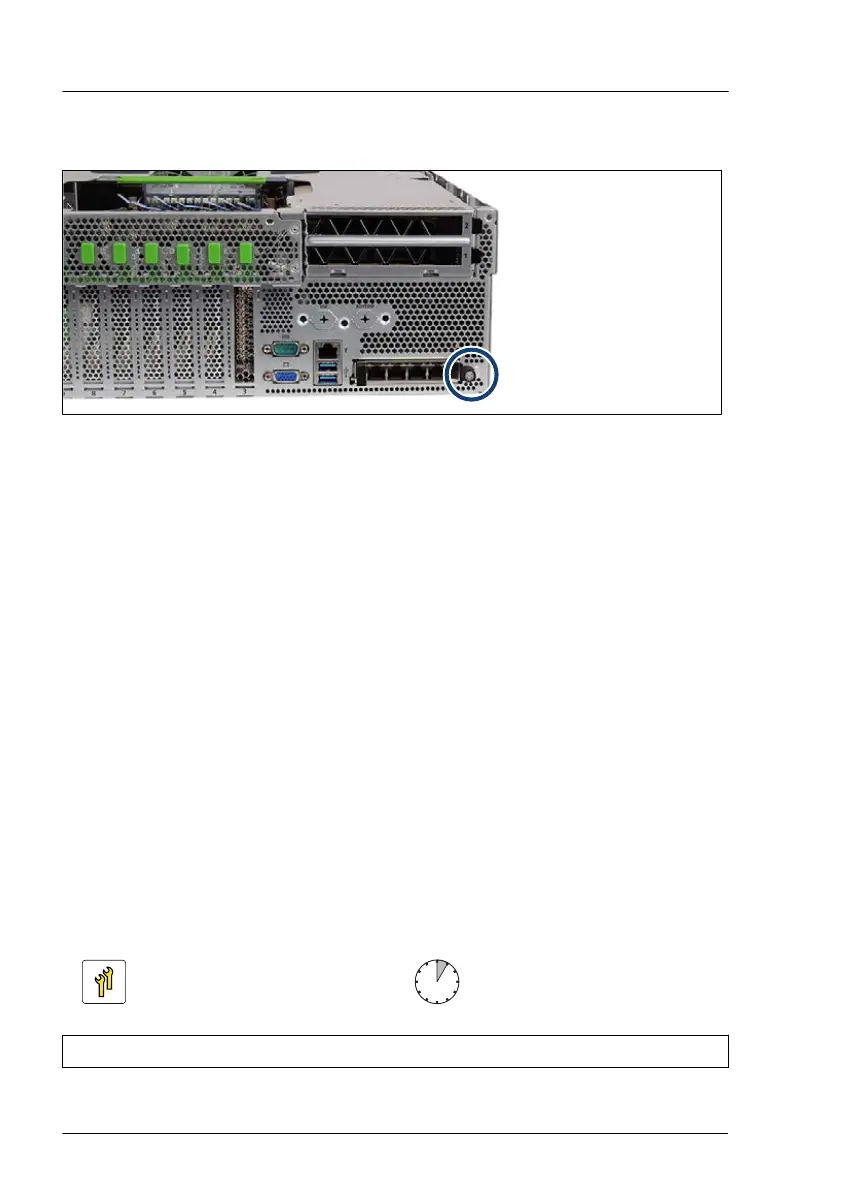
Push the OCP module into the slot.
Figure 97: Installing the OCP module (B)
▶
Fasten the OCP module with the knurled screw (see circle).
Concluding steps
▶
"Connecting the power cord" on page
59
.
▶
"Switching on the server" on page 60.
▶
Configure the new MAC address in the OS, if you have no VIOM
(ServerView Virtual-IO Manager) installed. If you have VIOM installed, it is
not necessary to configure the MAC address. This is virtualized by VIOM.
▶
Inform the customer about new MAC addresses. For more information, see
"Looking for MAC/WWN/GUID and SAS addresses" on page 106.
▶
"Updating the NIC configuration file in a Linux and VMware environment" on
page 104.
▶
"Configuring LAN teaming" on page 112.
9.5.3 Removing an OCP module
Upgrade and Repair Unit
(URU)
Hardware: 5 minutes
Tools: tool-less
Expansion cards and backup units
190 Upgrade and Maintenance Manual RX4770 M6
 Loading...