50
Chapter 6
Installing Hardware Options
This chapter provides procedures for installing DIMM cards, the WLAN device, and the internal IDE hard drive.
Installing/Removing a DIMM Module 6
There are two DIMM slots in your Tablet PC. 256 MB, 512 MB, and 1 GB modules are available, so you can install a
combination of up to 2 GB in the system.
Installing a Memory Module 6
To install a DIMM module in the Tablet PC:
1. Ensure that the Tablet PC is off. To do so, carry out the Shut Down command in the Start menu. (Do not attempt to
remove or install a DIMM module when the system is in Suspend mode or running.)
2. Remove the battery pack and store in a safe place.
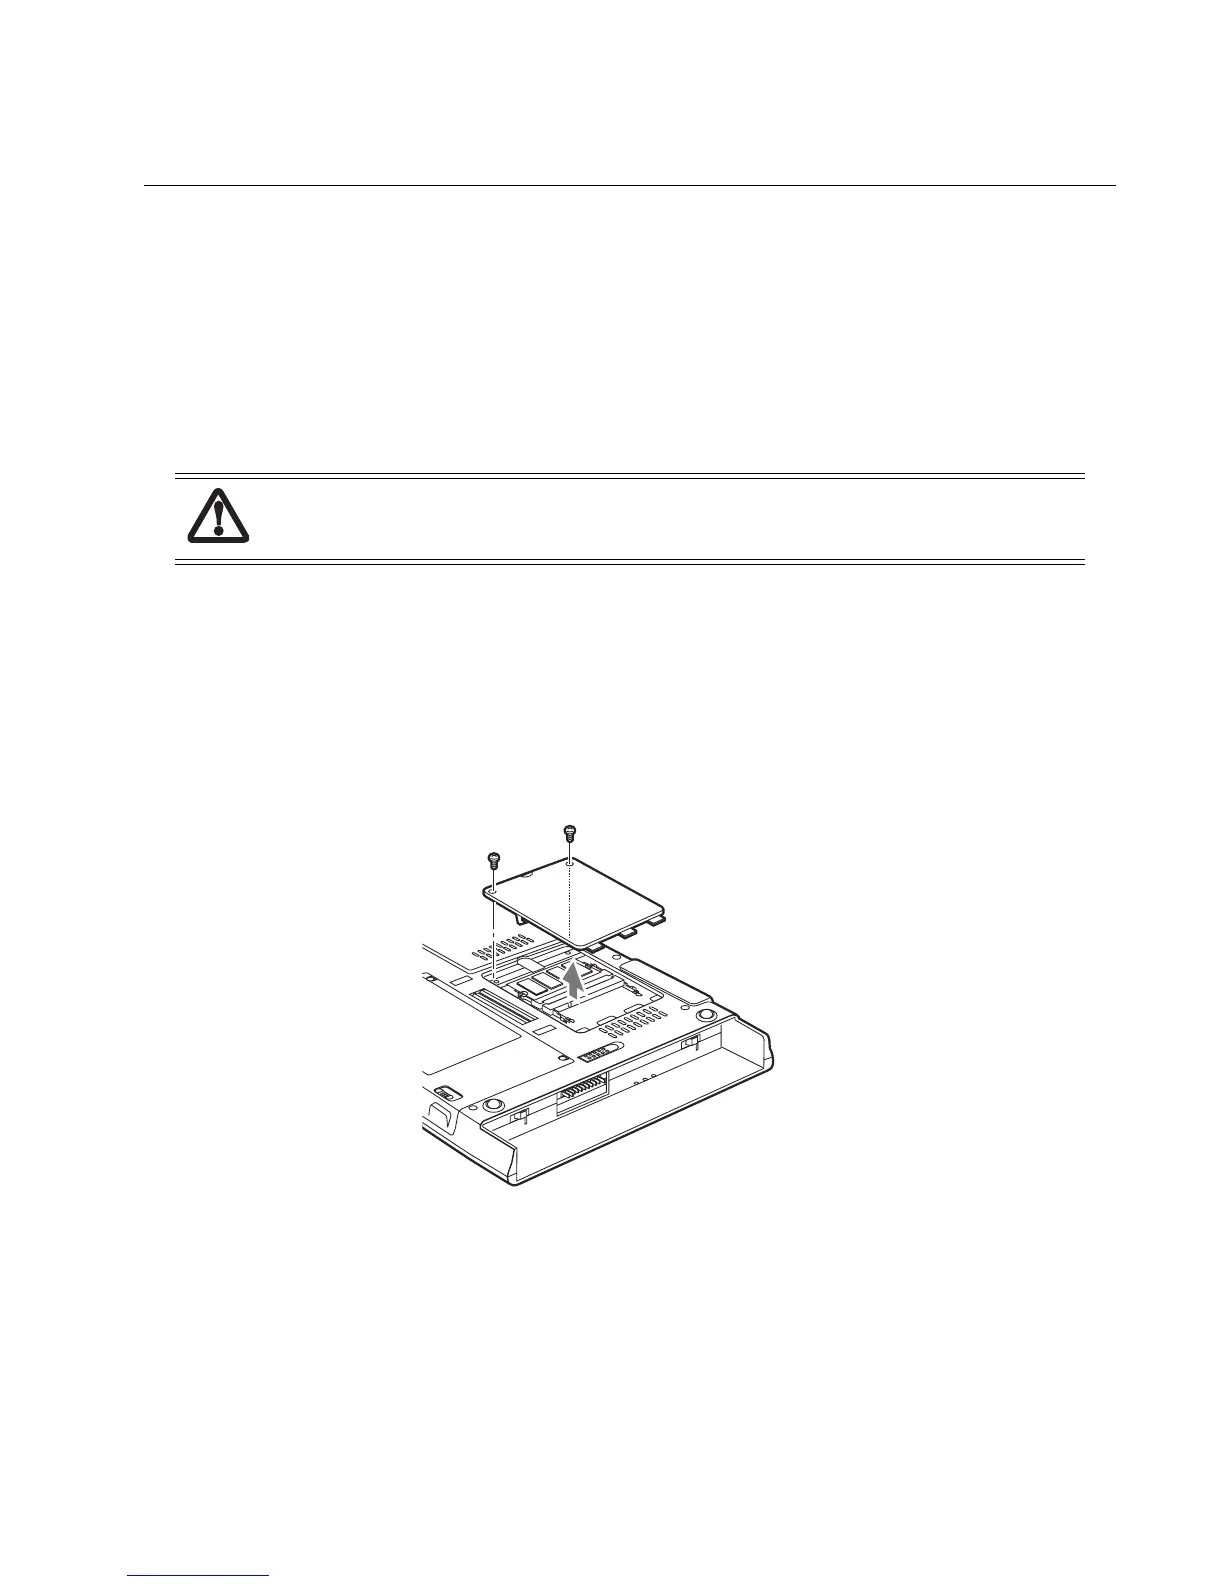
3. Remove the two screws from the cover plate on the back of the Tablet PC and remove the cover plate as shown in Figure
6-1.
Figure 6-1. Accessing the Memory Slot
4. Insert the DIMM module in the socket at an angle and push it down until it locks into place as shown in Figure 6-2.
Note that the DIMM module is keyed to prevent it from being inserted backwards.
DIMM replacement should only be performed at a static-free workstation. Avoid touching connector pins, circuit
boards, or other circuit components on the drive or Tablet PC. Electrostatic discharge caused by doing so can damage
sensitive components.
 Loading...