1. OPERATIONAL OVERVIEW
1-52
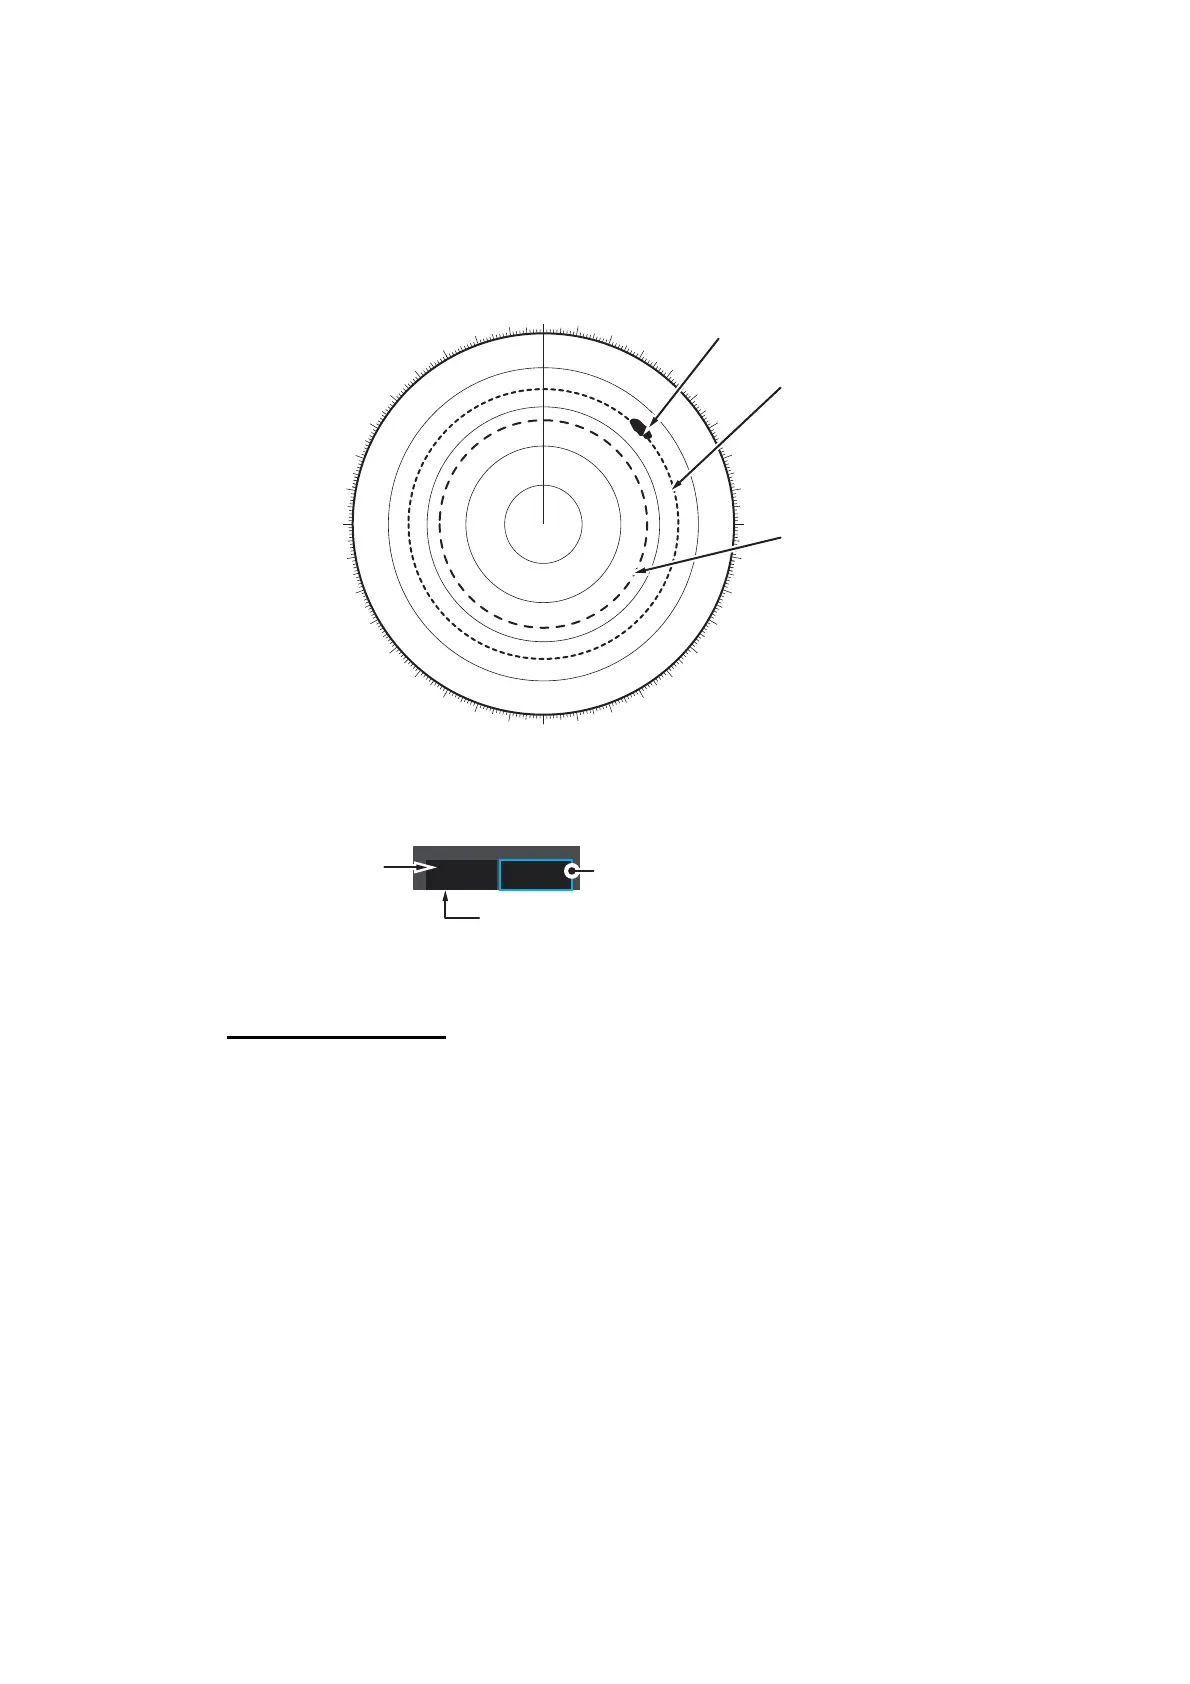
1.32.2 How to measure range with the variable range marker (VRM)
There are two VRMs, No. 1 and No. 2, which appear as dashed rings so that you can
distinguish them from the fixed range rings. The two VRMs can be distinguished from
each other by the different lengths of their dashes; the dashes on the No. 2 VRM are
longer.
There are two methods for measuring range with the VRMs, using the VRM key and
on-screen menu box operation.
Note: The maximum VRM distance is set by the current display range and can be set
as high as twice the distance of the display range.
Using the VRM keys
1. Press the VRM ON key to activate the VRM1 box. Press the VRM ON key again
to activate the VRM2 box. Press the VRM ON key again to switch between active
VRMs. The currently active VRM marker is displayed as shown in the above fig-
ure.
2. Rotate the VRM knob to align the active VRM with the inner edge of the target,
then read the distance at the lower right of the screen. In the previous figure, the
active VRM reads "36.44 NM".
Each VRM remains at the same geographical distance when you operate the
RANGE key or the [RANGE] box. This means that the apparent radius of the VRM
ring changes in proportion to the selected range scale.
3. Press the VRM OFF key to hide the VRMs.
000
010
020
030
040
050
060
070
080
090
100
110
120
130
140
150
160
170
180
190
200
210
220
230
240
250
260
270
280
290
300
310
320
330
340
350
VRM1
VRM2
Target echo
Currently active VRM is highlighted.
Range to VRM
TTG to VRM
28.11 36.44
NM
VRM1 VRM2
TTG
50:00 60:00
TTG
NM
 Loading...