2. WIRING
2-6
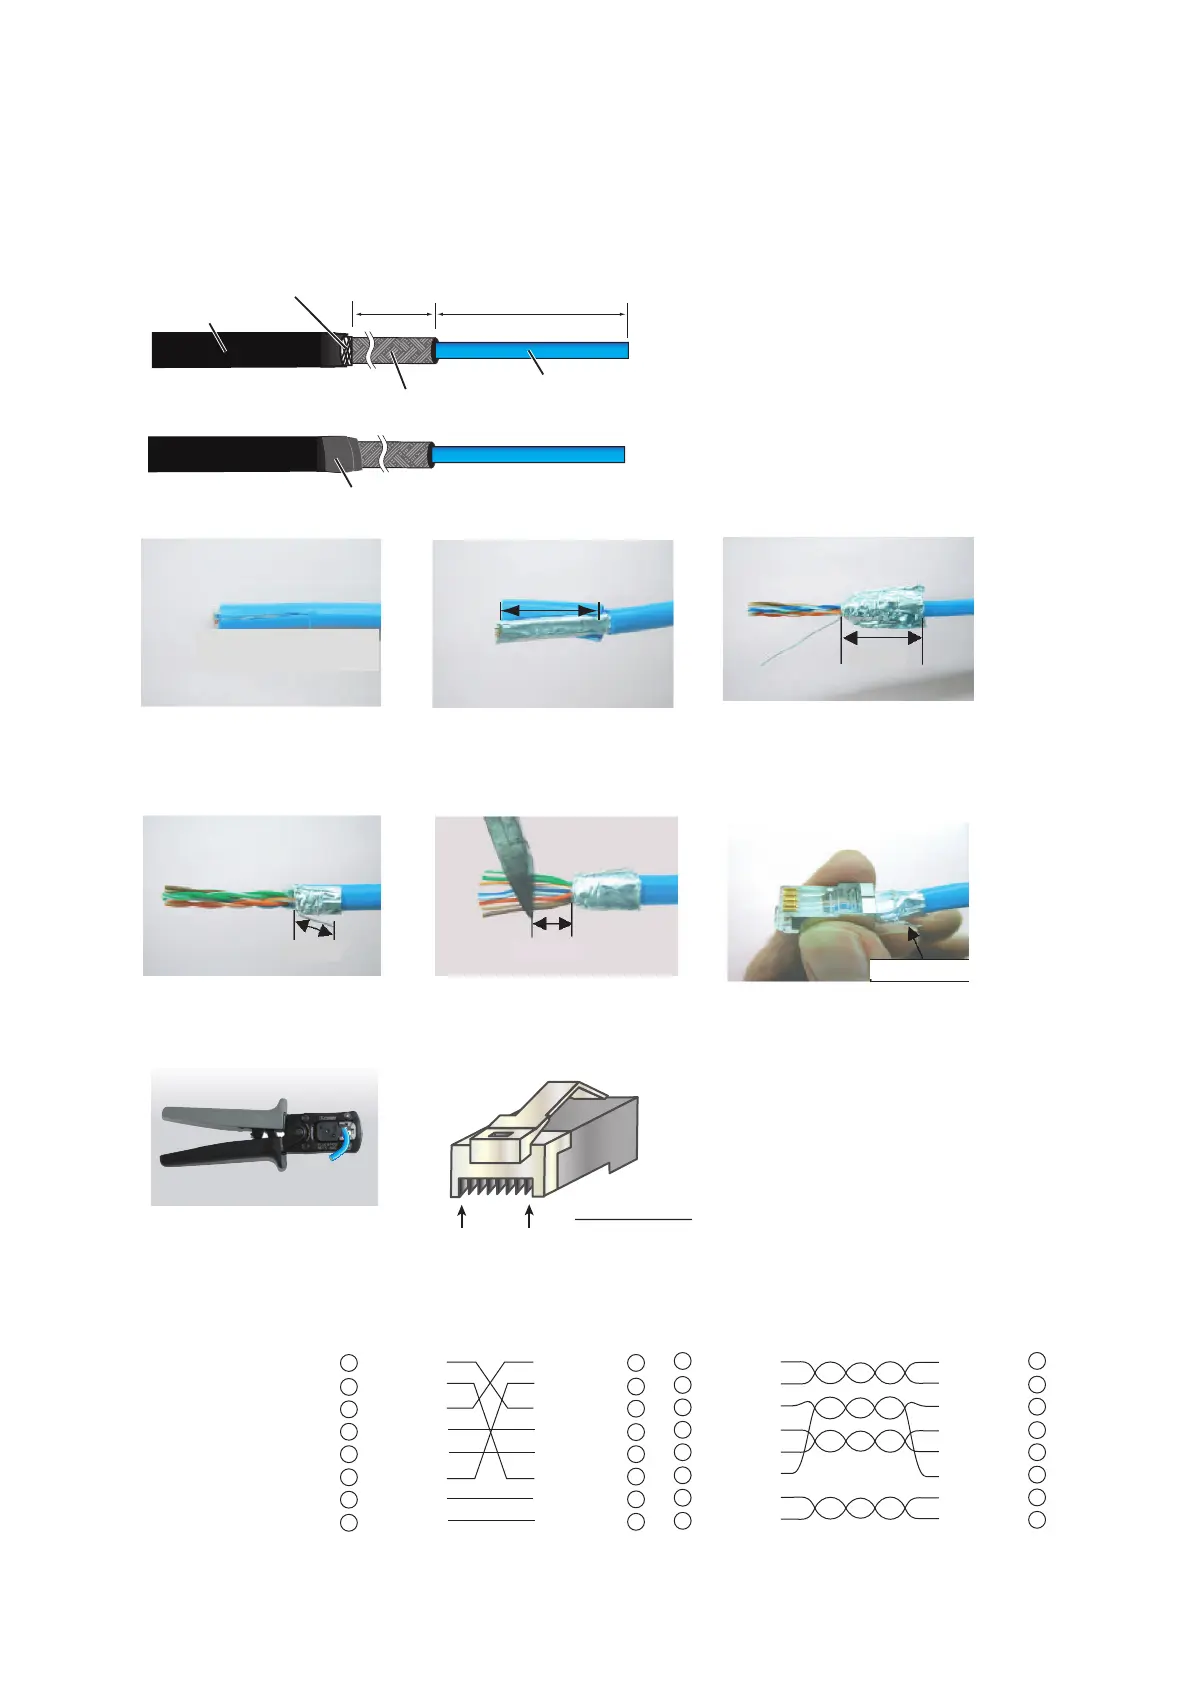
2.1.4 Fabricating LAN cables
Fabricate the LAN cable (FR-FTPC-CY, DTI-C5E350 VCV), as shown below. (Wrap
both edges of the armor with vinyl tape.) Confirm that the shield of the cable touches
to the shell of the modular plug.
1 WHT/GRN
2 GRN
3 WHT/ORG
4 BLU
5 WHT/BLU
6 ORG
7 WHT/BRN
8 BRN
WHT/ORG 1
ORG 2
WHT/GRN 3
BLU 4
WHT/BLU 5
GRN 6
WHT/BRN 7
BRN 8
1 WHT/ORG
2 ORG
3 WHT/GRN
4 BLU
5 WHT/BLU
6 GRN
7 WHT/BRN
8 BRN
WHT/ORG 1
ORG 2
WHT/GRN 3
BLU 4
WHT/BLU 5
GRN 6
WHT/BRN 7
BRN 8
Expose inner sheath.
[Cross cable] [Straight cable]
Remove the sheath by
approx 25 mm. Be careful
not to damage inner shield
and cores.
Fold back the shield, wrap it
onto the outer sheath and
cut it, leaving 9 mm.
12
3
25 mm
approx. 9 mm
4
5
6
approx. 9 mm
approx. 11 mm
Drain wire
Fold back drain wire and
cut it, leaving 9 mm.
Straighten and flatten the
core in order and cut them,
leaving 11 mm.
Insert the cable into the modular
plug so that the folded part of
the shield enters into the plug
housing. The drain wire should
be located on the tab side of
the jack.
7
*
: For flush mount installations, adjust the length
of stripped cable to suit your conditions
Cable jacket
Outer sheath
Inner sheath
Cover the cable jacket with insulated tape (20 mm width)
225
*
80
Shielding
1
8
Modular plug
Using special crimping tool
MPT5-8AS (PANDUIT CORP.),
crimp the modular plug.
Finally check the plug visually.

 Loading...