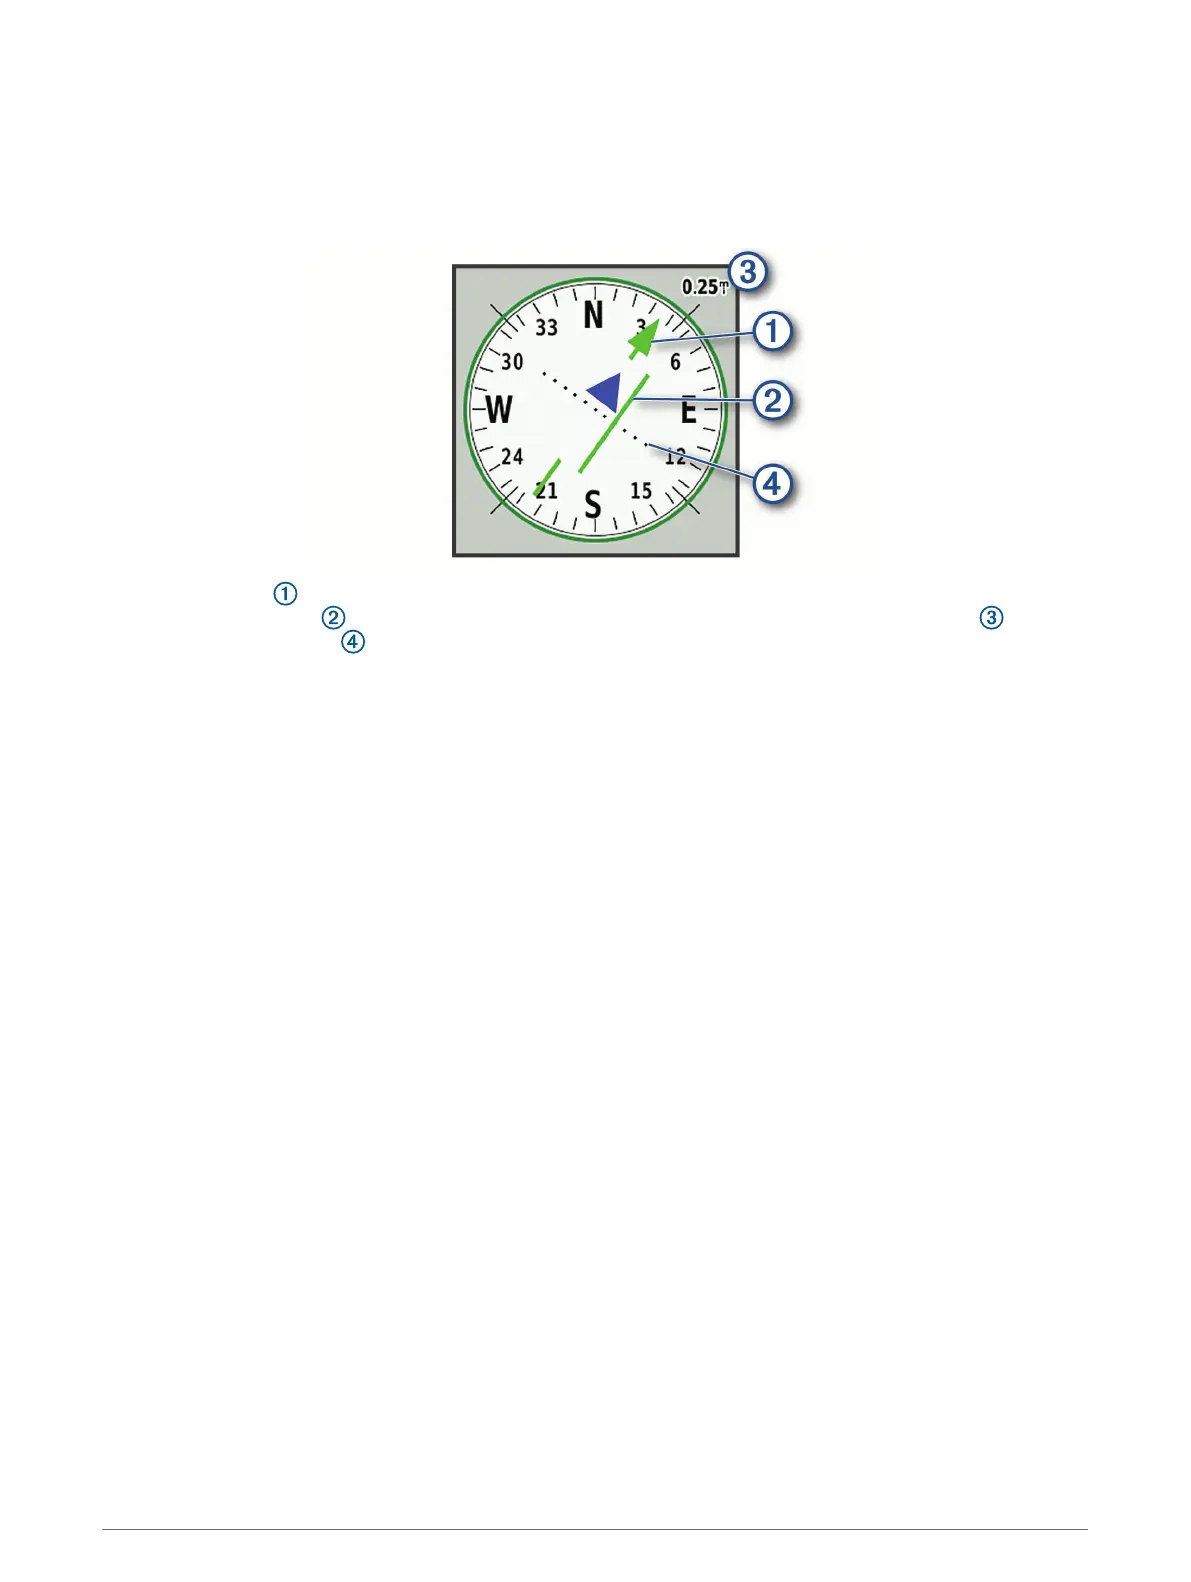
Course Pointer
The course pointer is most useful when you are navigating on water or where there are no major obstacles in
your path. It can also help you avoid hazards near the course, such as shoals or submerged rocks.
To enable the course pointer, from the compass, select menu > Setup Heading > Go To Line/Pointer > Course
(CDI).
The course pointer indicates your relationship to the course line leading to the destination. The course
deviation indicator (CDI) provides the indication of drift (right or left) from the course. The scale refers to
the distance between dots on the course deviation indicator, which tell you how far off course you are.
Elevation Plot
NOTE: The elevation plot is available only with eTrex 30/30x devices.
By default, the elevation plot displays the elevation over the distance traveled. You can customize elevation plot
settings (Elevation Plot Settings, page 10). You can select any point on the plot to view details about that
point.
Calibrating the Barometric Altimeter
You can manually calibrate the barometric altimeter if you know the correct elevation or the correct barometric
pressure.
1 Go to a location where the elevation or barometric pressure is known.
2 Select Elevation Plot > menu > Calibrate Altimeter.
3 Follow the on-screen instructions.
Elevation Plot Settings
From the elevation plot, select menu.
Change Plot Type: Sets the type of data shown on the elevation plot. .
Adjust Zoom Ranges: Adjusts the zoom ranges shown on the altimeter page.
Change Data Fields: Allows you to customize the altimeter data fields.
Reset: Resets the altimeter data, including waypoint, track, and trip data.
Calibrate Altimeter: See (Calibrating the Barometric Altimeter, page 10).
Restore Defaults: Restores the altimeter to factory default settings.
Trip Computer
The trip computer displays your current speed, average speed, trip odometer, and other helpful statistics. You
can customize the trip computer layout, dashboard, and data fields.
10 Navigation
 Loading...