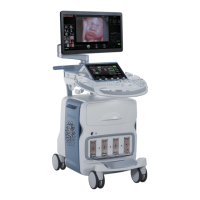
DIRECTION 5750007-1EN, REV. 1 LOGIQ E10 BASIC SERVICE MANUAL
Chapter 4 Functional Checks 4 - 19
B-Mode Checks (cont’d)
Probe Indications for Use
See On-line Help or refer to the appropriate version of the LOGIQ E10 Basic User Manual, Chapter 11.
See: Section 1-5 "Label locations" on page 1-26.
Preparations
You may use a phantom (optional) when doing these tests.
1.) Connect one of the probes, to the scanner’s active probe connector.
- see: Section 3-4-6 "Connecting Probes" on page 3-19 for info about connecting the probes.
- For available probes, see: Section 9-17 "Probes" on page 9-39.
2.) Turn ON the scanner.
The B-Mode window is displayed (default mode).
3.) If needed, adjust the Display’s Brightness and Contrast setting (see: Section 6-2 "Monitor
adjustments" on page 6-2).
1.) Press B-MODE on the Operator Panel to access B-Mode.
2.) These Image Controls are used to optimize the B-Mode picture:
-Use Gain and TGC controls to optimize the overall image together with the Power control.
-Use Depth to adjust the range to be imaged.
-Use Focus to center the focal point(s) around the region of interest.
-Use Frequency (move to higher frequencies) or Frame rate (move to lower frame rate) to
increase resolution in image.
-Use Frequency (move to lower frequency) to increase penetration.
- Use the control to optimize imaging in the blood flow regions and make a cleaner, less noisy
image.
-Use Reject controls to reduce noise in the image.
Checks
• Check Width, Focus, Frame rate, Frequency
The results of these adjustments must be verified on the B-Mode sector on the screen.
• Check Up/Down, Left/Right, B Color Maps and Cineloop
The results of these adjustments must be verified on the B-Mode sector on the screen.
• Check Gain, TGC and Depth
• Check B-Mode Soft Menu Controls
• Check Compress, Contour, Reject and Tilt
• Check Power and Dynamic Range
WARNINGWARNING
ALWAYS USE THE MINIMUM POWER REQUIRED TO OBTAIN ACCEPTABLE IMAGES
IN ACCORDANCE WITH APPLICABLE GUIDELINES AND POLICIES.

 Loading...