16
Save These Instructions3-90-775R36_09/15
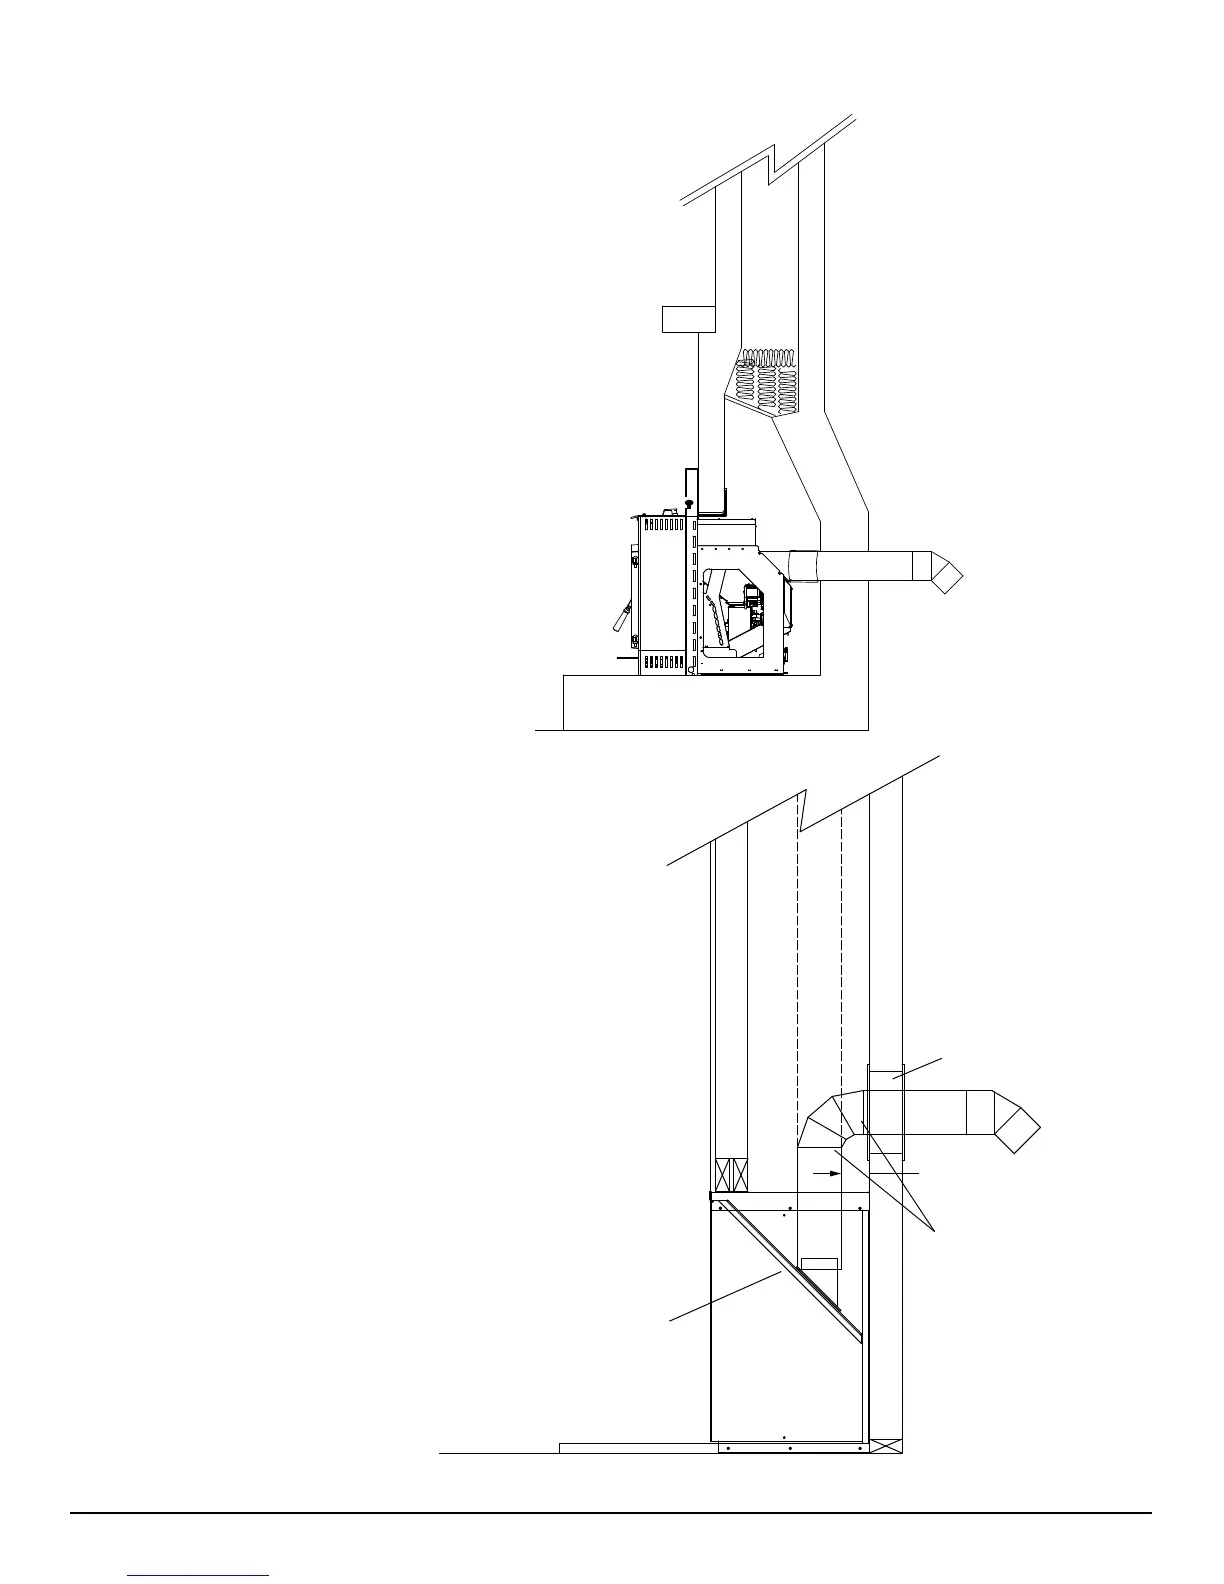
F. Optional Zero Clearance Cabinet Installation:
If installing using the optional zero clearance cabinet, Part
#1-00-774257,theventingwillneedtoexitthroughthetop
of the cabinet. The vent can be vertical or horizontal after
leavingthecabinet.Onceclearofthecabinet,a90degree
elbow can be installed for rear termination as shown. Do
not allow vent pipe seams to fall within the cabinet wall. Use
proper wall thimble as supplied by the venting manufacturer.
If nishing the interior with stone or masonry, the venting
can be installed without the appliance. Install the cabinet
and secure the venting using the Flue Rough-in Support
#1-00-774283.
Notice the side edges of the surround contain slotted
openings. These openings allow room air to be drawn into the
rearofthecabinetandcirculatedthroughtheheatexchange
andbackintotheroom.Theseopeningscannotbeblocked.If
nishingwithstoneormasonrykeepthemasonryaminimum
of one inch from the sides of the surround. Mortar can be
usedtogiveamorenishedlook.
The top of the chimney must also be sealed.
Otherwise, it can become a nesting area or a
water trap.
If passing through combustible
material, the proper thimble from the
vent manufacturer must be used.
3" Clearance
Zero Clearance Cabinet
shown with Flue
Rough-in Support
Vent pipe seams must be
accessible.
Vertical Venting may be used in a constructed chase
providing all clearances to combustibles are met.
Proper wall pass-thru device
as recommended by the
venting manufacturer.
E. Existing Fireplace, Rear Vent:
NOTE: When installed in a rear vent conguration,
themaximumBTUmaybereducedduetoelevated
ESP temperatures associated with the horizontal
exhauststream.
 Loading...