Quick Operation Guide of DS-A81 Series Storage System
14
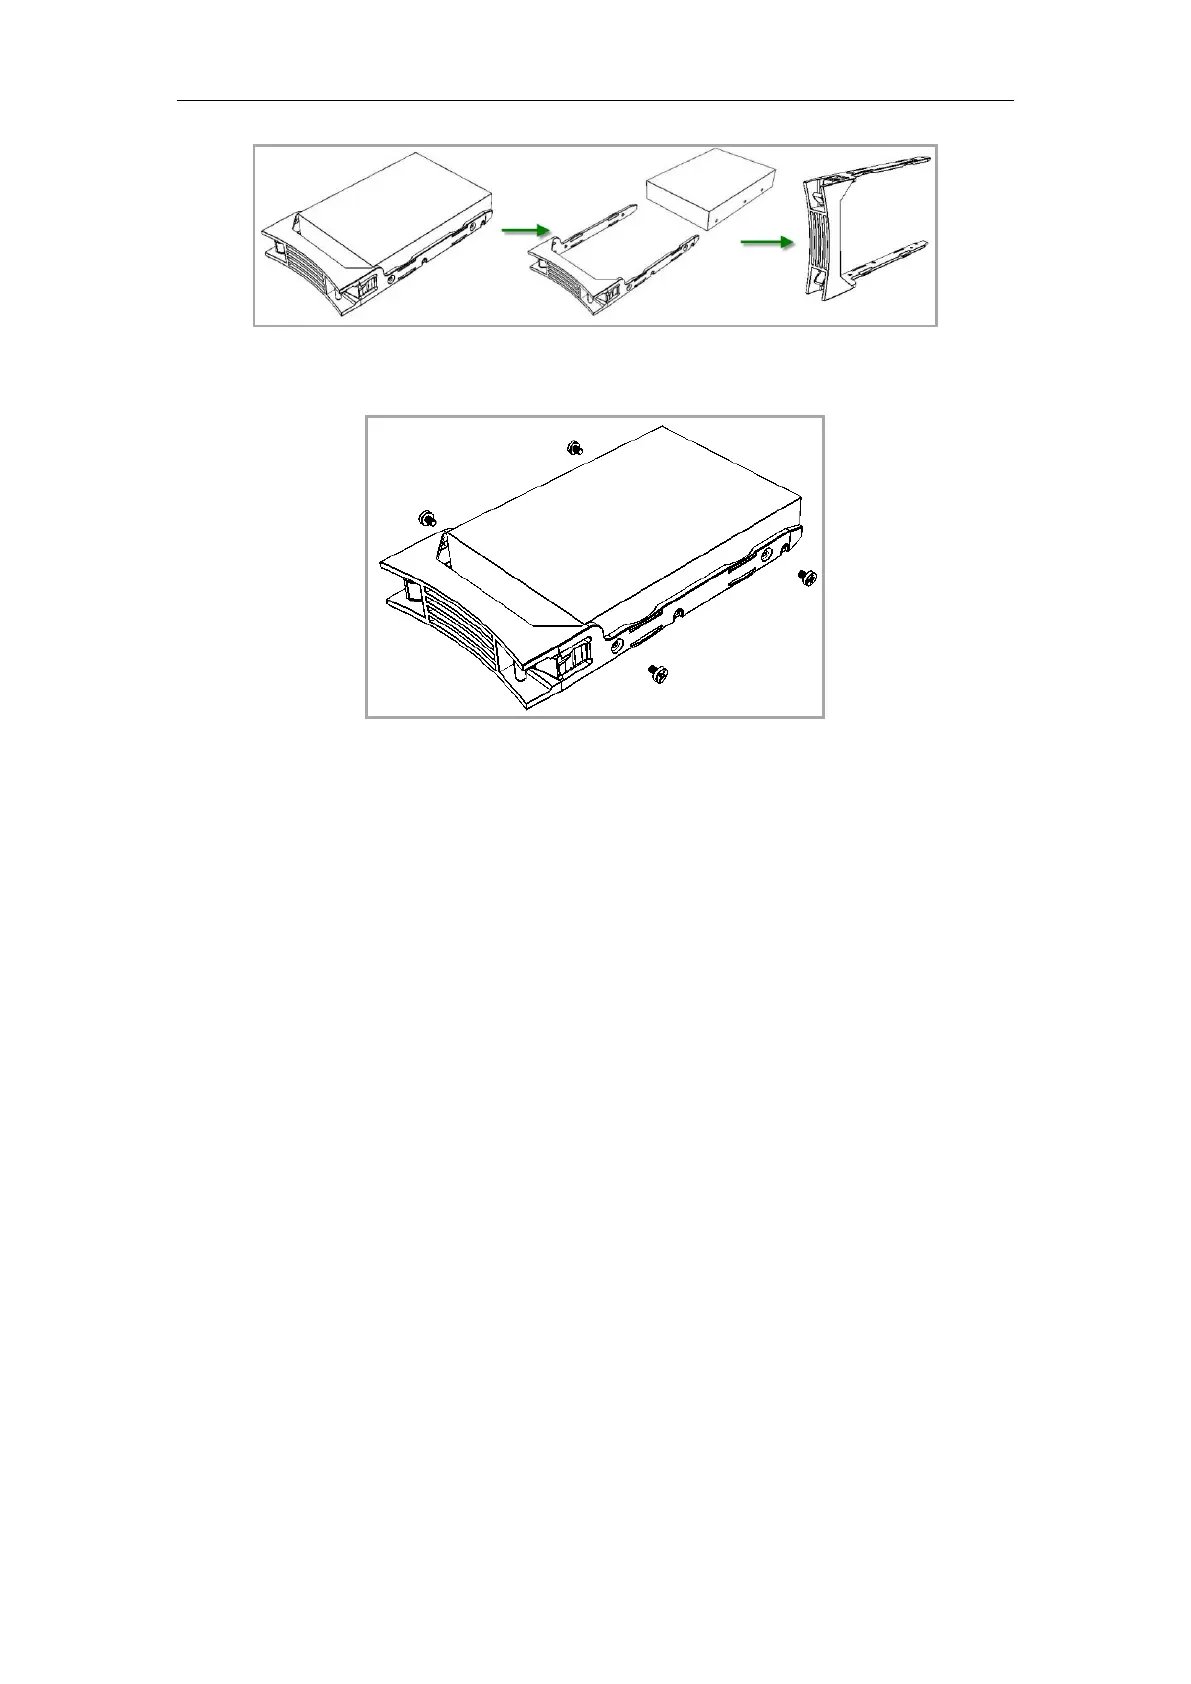
Figure 3. 9 Unplug HDD Bracket
5. Use four screws to secure the HDD to the bracket (with the HDD label facing up).
Figure 3. 10 Install HDD to Bracket
6. Press the spring lock of the HDD, insert the HDD bracket to the chassis and push it along the
guide apparatus until to the bottom, to ensure the bracket being seated into position and
locked.
7. Repeat the steps to install all the other HDDs.
8. Finally, close the front panel and lock it with the key again.
3.3.3 Precautions for HDD Installation
Before you plug or unplug the hard disks, please take the following precautions:
1. After you have plugged the hard disk to its mounting bracket, please use the provided screws
to fix the four edges of the mounting bracket.
2. Make sure the HDD mounting bracket is steadily plugged to the chassis along the slot.
3. When you unplug the hard disk, unplug it about 3cm away from the chassis and then make it
stay about 30 seconds on the guide apparatus before totally unplug it from the chassis. Since
the discs of the hard disk are still spinning at high speed just after powering off, unplugging
the hard disk immediately will damage the discs.
4. The system supports disk hot swapping, yet the data storage safety is not ensured.
5. Please avoid frequent plugging/unplugging of the hard disks during the system running so as
to maintain long service life of the hard disks.
6. Check and examine the working status of the hard disks every two months, or configure the
system with auto check and examine task.
 Loading...