Do you have a question about the HIKVISION DS-KD7003EY-IME2 and is the answer not in the manual?
| Model | DS-KD7003EY-IME2 |
|---|---|
| Category | Intercom System |
| Screen Size | 7 inch |
| Touch Screen | Yes |
| Video Standard | H.264 |
| Video Compression | H.264 |
| Video Frame Rate | 30 fps |
| Field of View (Horizontal) | 90° |
| WDR | Yes |
| Audio Input | Built-in Microphone |
| Audio Output | Built-in Speaker |
| Audio Compression Standard | G.711 |
| Audio Compression Rate | 64 Kbps |
| Ethernet | 10/100 Mbps |
| Network Interface | RJ45 |
| RS-485 | Yes |
| Debugging Port | Yes |
| Button | Yes |
| Power Consumption | ≤ 10 W |
| Working Humidity | 10% to 90% |
| IP Protection Level | IP65 |
| Weight | 1.2 kg |
| Operation System | Linux |
| Display | Color LCD |
| Resolution | 1024 x 600 |
| Camera | 2MP |
| Resolution (Main Stream) | 1920 x 1080 |
| Resolution (Sub Stream) | 704 x 576 |
| Audio Compression | G.711 |
| Network Protocol | TCP/IP |
| Power Supply | 12 VDC |
| Working Temperature | -30°C to +60°C |
| Operating Temperature | -30°C to +60°C |
| Installation | Wall Mount |
| Material | Plastic |
Information regarding the user manual's purpose and scope.
Details about the product's after-sales service support.
Hikvision's ownership of copyrights and trademarks.
Disclaimer of warranties and limitation of liability.
Definitions of symbols used in the document for hazard identification.
Compliance with EU directives for product safety and environmental standards.
Compliance with Industry Canada standards for radio equipment.
Information on how to obtain the manual and related software.
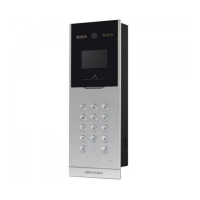
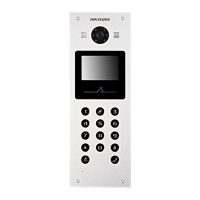
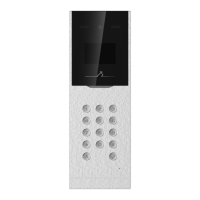
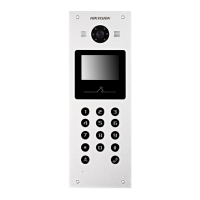
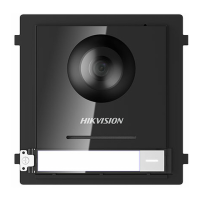
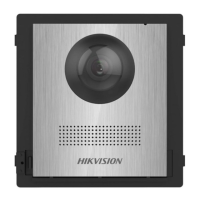
Description of the main unit and its physical components.
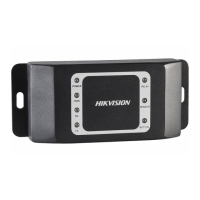
Detailed description of the main unit's terminals and their functions.
Instructions for installing a single module.
Steps for surface mounting a single module unit.
Steps for flush mounting a single module unit.
Instructions for installing two module units.
Steps for surface mounting two module units.
Steps for flush mounting two module units.
Instructions for installing three module units.
Steps for surface mounting three module units.
Steps for flush mounting three module units.
Diagrams and explanations of multi-family system topology.
Diagrams and explanations of single floor system topology.
Diagrams and explanations of single building system topology.
Information on extending the system within a single building.
Diagrams and explanations of multi-building system topology.
Table detailing cable types and maximum transmission distances.
Overview of basic device deployment steps.
Overview of advanced device deployment steps.
Flowchart for managing the device.
Flowchart for configuration via mobile web.
Flowchart for making calls.
Flowchart for adding or deleting persons via the door station.
Instructions for setting DIP switches on the door station.
Instructions for setting DIP switches on the indoor station.
Configuration and characteristics of Villa Mode using DIP switches.
Configuration and characteristics of Building Mode using DIP switches.
Steps to initiate a call from the door station to an indoor station.
Procedure to unlock the door using a public password.
Procedure to unlock the door using a card.
Steps to enable AP mode directly on the device.
Steps to enable AP mode via the PC Web interface.
Frequently asked questions regarding AP mode functionality.
Instructions for logging into the device via a web browser.
Procedure to reset the password using a mobile web interface.
Procedure to reset the password using a PC web interface.
General overview of the PC web interface features.
General overview of the mobile web interface features.
Adding, editing, and searching users via mobile web.
Adding, editing, and searching users via PC web.
Viewing room number details of linked indoor stations on mobile web.
Managing devices, including adding and upgrading, on PC web.
Viewing device details on the mobile web interface.
Viewing device details on the PC web interface.
Configuring time zone, sync mode, and time on mobile web.
Configuring Daylight Saving Time on mobile web.
Configuring time zone, sync mode, and time on PC web.
Configuring Daylight Saving Time on PC web.
Adjusting input and output volume on mobile web.
Adjusting audio parameters and encoding type on PC web.
Configuring image parameters like WDR on mobile web.
Adjusting image, backlight, and day/night settings on PC web.
Customizing camera name, time, and OSD size on PC web.
Selecting and cropping images on the live view via PC web.
Configuring motion detection parameters on mobile web.
Configuring motion detection parameters and sensitivity on PC web.
Setting door name and checking open duration on mobile web.
Adding a public password for door access on mobile web.
Configuring Input/Output parameters on mobile web.
Setting door name and checking open duration on PC web.
Adding a public password for door access on PC web.
Configuring Input/Output parameters on PC web.
Setting maximum call duration and ring duration on mobile web.
Configuring the press button to call function on mobile web.
Configuring sub-module parameters like brightness and buzzer on mobile web.
Setting ringtones for video intercom on PC web.
Setting maximum call duration and ring duration on PC web.
Configuring call buttons, view image, and backlight on PC web.
Configuring sub-module parameters, brightness, buzzer, and call buttons on PC web.
Restarting the device and restoring parameters on mobile web.
Rebooting, restoring, and upgrading device versions on PC web.
Changing the administrator password using the mobile web interface.
Changing the administrator password using the PC web interface.
Configuring security questions or email for password reset on mobile web.
Configuring security questions or email for password reset on PC web.
Viewing device arming type and IP address information on PC web.
Viewing a list of users currently logged into the device on PC web.
Configuring theme management, slide show interval, and text display on PC web.
Setting debugging parameters, SSH, and network packet capture on PC web.
Accessing online help documents via mobile web.
Accessing online help documents via PC web.
Viewing the open source software license on mobile web.
Viewing the open source software license on PC web.
Changing the device activation password type via security questions or email.
Selecting the system language for the device.
Configuring time zone, synchronization, and DST via web browser.
Setting up administrator credentials and adding cards.
Linking video intercom devices and setting DIP switches.