39
Connecting Plug-in Modules
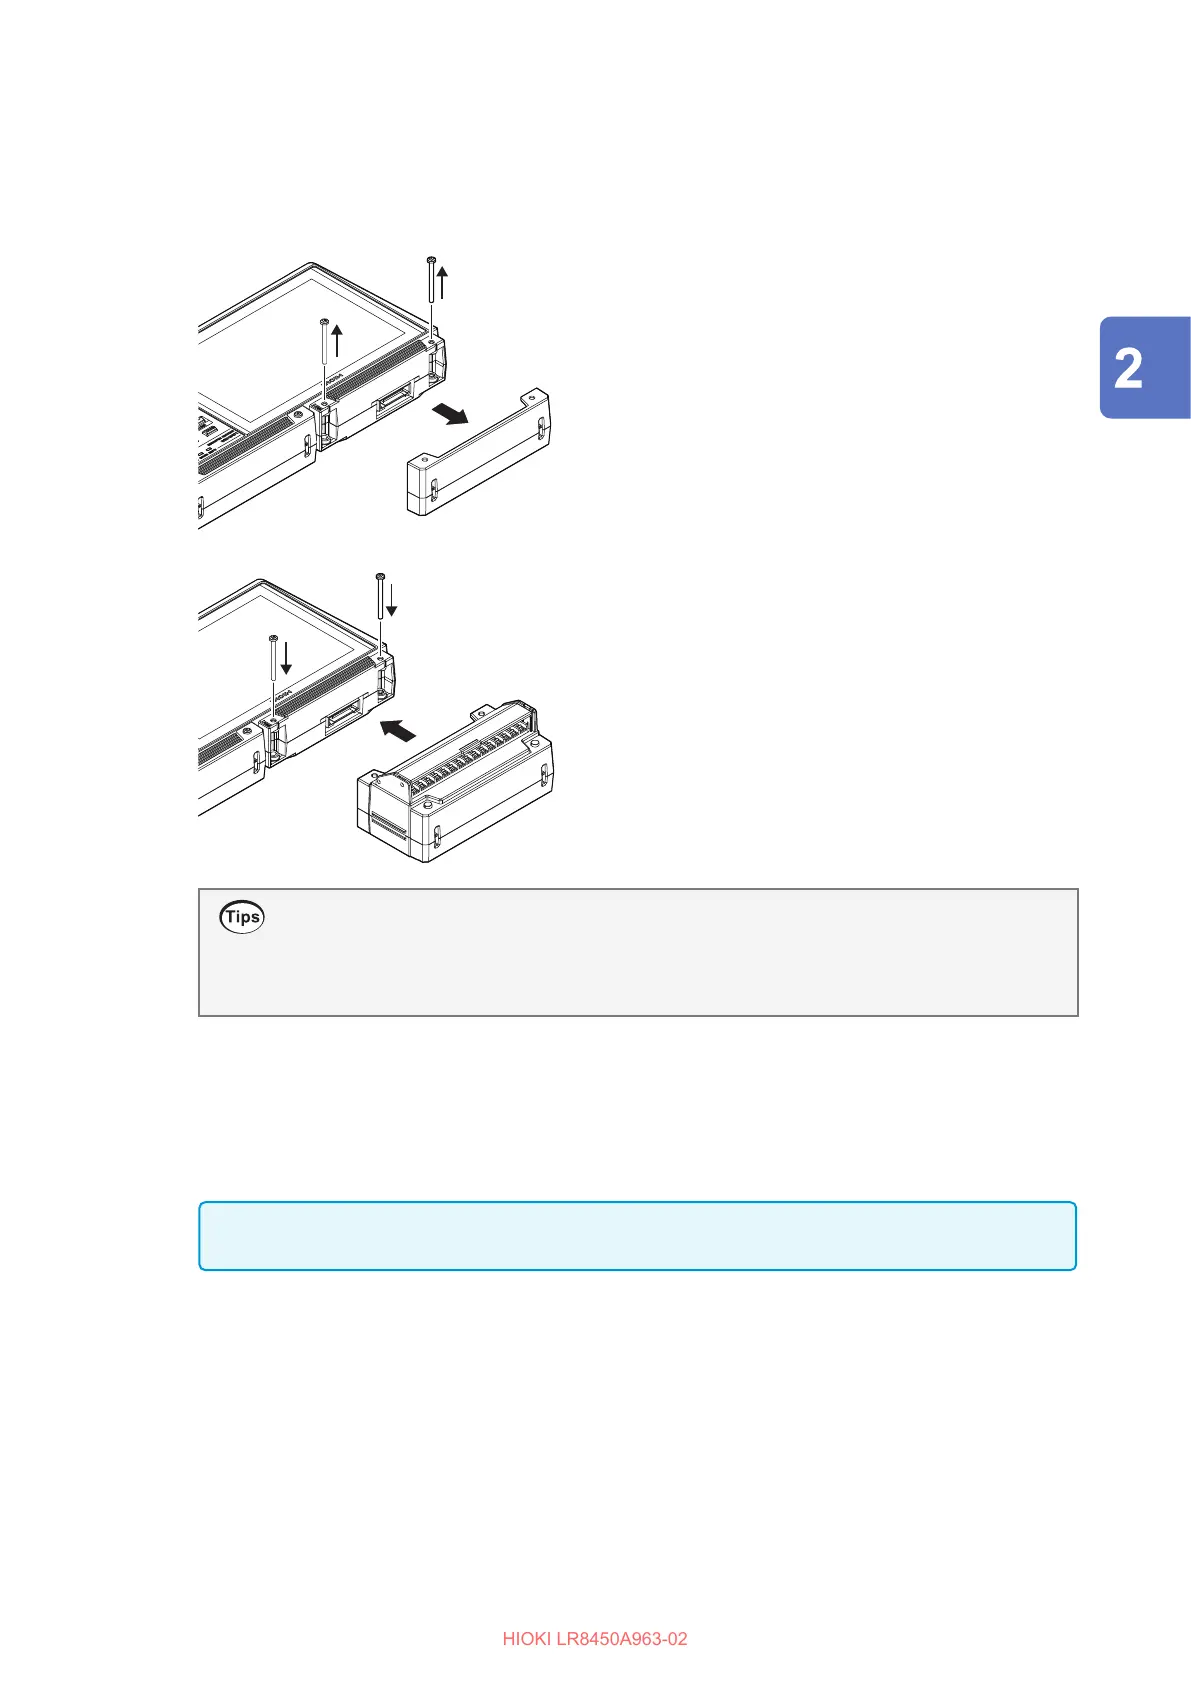
Connecting plug-in modules to the instrument
Compatible modules: U8550, U8551, U8552, U8553, U8554
You will need: a Phillip’s head screwdriver (No. 2)
2
3
Connector
1
Turn o the instrument and disconnect the AC
Adapter.
2
Remove the two screws from the instrument’s
connector cover.
3
Remove the connector cover.
Store the removed connector cover for future use.
4
5
4
Connect the plug-in module to the connector
on the instrument.
5
Insert and tighten the two screws removed in
step
2
.
Wiring cables to plug-in units and then connecting the plug-in units to the
instrument
Plug-in units can be disconnected from the instrument when wiring cables to their input terminals.
It’s easier to connect plug-in units to the instrument after cables have been wired to the unit.
Adding plug-in modules
You can additionally connect another plug-in module to the module attached to the instrument.
Connect another module to the attached module in the same way as to the instrument.
IMPORTANT
Plug-in modules ship with two spare screws (M3×35 mm). Exercise care not to lose them.
Making Connections (Preparing for Measurement)

 Loading...