4-6 White Balance Adjustment
Adiustment Preparation
(1) Apply heat-run 10 minutes or more after the
power is turned on.
(2) Check that the purity adjustment has been com-
pleted.
(3) Set the vertical incident illumination on the CPT
surface to 20 lux or less.
(4)
Receive white raster signal.
(5) Set the color temperature control (white control)
to cool.
(6)
Set data of PO1 and PO2 to D128.
(7) Turn the screen adjusting VR fully counter clock-
wise.
(8) Set cut-off mode (see item 4-4).
Adiustment Procedure
(1)
(2)
(3)
(4)
(5)
(6)
(7)
(8)
(9)
Turn the screen adjusting VR clockwise and set
it to the position where the bright colored line
starts appearing on CPT screen.
Do not change the cut-off data (this data is
named “CODE-A”) corresponding to the color
first appearing.
Turn the screen fully clockwise adjusting VR
when a bright color line does not appear.
Adjust the cut-off data except Code-A so that the
red, green and blue bright colored line appear on
the screen equally by using A,v,q,F keys.
Set to normal mode by pressing “MENU” key.
Change G and B data (“PO1 and PO2”) by using
d,, keys and adjust the high-brightness white
balance.
Adjust picture control to minimum and check that
the low-brightness white balance is obtained by
directly observing the low-brightness without
using a mirror.
When the low brightness white balance is not
obtained, adjust other low-brightness white
balance code except Code-A and return to item
(6). White balance color temperature setting
10800°K + MPCD.
Set white control (color temperature control) to
warm, and check that color temperature is
approx. 7,200”K
M9LXU
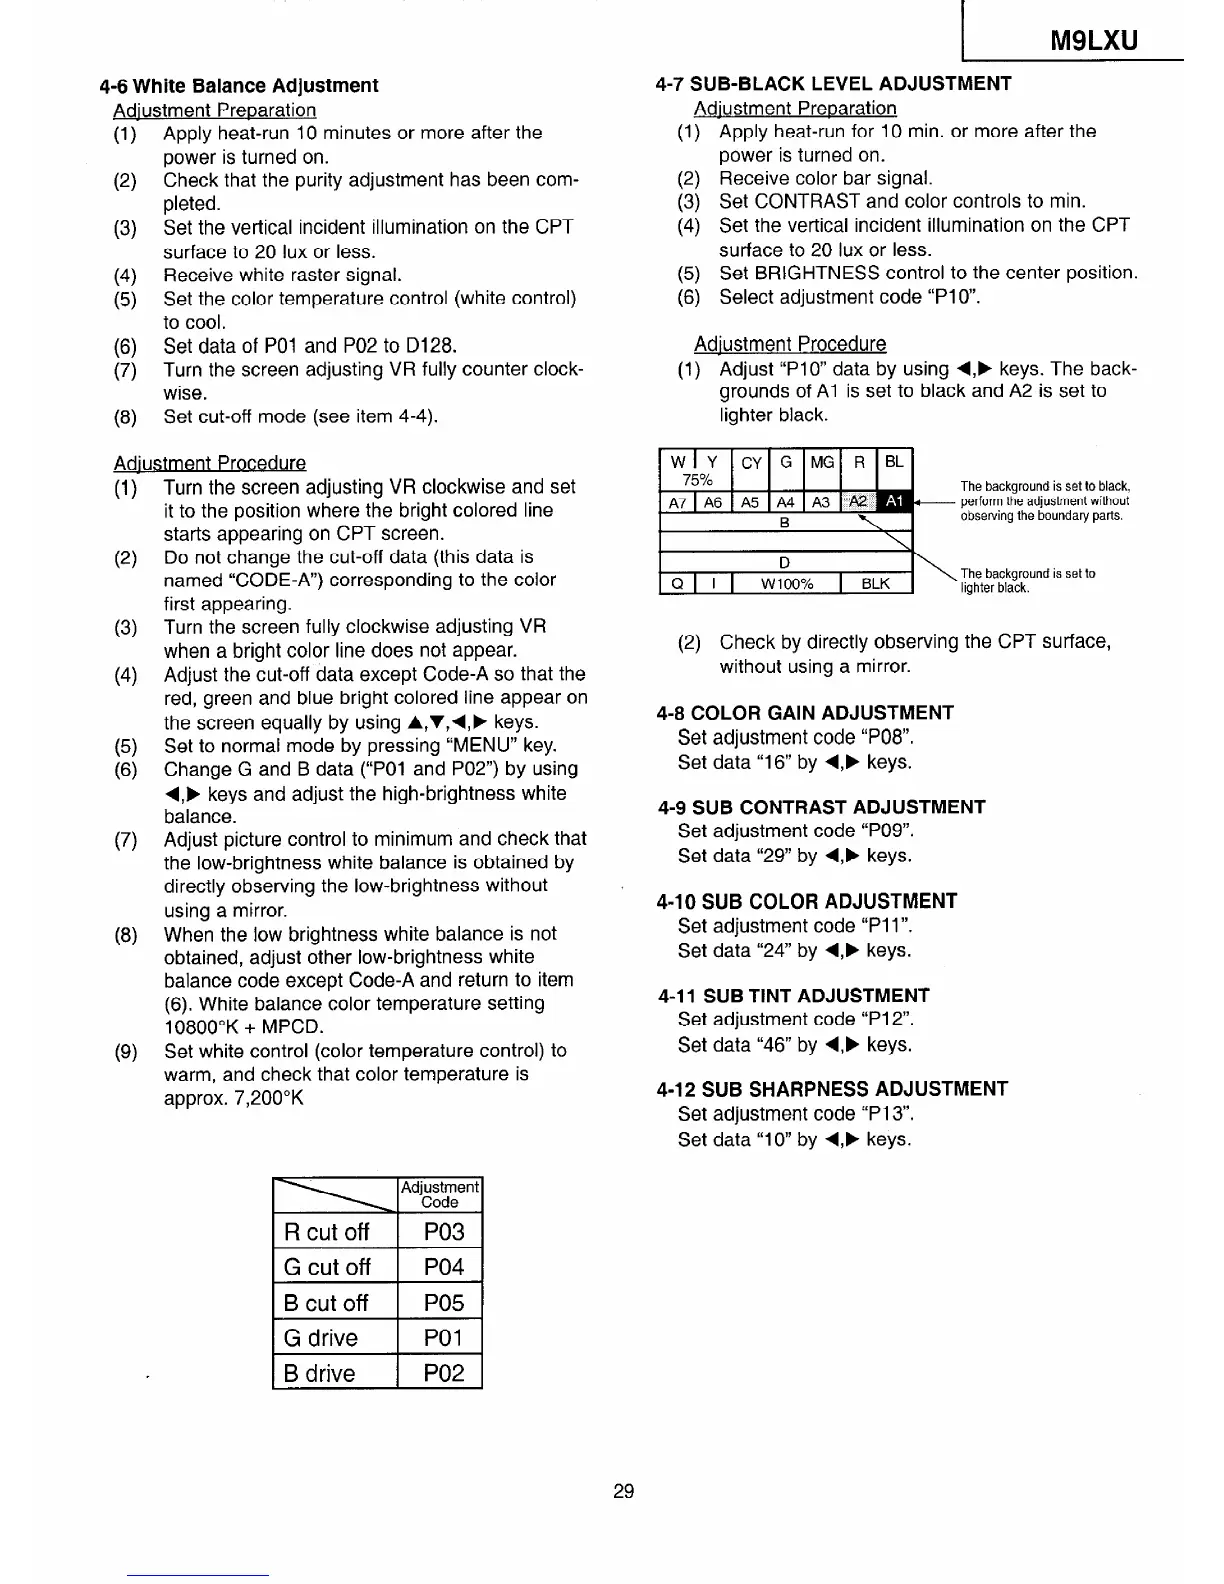
4-7 SUB-BLACK LEVEL ADJUSTMENT
Adiustment Preparation
(1) Apply heat-run for 10 min. or more after the
power is turned on.
(2) Receive color bar signal.
(3) Set CONTRAST and color controls to min.
(4) Set the vertical incident illumination on the CPT
surface to 20 lux or less.
(5) Set BRIGHTNESS control to the center position.
(6) Select adjustment code “Plo”.
Adiustment Procedure
(1) Adjust “PlO” data by using d,F keys. The back-
grounds of Al is set to black and A2 is set to
lighter black.
D
Q 1 I 1 WlOO% 1 BLK
\
The background is set to
lighter black.
(2) Check by directly observing the CPT surface,
without using a mirror.
4-8 COLOR GAIN ADJUSTMENT
Set adjustment code “PO8”.
Set data “16” by q,, keys.
4-9 SUB CONTRAST ADJUSTMENT
Set adjustment code “PO9”.
Set data “29” by d,, keys.
4-10 SUB COLOR ADJUSTMENT
Set adjustment code “Pll”.
Set data “24” by d,, keys.
4-11 SUB TINT ADJUSTMENT
Set adjustment code “Pl2”.
Set data “46” by d,, keys.
4-12 SUB SHARPNESS ADJUSTMENT
Set adjustment code “Pl3”.
Set data “10” by d,F keys.
29
 Loading...