MSLXU
Adiustment Procedure
(1) Check that with each press of the “PIP” button of
Remo-con, sub-picture alternates between On
and Off. When sub-picture is On, check that the
channel numbers are displayed as below.
Ai4fAld
PIP VIDEO: 1
1 [>-Kj 1
6. MOVE
Adiustment Preparation
(1) Press “PIP” button to set to PinP mode.
Adjustment Procedure
(1) Check that with each press of the “MOVE” button
on Remo-con, sub-picture moves counterclock-
wise.
Note: When sub-picture is in the upper left of the
screen, the channel number of main picture
comes to the lower right, as shown below.
7. SWAP
Adiustment Preparation
(1) Press “PIP” button to set to PinP mode.
Adiustment Procedure
(1) Check that with each press of the ‘SWAP” but-
ton, the contents of main picture and sub-picture
are exchanged.
8. FREEZE
Adiustment Preparation
(1) Connect signal to ANT A and video. (One or both
of the pictures should be moving picture.)
(2) Press “PIP” button to set PinP mode.
(3) Sub-picture should be moving picture.
Adjustment Procedure
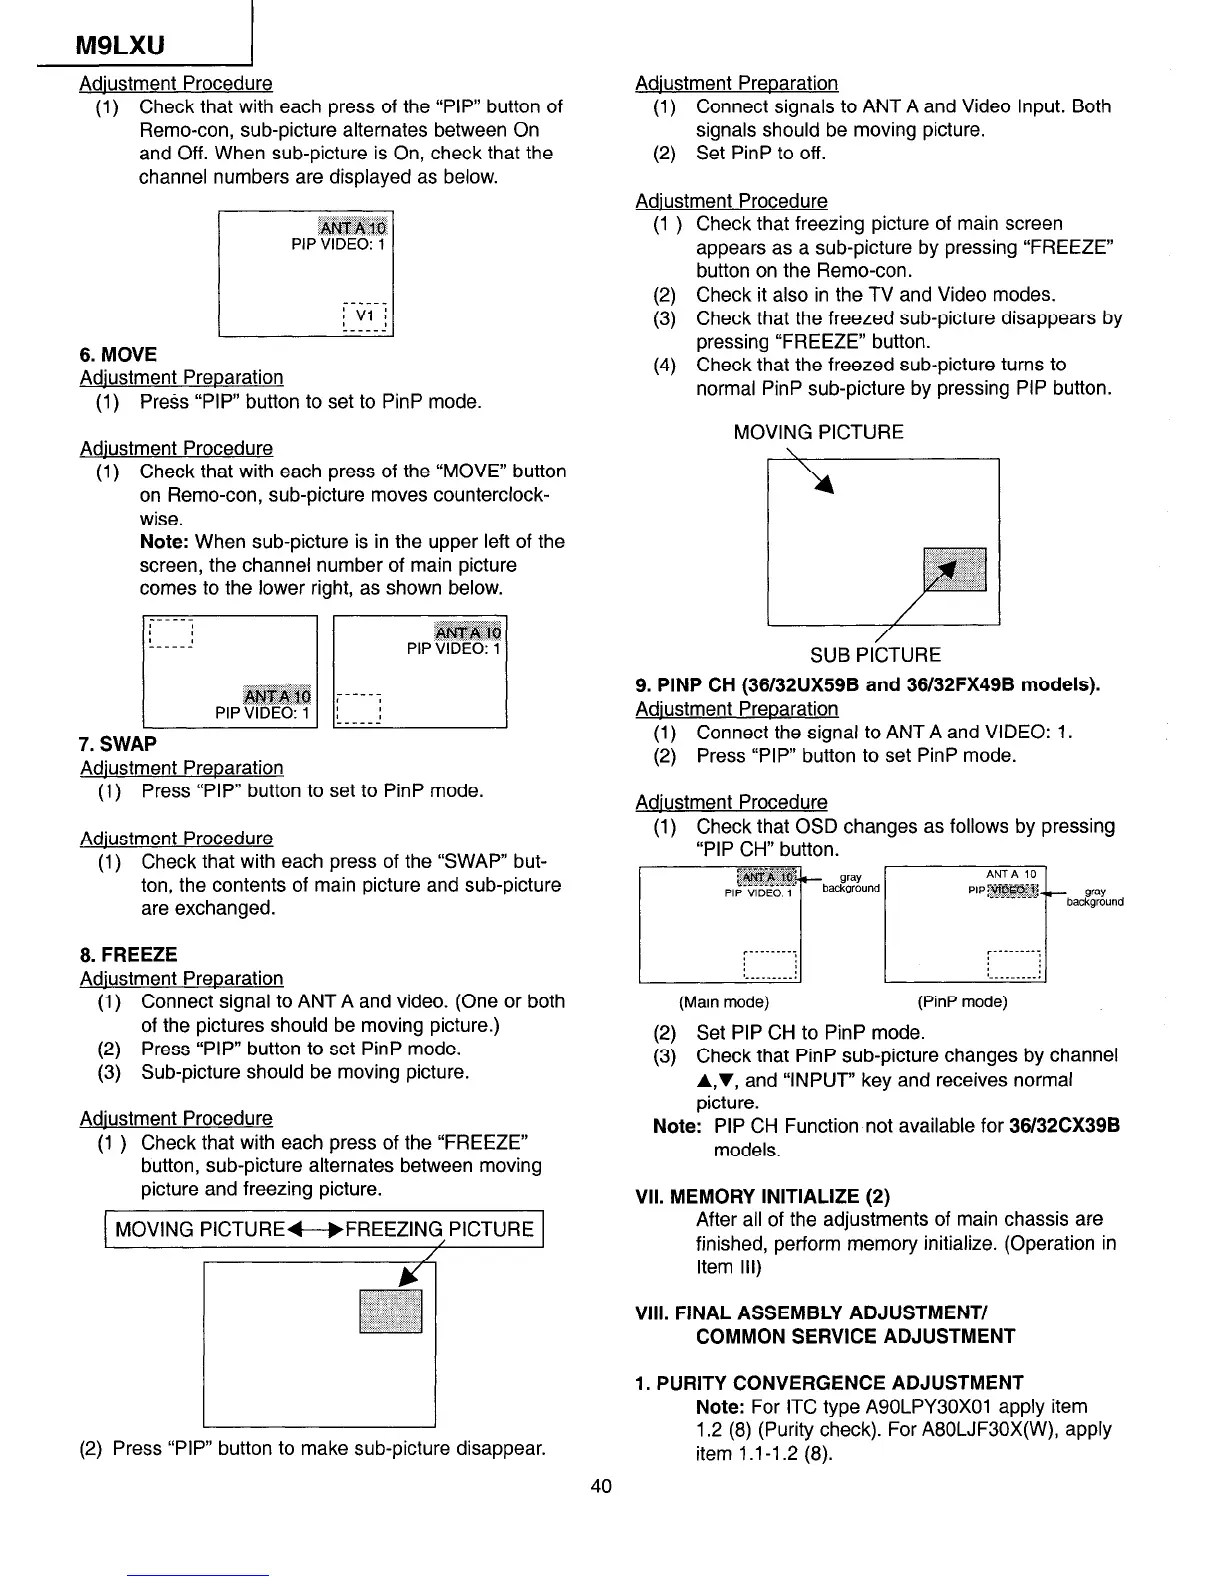
(1 ) Check that with each press of the “FREEZE”
button, sub-picture alternates between moving
picture and freezing picture.
1 MOVING PICTUREe-+FREEZING.PlCTURE 1
I
I
(2) Press “PIP” button to make sub-picture disappear.
Adiustment Preoaration
(1) Connect signals to ANT A and Video Input. Both
signals should be moving picture.
(2) Set PinP to off.
Adjustment Procedure
(1 )
(2)
(3)
(4)
Check that freezing picture of main screen
appears as a sub-picture by pressing “FREEZE”
button on the Remo-con.
Check it also in the TV and Video modes.
Check that the freezed sub-picture disappears by
pressing “FREEZE” button.
Check that the freezed sub-picture turns to
normal PinP sub-picture by pressing PIP button.
MOVING PICTURE
\
I \ I
I
/ I
/
SUB PICTURE
9. PINP CH (36/32UX59B and 36/32FX49B models).
Adjustment Preoaration
(1) Connect the signal to ANT A and VIDEO: 1.
(2) Press “PIP” button to set PinP mode.
Adiustment Procedure
(1) Check that OSD changes as follows by pressing
“PIP CH” button.
(Main mode) (PinP mode)
(2) Set PIP CH to PinP mode.
(3) Check that PinP sub-picture changes by channel
A,v, and “INPUT” key and receives normal
picture.
Note: PIP CH Function not available for 36/32CX39B
models.
VII. MEMORY INITIALIZE (2)
After all of the adjustments of main chassis are
finished, perform memory initialize. (Operation in
Item Ill)
VIII. FINAL ASSEMBLY ADJUSTMENT/
COMMON SERVICE ADJUSTMENT
1. PURITY CONVERGENCE ADJUSTMENT
Note: For ITC type A90LPY30XOl apply item
1.2 (8) (Purity check). For A80LJF30X(W), apply
item 1.1-l .2 (8).
40
 Loading...