Daily Operation
MAN0996_Iss 1_02/16 Touchpoint Plus
Pt. No. 3011M5044_EN 22 User Guide
4.2 Touchscreen
The Touchscreen is touch only; it has no swipe or pinch gestures.
The Touchscreen has four access levels: View mode is available to all users while Configuration, Maintenance and
System Test functions are password protected. (See Ch.4.4 Menu Items and Access Levels for further information.)
There are only three passworded accounts: Administrator, Service and Operator, and their passwords must be carefully
guarded.
Lost passwords can only be replaced by someone higher which, in the case of the Administrator, will be a Honeywell
representative.
Password holders should be assigned to one access level only.
4.3 Switching On and Off
Before switching power on, ensure that the system has been commissioned or that a qualified person has checked that
the wiring is safe and conforms to local regulations. Also check that the battery isolator switches are ‘On’ and that an SD
Card is fitted. Check that the optional expansion unit battery switches are on too.
Switch on power at the Isolator switch and wait for the system to initialise. (The system start up sequence may last for up
to 5 minutes depending on the number of channels in use.)
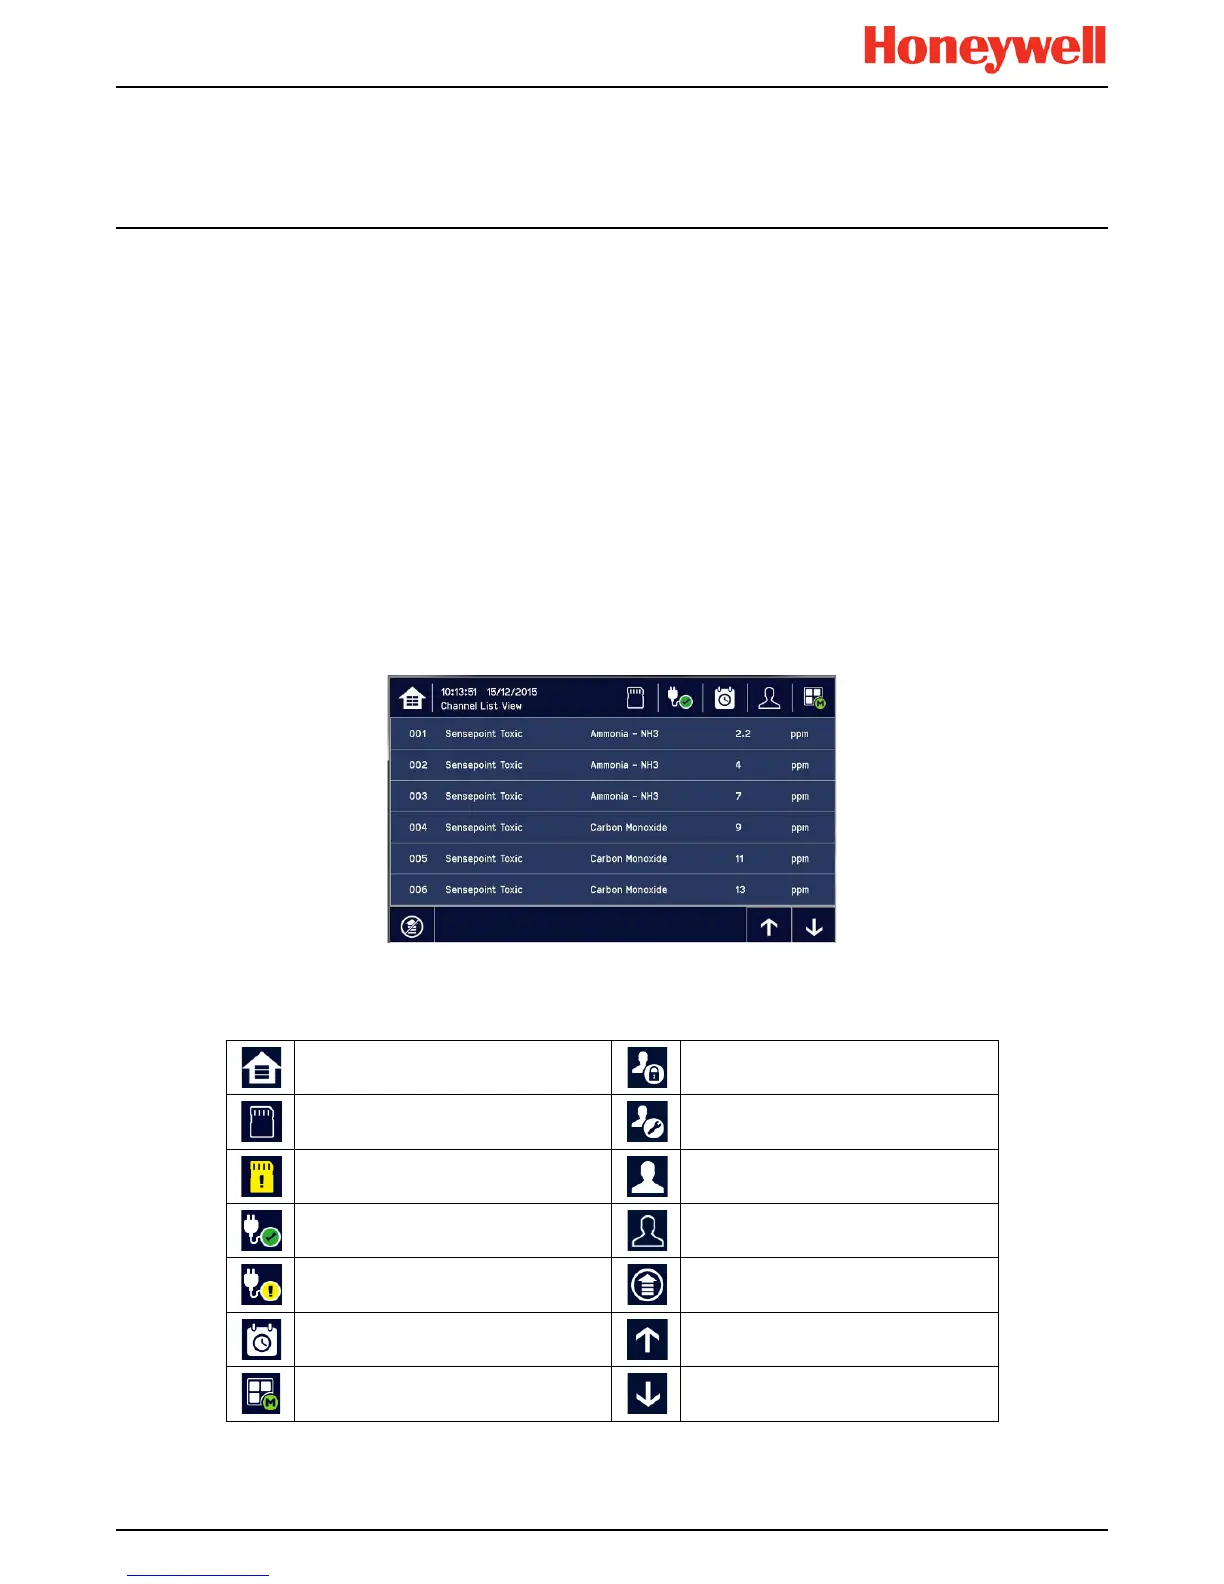
TPPL will first display the auto-scrolling Input screen, indicating the current status of the system. The Channel List View is
shown below. The screenshot shows installed sensors but it may be blank depending on your system status:
You can alter the screen views or gain further information by touching the icons shown below:
Table 5. Home Screen Menu Icons
Toggle to select screen layout
Admin Logged in
SD Card Status Good
Service Logged in
SD Card Status Fault
Operator Logged in
External mains power is connected.
Touch for status
No one Logged in
External power is not connected.
Touch for status
Toggle auto-scroll on and off
Event History (changes colour to show
fault, inhibit or alarm)
Scroll up when auto-scroll disabled
Further Menu Options
Scroll down when auto-scroll disabled

 Loading...