XNX Universal Transmitter Quick Start Guide
28
7. PlugtheconnectorintothebackofthemVpersonalityboard.
8. InstallthemVsensor.
9. TerminatewiringatthemVsensor.
10.Atthetransmitter,passthewiresthroughtheferritebeadasshown
inFigure16andterminatethewiringatthepluggableterminalblock
asshowninFigure14.
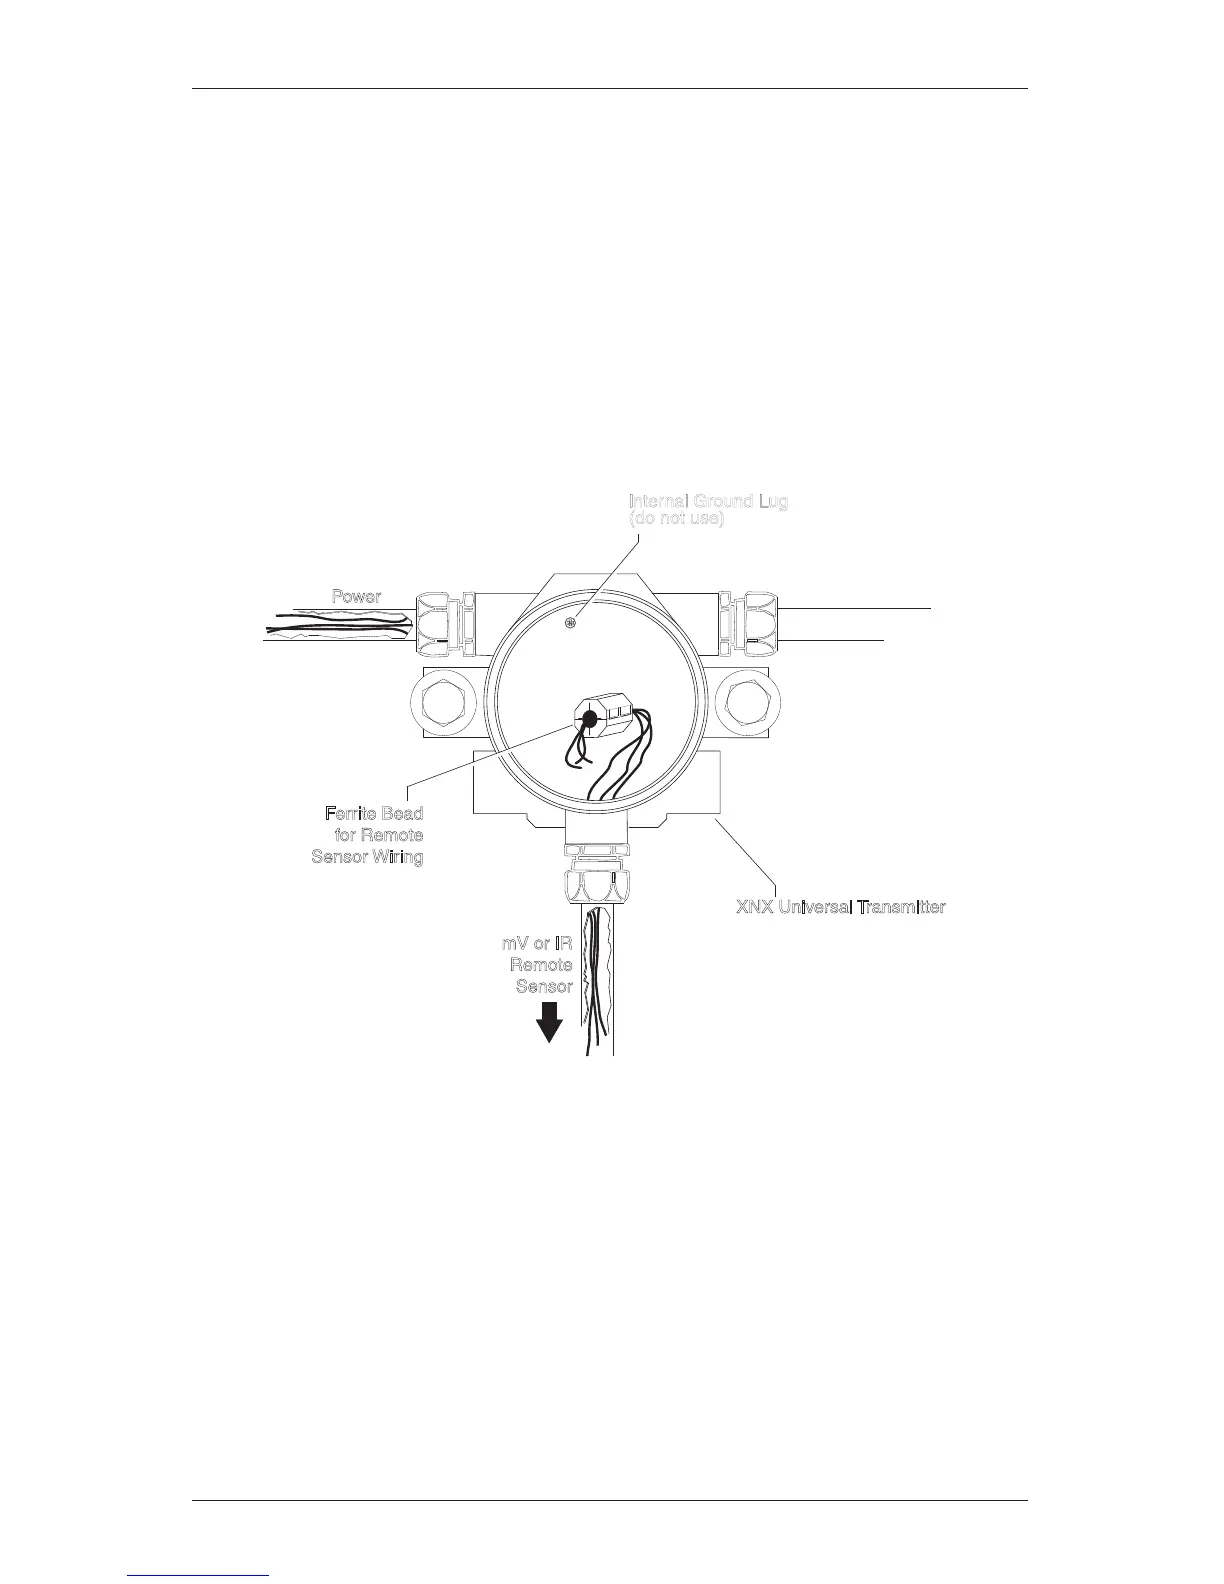
In remote mount MPD configurations, the three wires from the sensor that
connect to the pluggable terminal block must be routed through the supplied
ferrite bead (part no. 0060-1051, supplied in the accessory kit), as shown in
Figure 16.
mV or IR
Remote
Sensor
lnternal Ground Lug
(do not use)
Power
Ferrite Bead
for Remote
Sensor Wiring
XNX Universal Transmitter
Figure 16. Ferrite bead wiring
11.Verifypoint-to-pointconnectionsbeforecompletingtheinstallation
andapplyingpower.
12.Calibratethesensor.
13.Reinstalltheweatherproofcoveronthetransmitter.
Note: Environmental conditions that compromise the IP66 protection provided by
the weather proof cover will extend published response times. Safety protocols
or maintenance procedures that consider these environmental conditions are
recommended specific to the installation.
 Loading...


