C-6
Hardware Components
Replacing the Disk Drive
Caution A 5-second delay is mandatory between removing a module, and either re-
installing it, or replacing it with another.
To replace one module with another, or to remove a module without replacing
it, use the following procedure:
1. Unscrew the retaining screws enough to disconnect them from the
threaded holes in the switch.
2. Using the extractor handles pull the module out from the slot.
3. Do one of the following:
• If installing another module of the same type, go to “Installation
Procedure” on page 1-3 and begin with step 2. A switch reset is not
required. The current configuration in that slot will apply to the new
module.
• If another module will not be installed in the slot (that is, the slot will
be left empty), re-install the cover plate over the slot opening.
Caution For proper cooling and reduction of electromagnetic emissions, ensure that
a slot cover is installed on any unused slot.
Replacing the Disk Drive
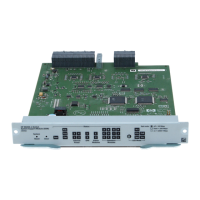
The following is the procedure for replacing the Disk Drive in the Services
Module. The module may be removed while the switch is powered on. The
numbers in Figure C-5 correspond to the step numbers below.
1. Using either a flat-bladed or Torx T-10 screwdriver loosen the retaining
screws securing the Services Module.
2. Using the extractor handles, pull the module out from the slot and turn
it over.
3. Using a Cross Recess Type 1 No.1 (Philips tip) screwdriver remove the
four retaining screws holding the disk drive.
4. Slide the disk drive half way back to disconnect it.
5. Position the disk drive in the middle of the disk drive slot.
6. Using either side of the disk drive bracket, lift the disk drive out.
7. Install the new disk drive and slide it forward to engage the connector.
8. Re-install the four retaining screws.
zlSM .book Page 6 T hursday, January 29, 2009 11:53 AM
 Loading...
