FusionModule5000 Smart Modular Data Center
Maintenance Guide (ECC800)
Huawei Proprietary and Confidential
Copyright © Huawei Technologies Co., Ltd.
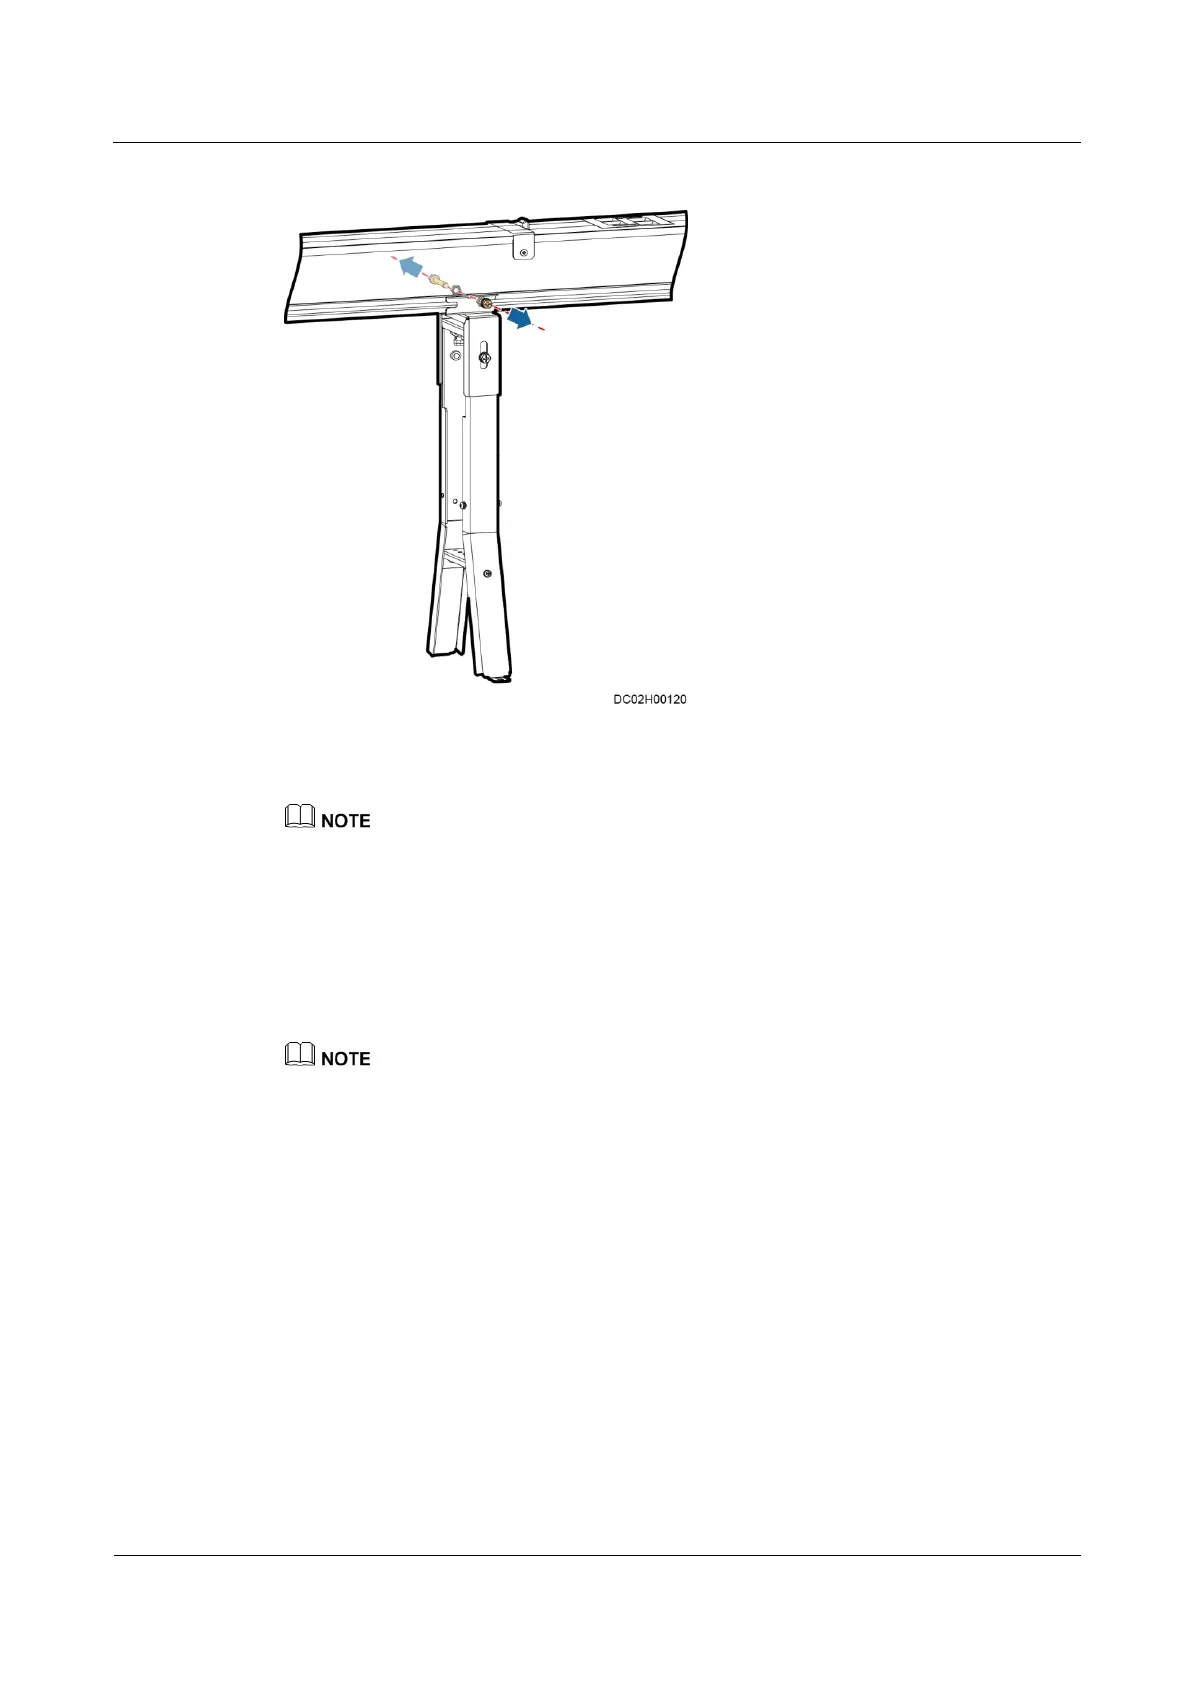
Figure 5-25 Removing the busbar trunking unit
Step 6 Take out the faulty busbar trunking unit, and place the spare one on the support.
Before installing the busbar trunking unit, determine the installation direction based on the position of
the upstream phase cable, align the copper bars, and avoid reverse installation.
Step 7 Secure the busbar trunking unit to the support using M6 screws by referring to Figure 5-25.
Step 8 Fasten the spare connective kits to both sides of the new busbar trunking unit and ensure that
they are in good touch with the copper bars of the busbar trunking unit. Twist off the external
nuts of the dual-nut bolts of the connective kits using a 13# socket wrench. Install the
protective cover and bottom plate of the connective kit by referring to Figure 5-24.
Place the connective kits according to the labels on them.
Step 9 Install the power distribution unit by referring to 5.1.3.1 Replacing the Power Distribution
Unit.
Step 10 Turn on the general input unit switch.
Step 11 Turn on the power distribution units and downstream switches corresponding to the load.
----End
5.1.3.3 Replacing the General Input Unit
Prerequisites
Tools: electroprobe, insulation gloves, Phillips screwdriver, wrench, step ladder
Materials: spare and functional general input unit and connective kit of the same model

 Loading...