147
AIS AND MARPA DISPLAY SETTINGS
Display AIS and MARPA Targets
Use the following instructions to display AIS or MARPA Targets on the Chart View or Radar View.
N
OTE: If Automatic AIS Tracking is turned on, but you do not see AIS targets on the chart and Radar Views, use these instructions
to make sure targets are set to display in the Overlays menu.
1. With a Radar View or Chart View displayed on-screen, tap Radar or Chart in the status bar.
OR
Press the MENU key once.
2. Select Radar Options or Chart Options.
3. Select Overlays.
4. Select Targets.
5. Select Show, and turn it on.
6. Select MARPA and/or AIS, and add a check mark to each box.
Display the Safe Zone
The Safe Zone is displayed on the Radar View or Chart View to
indicate the safe zone range. The range is highlighted in red. To
change the range of the safe zone, see AIS and MARPA Alarms: Set
the Safe Zone.
1. With a Radar View or Chart View displayed on-screen, tap
Radar or Chart in the status bar.
OR
Press the MENU key once.
2. Select Radar Options or Chart Options.
3. Select Overlays.
4. Select Targets.
5. Select Show, and turn it on.
6. Select Safe Zone and tap it, or press the ENTER key, to add a
check mark to the box.
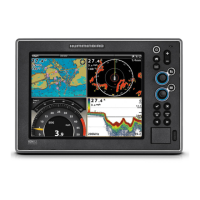
Chart View with the Safe Zone Displayed
safe zone
AIS & MARPA
 Loading...
