Maintenance
5-24 HPR130XD Auto Gas – 806330
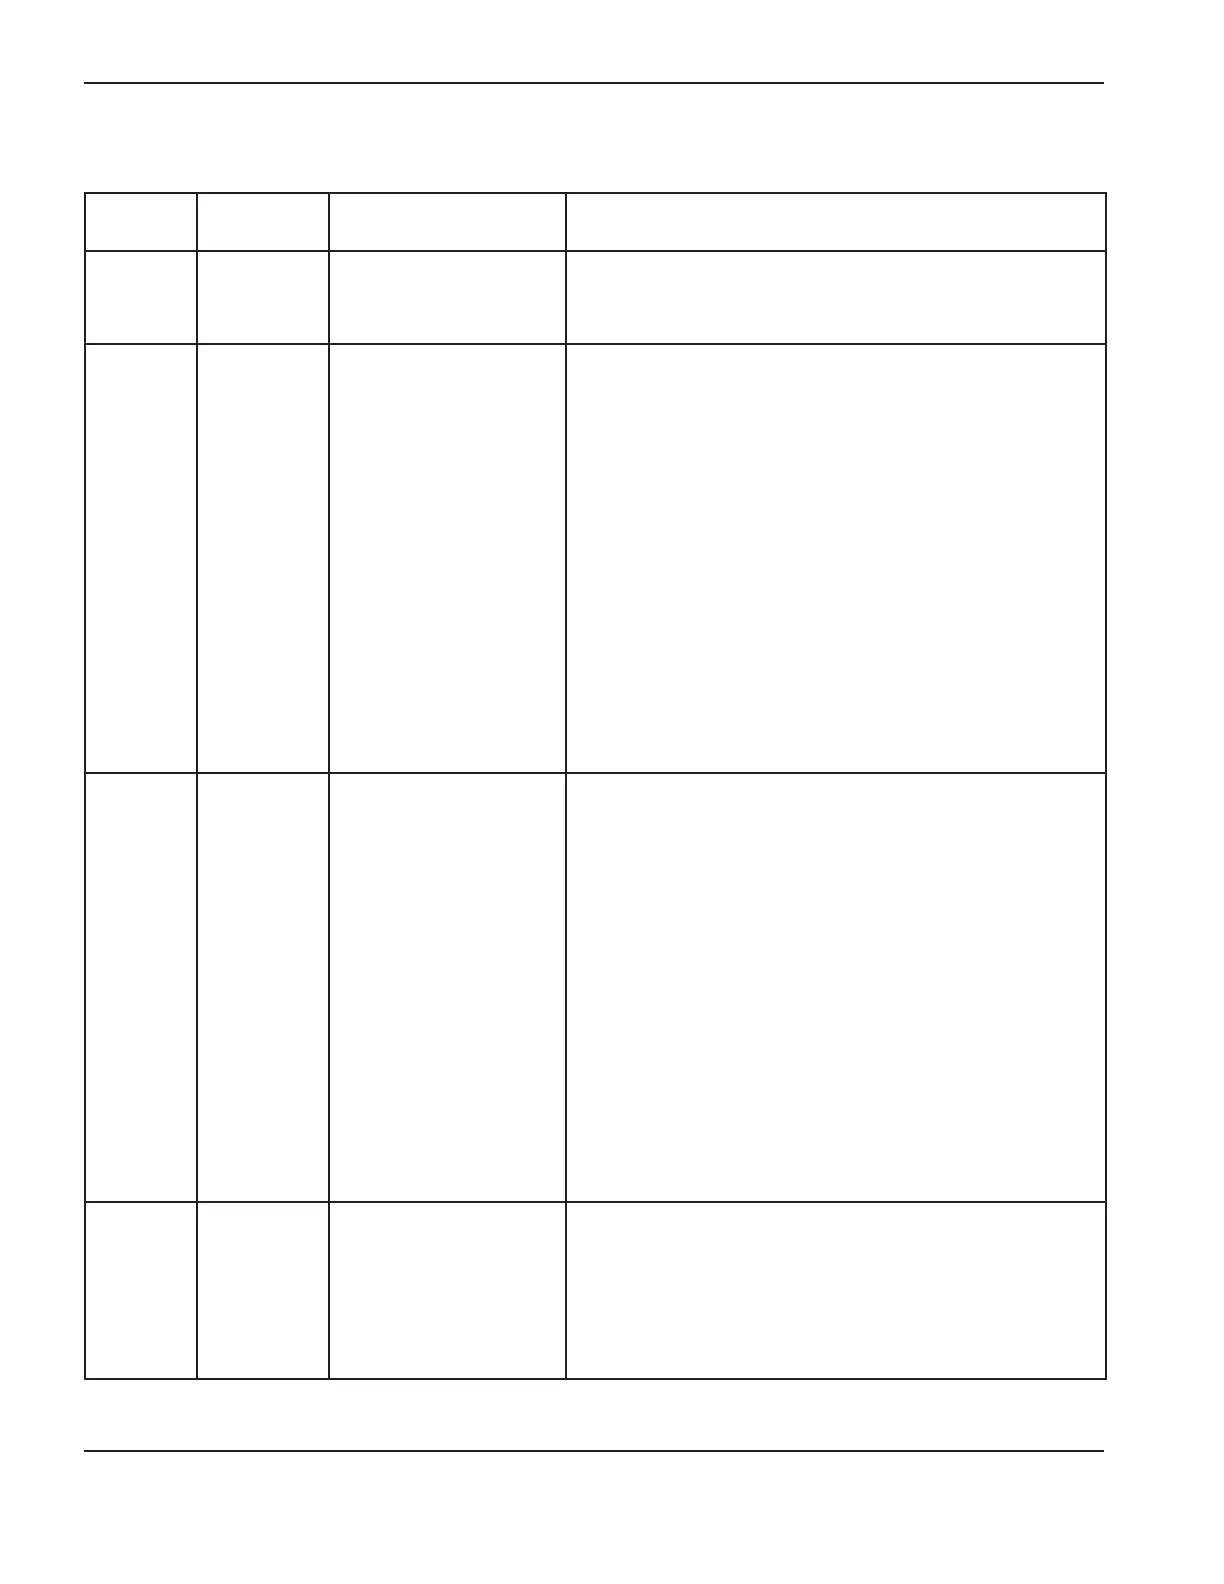
Error code troubleshooting – error codes 153 to 156, 354 to 356
Error code
number
Name Description Corrective action
153
PS EEPROM
error
EEPROM memory on
power supply control
board not working.
Replace the control board.
154
Primary
354
Secondary
Chopper 3
overcurrent
HPR400XD
Only
Chopper 3 current
feedback has exceeded
160 amperes.
1. Verify that the wiring between CS3 and PCB3 is correct
and not damaged.
2. Measure voltage across current sensor.
a) Red to black = +15 VDC, Green to black = -15 VDC,
white to black = 0 VDC at idle and varies with current
output (4 VDC = 100 A).
b) If possible, take a voltage reading on current sensor
while trying to cut. Ratio is 4 VDC = 100 A.
c) If the current sensor voltage is approximately 6.4 VDC
or greater at idle, replace the current sensor.
3. Remove connector JC.1 from the chopper and verify that
LED1 is extinguished.
a) If LED1 is extinguished with the connector removed,
then reconnect JC.1 and try to fire the torch. If the
chopper still goes into overcurrent, replace the chopper.
b) If the chopper does not go into overcurrent, replace
PCB3..
155
Primary
355
Secondary
Chopper 4
overcurrent
HPR400XD
Only
Chopper 4 current
feedback has exceeded
160 amperes.
1. Verify that the wiring between CS4 and PCB3 is correct
and not damaged.
2. Measure voltage across current sensor.
a) Red to black = +15 VDC, Green to black = -15 VDC,
white to black = 0 VDC at idle and varies with current
output (4 VDC = 100 A).
b) If possible, take a voltage reading on current sensor
while trying to cut. Ratio is 4 VDC = 100 A.
c) If the current sensor voltage is approximately 6.4 VDC
or greater at idle, replace the current sensor.
3. Remove connector JD.1 from the chopper and verify that
LED1 is extinguished.
a) If LED1 is extinguished with the connector removed,
then reconnect JD.1 and try to fire the torch. If the
chopper still goes into overcurrent, replace the chopper.
b) If the chopper does not go into overcurrent, replace
PCB3.
156
Primary
356
Secondary
Chopper 2
current at
power-up
HPR260XD
HPR400XD
Only
Chopper 2 current signal
is active at power-up.
See wiring diagrams in section 7
1. Verify that the voltage at CS2 is correct.
2. Verify that the wiring between CS2 and PCB3 is correct
and not damaged.
3. Swap CS2 with CS3. If the error code changes to 157,
replace the original CS2.

 Loading...


