TORCH SETUP
3-6 powermax
45
Operator Manual
Machine torch setup
Before using the T45m, you must:
• Mount the torch on your cutting table or other equipment.
• Choose and install the consumables.
• Align the torch.
• Attach the torch lead to the power supply.
• Set up the power supply for remote starting with either the remote-start pendant or a
machine interface cable.
Mount the torch
Depending on the type of cutting table you have, you may or may not need to disassemble the
torch to route it through the track and mount it. If your cutting table’s track is large enough for you
to thread the torch through it without removing the torch body from the lead, do so and then attach
the torch to the lifter per the manufacturer’s instructions.
Note: The T45m can be mounted on a wide variety of X-Y tables, track burners, pipe
bevelers, and other equipment. Install the torch per the manufacturer’s instructions and
following the instructions below for disassembly if necessary.
If you need to disassemble the torch, follow these steps:
1. Disconnect the torch lead from the power supply and remove the consumables from the torch.
2. Remove the gear rack from the positioning sleeve by removing the 2 black screws that secure
it to the positioning sleeve. Remove the 6 screws (3 at each end) that secure the positioning
sleeve to the brass strain relief and to the torch body. Slide the positioning sleeve off the torch.
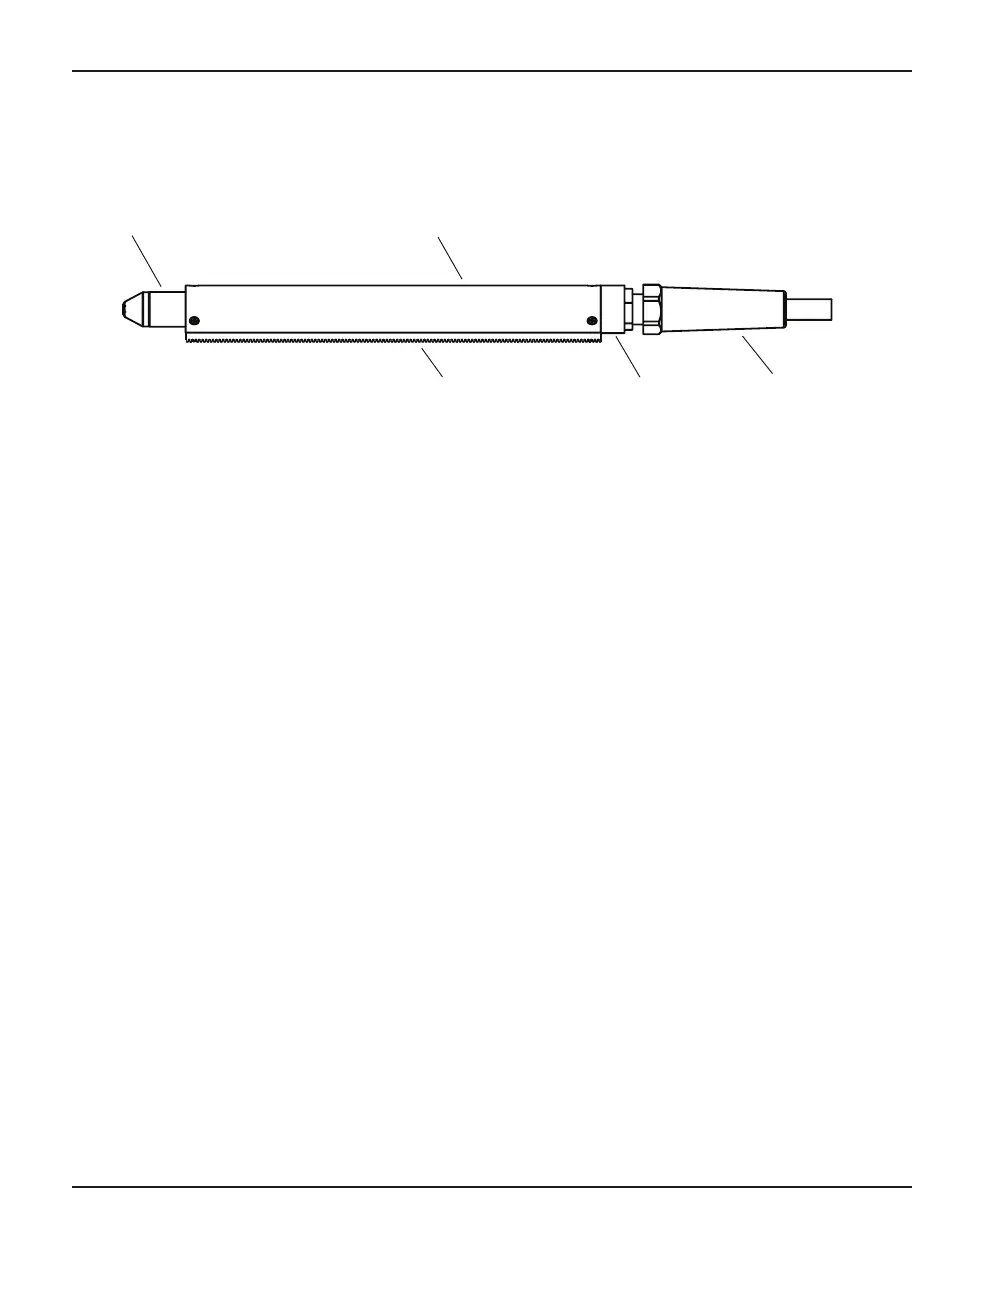
Consumables
Gear rack Strain relief
Positioning sleeve
Brass strain
relief
 Loading...