Installing an expansion unit
Use these instructions to install an expansion unit or for the topmost blade server
in a scalable blade complex.
Attention: You cannot insert the blade server into the BladeCenter chassis until
the cover is installed and closed. Do not attempt to override this protection.
Statement 21
CAUTION:
Hazardous energy is present when the blade server is connected to the power
source. Always replace the blade cover before installing the blade server.
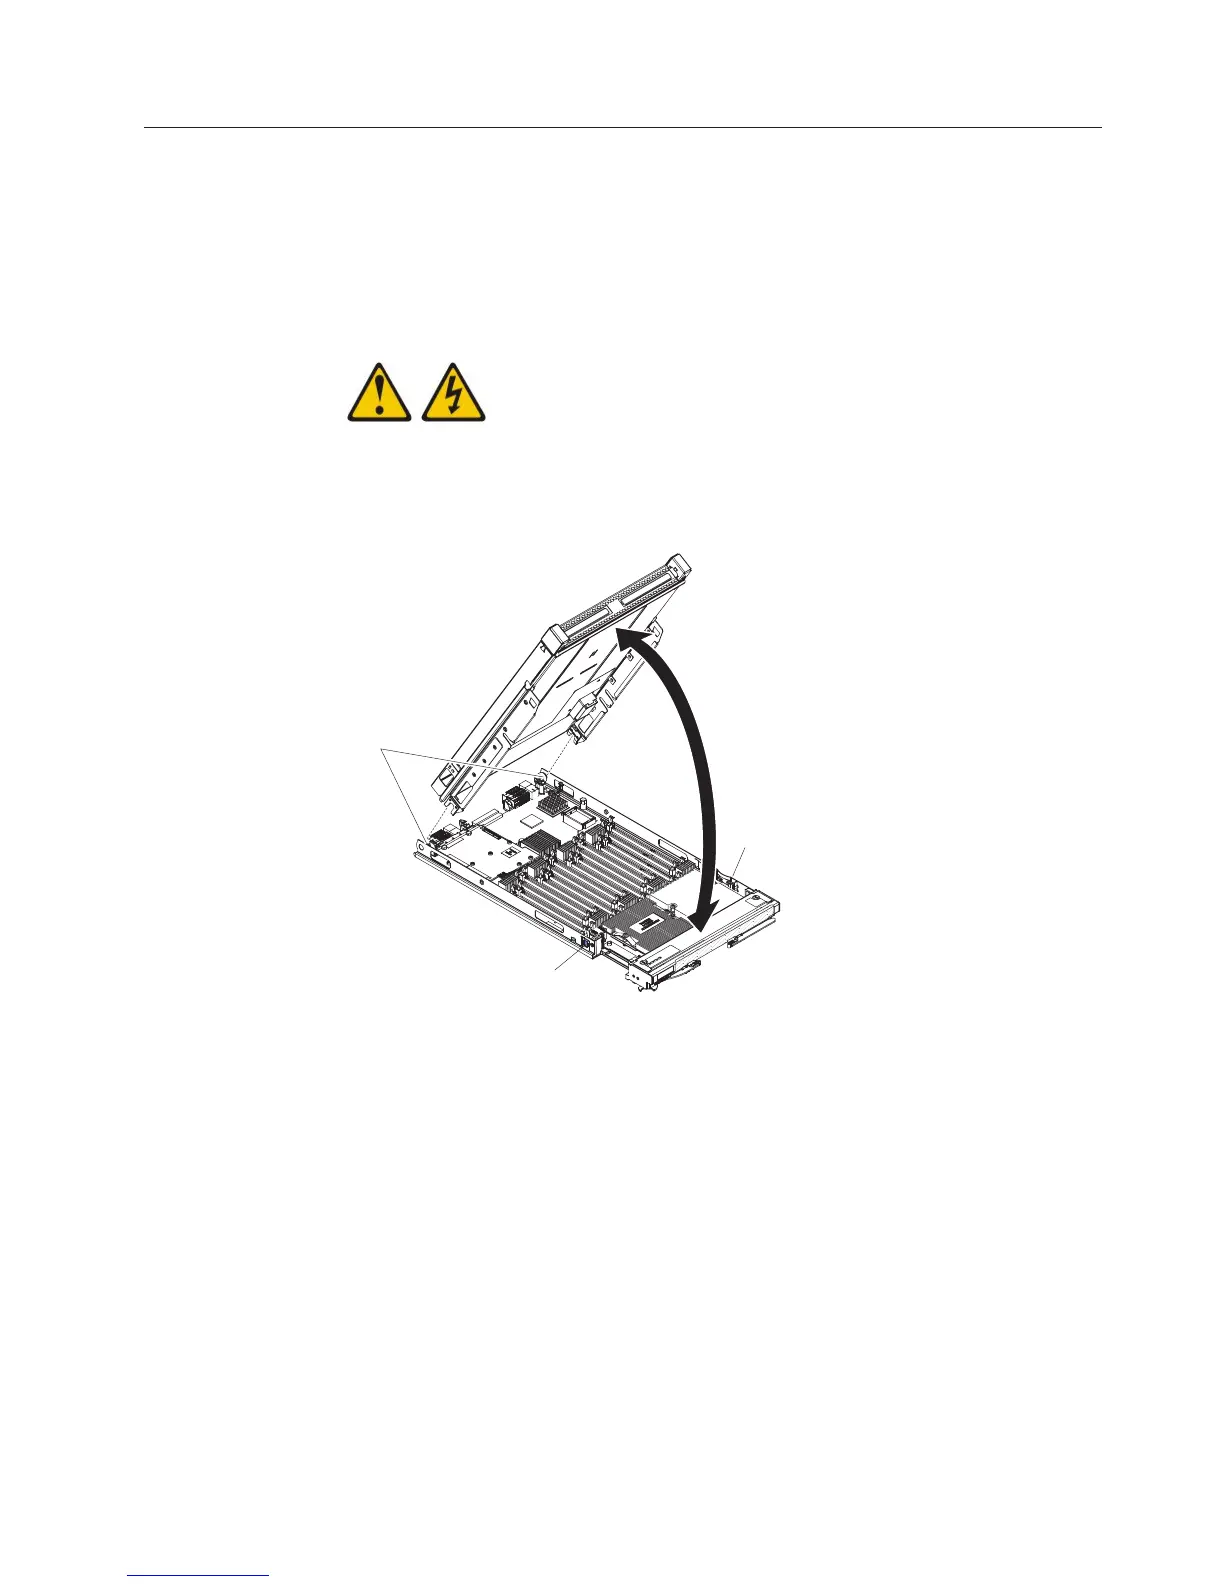
Blade server
cover release
Blade server
cover release
Cover
Pins
To install and close the blade server cover, complete the following steps:
1. Before you begin, read “Safety” on page v and “Installation guidelines” on
page 23.
2. Carefully lay the blade server on a flat, static-protective surface, orienting the
blade server with the bezel pointing toward you.
3. Locate the blade expansion connector and remove the cover if one is installed
(see “Blade server connectors - BladeCenter HX5” on page 21).
4. Touch the static-protective package that contains the optional expansion unit to
any unpainted metal surface on the BladeCenter unit or any unpainted metal
surface on any other grounded rack component; then, remove the optional
expansion unit from the package.
5. Orient the optional expansion unit as shown in the illustration.
6. Lower the expansion unit so that the slots at the rear slide down onto the cover
pins at the rear of the blade server; then, pivot the expansion unit down onto
the blade server.
7. If the expansion unit has a cover already installed, remove it (see Removing the
blade server cover).
Chapter 3. Installing optional devices 31
 Loading...