1. Before you begin, read “Safety” on page v and “Installation guidelines” on
page 23.
2. Stand the blade server upright on a clean, flat work surface, with the scalability
filler connector facing up.
3. Open the lower handle (rotate the lower handles down) to allow the blade
server to sit flat on the work surface.
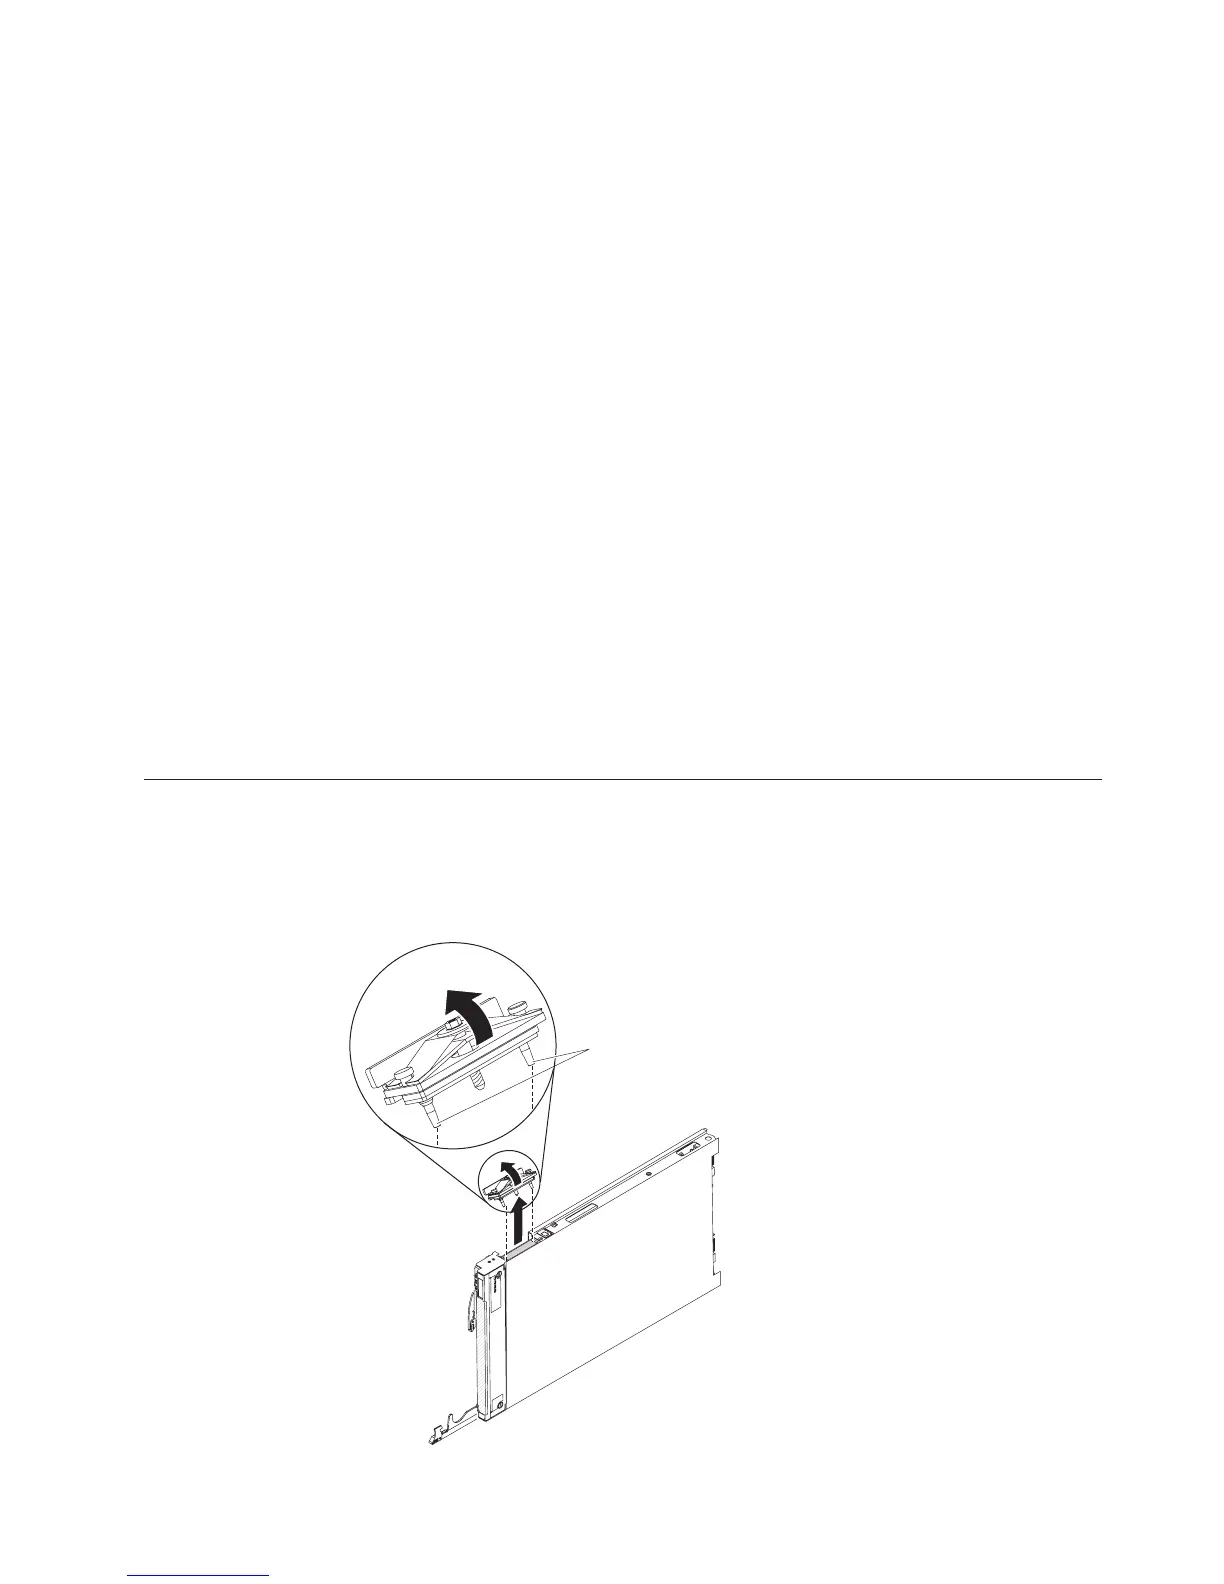
4. Remove the scalability filler from the blade server or 2-node scalability card
(see “Installing the 2-node scalability card” on page 60). To remove the
scalability filler, complete the following steps:
a. Using the 3/16" hex driver that is provided with the 1-node speed burst
card, loosen the nut that attaches the filler to the blade server.
b. Lift the filler off the blade server.
5. Align the pins on the bottom of the 1-node speed burst card with the holes on
the scalability connector on the blade server.
6. Press down firmly so that the 1-node speed burst card is flush with the
scalability connector on the blade server.
7. Tighten the screw on the filler by hand to ensure that the screw threads start
properly.
Important: Always hand tighten the screw before using the 3/16" hex driver.
8. Using the 3/16" hex driver, tighten the nut that attaches the 1-node speed burst
card to the blade server.
Note: If you are using a torque driver, the correct torque is 15 in-lb.
Removing the 1-node speed burst card
Use this information to remove the 1-node speed burst card from a blade server.
To remove the 1-node speed burst card, complete the following steps.
Alignment
pins
Chapter 3. Installing optional devices 57
 Loading...