11
2
STARTING INITIAL SETUP
New2001 New2001
■ PowerON
Holddown[ ➥ ]for1secondtoturnONpower.
•Aftertheopeningmessageand powersourcevoltagearedis-
played, the operating frequency appears.
•Holddown[ ]for1secondtoturnOFFpower.
The opening message and power source voltage display
options can be turned ON or OFF in the Display menu.
MENU > Display > OpeningMessage (p. 28)
MENU >
Display
> Voltage(PowerON)
(p. 28)
■ Settingaudiovolume
Rotate[VOL]toadjusttheaudiolevel. ➥
•Ifthesquelchisclosed,holddown[SQL]whilesettingtheaudio
level.
•Thedisplayshowsthevolumelevelwhileadjusting.
The beep level is adjusted in the Sounds menu.
MENU > Sounds > BeepLevel (p. 29)
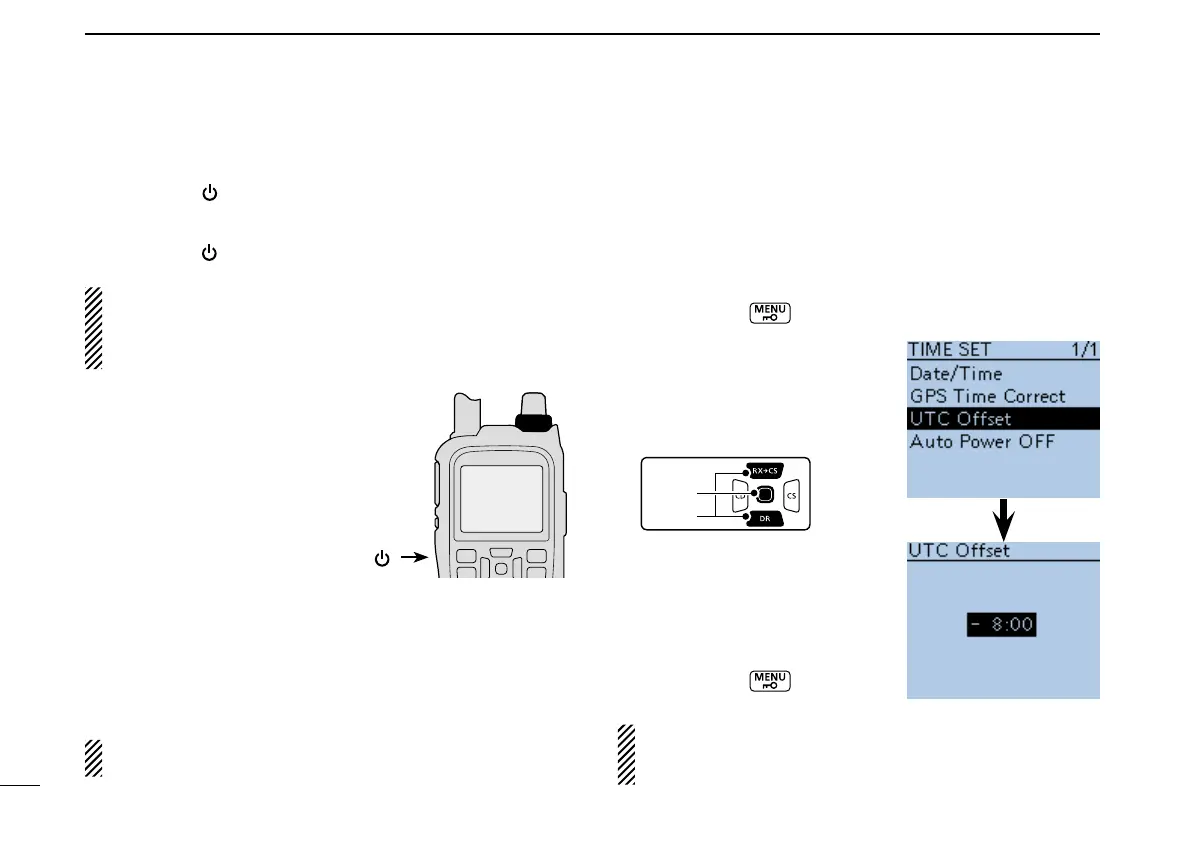
■ SettingDate/Time
The ID-51A/E has a built-in internal GPS receiver, and has a
time correction function. The transceiver automatically sets
the Date/Time settings to your local time.
D Localsetting
[ ]
[VOL]
Push[MENU] q .
Push D-pad( w ) to select the
root item “Time Set,” and then
push D-pad(Ent).
•Iftheitemisnotdisplayed,push
D-pad() one or more times to
select the page.
Push D-pad( e ) to select
“UTC Offset,” and then push
D-pad(Ent).
Push D-pad( r ) to set to your
local offset time.
(Example:–8:00)
Push[MENU] t
to exit the
Menu screen.
The “GPS Time Correct” item in the Time Set menu is set
to “Auto” as the default setting.
MENU > Time Set > GPSTimeCorrect (p. 29)
 Loading...