ARMY TM 9-2815-254-24
AIR FORCE TO 38G1-94-2
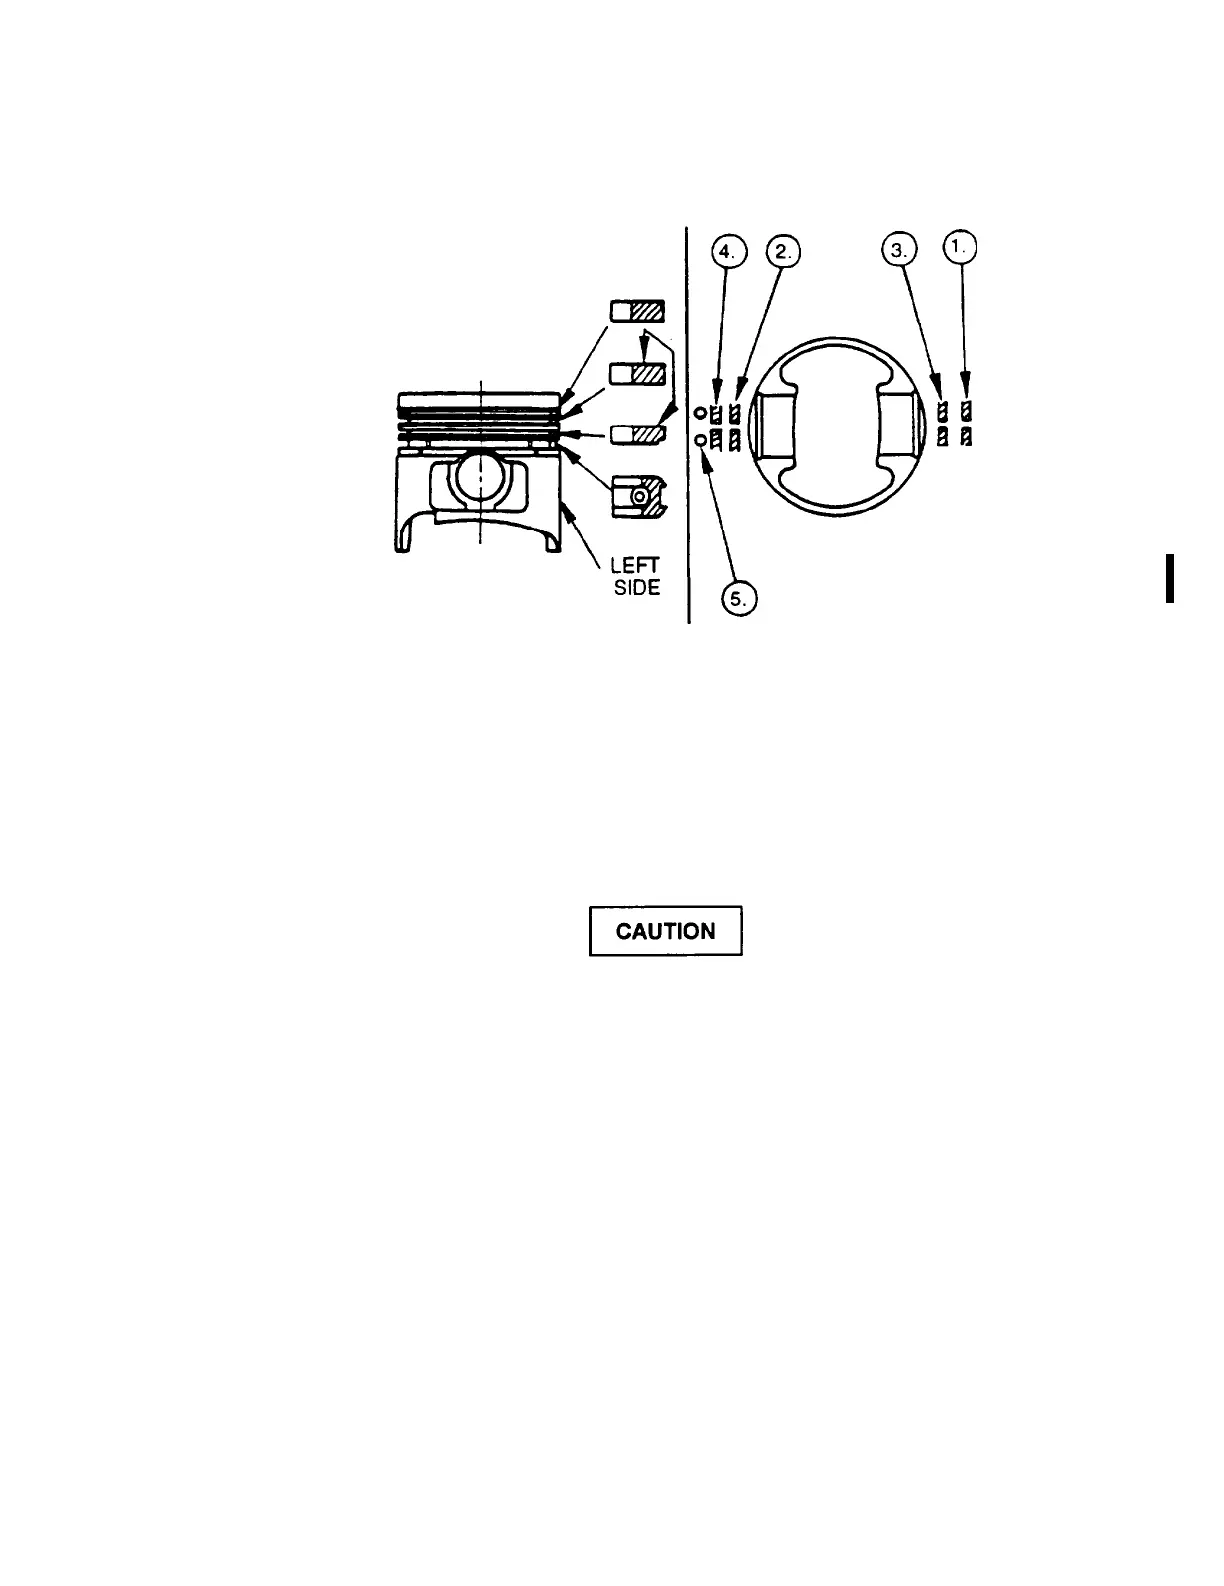
1.
First Compression Ring Gap
2.
Second Compression Ring Gap
3.
Third Compression Ring Gap
4.
Oil Ring Gap
5.
Coil Expander Jointing End
FIGURE 3-97. Piston Ring Gap Setting
Ensure rod bolts do not come in contact with crankpin. Damage to crankpin
could result.
X.
Using a piston ring compressor, compress piston rings. Use a hammer handle to push piston into
cylinder bore until connecting rod makes contact with crankpin. At same time rotate crankshaft until
crankpin is at BDC.
y.
Position piston head front mark so it faces front of engine.
z.
Align bearing cap (3, FIGURE 3-77) cylinder number marks and connecting rod cylinder number
marks. The cylinder number marks must be turned toward exhaust manifold.
aa.
Apply a coat of engine lubricating oil (MIL-L-2104) to threads and seating faces of connecting rod
cap bolts (1). Install two bolts (1) and nuts (2) for each beating cap (3). Tighten nuts to 61.5 ft-lbs
(83.3 Nm).
ab. Ensure crankshaft rotates freely.
Change 2
3-147

 Loading...