Powershift Gearbox
Suction Strainer - Removal and Replacement
Removal
The suction strainer is located inside the gearbox front case.
Access is gained by removing the 4WD clutch assembly.
1 Park the machine on level ground, apply the parking
brake and chock the wheels.
2 Allow transmission oil to cool and then drain the oil, see
Powershift Gearbox, Changing the Oil, Routine
Maintenance.
3 Disconnect the propshaft from the 4WD unit, see
Propshaft, Removal and Replacement.
4 Remove the 4WD unit, see Powershift Gearbox,
Dismantling Step 6 - Remove the 4WD Clutch
Assembly.
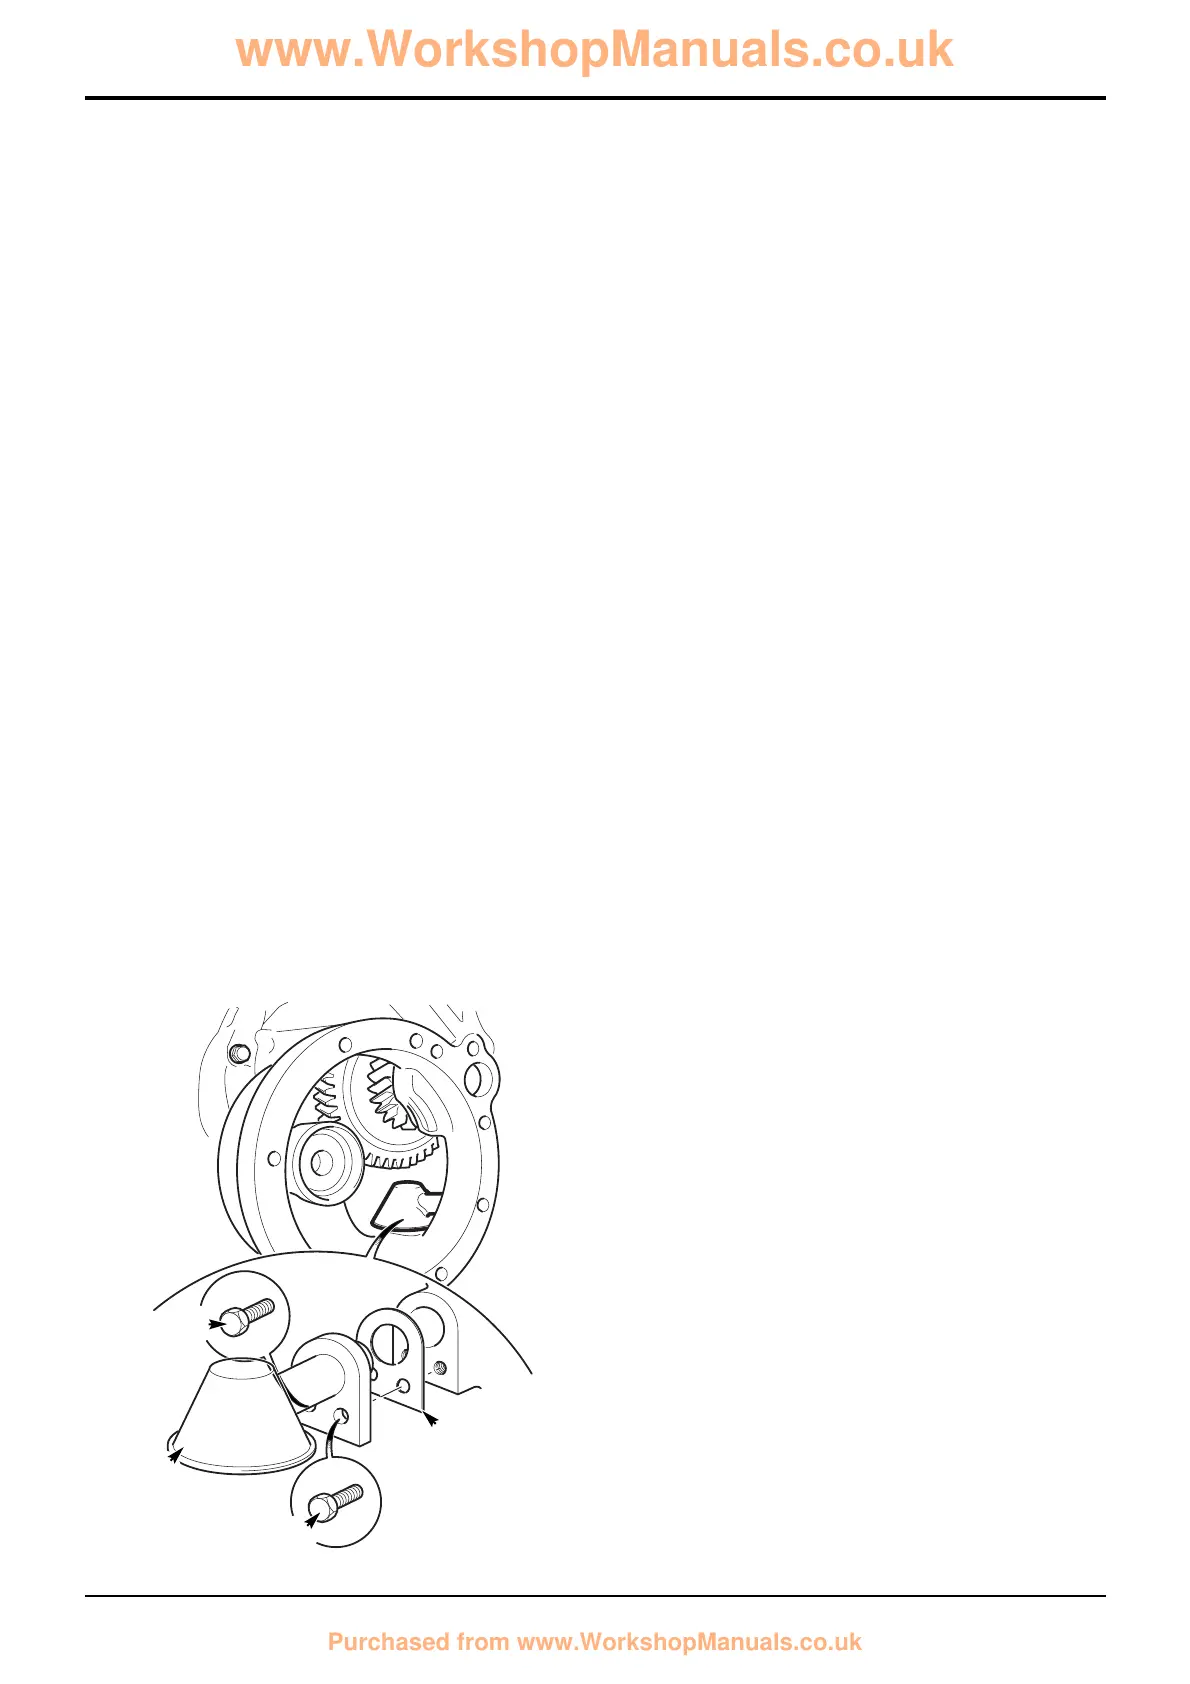
5 Using a 13 mm ring spanner, reach inside the casing
and undo the 2 suction strainer retaining bolts A. Be
sure to retrieve the bolts from inside the gearbox.
6 Push the suction strainer B away from you (towards the
rear of the gearbox) to disengage it from the gearbox
casing. Remove the strainer via the 4WD aperture.
7 Make sure that the gasket C is retrieved. Discard the
gasket.
8 Clean the suction strainer by flushing with a solvent
cleaner. Inspect the strainer mesh for tears or splits.
Renew the suction strainer if the mesh is damaged.
64 - 1
Replacement
Replacement is the reverse of the removal sequence but
note the following:
1 Fit a new gasket C.
2 Make sure that no loose components or debris have
been left inside the gearbox casing.
3 Before replacing the 4WD assembly make sure that all
traces of gasket or gasket compound have been
removed from the mating faces, see Powershift,
Gearbox, Inspection.
Section F Transmission
9803/3280
Section F
64 - 1
Issue 1
Service Procedures
 Loading...