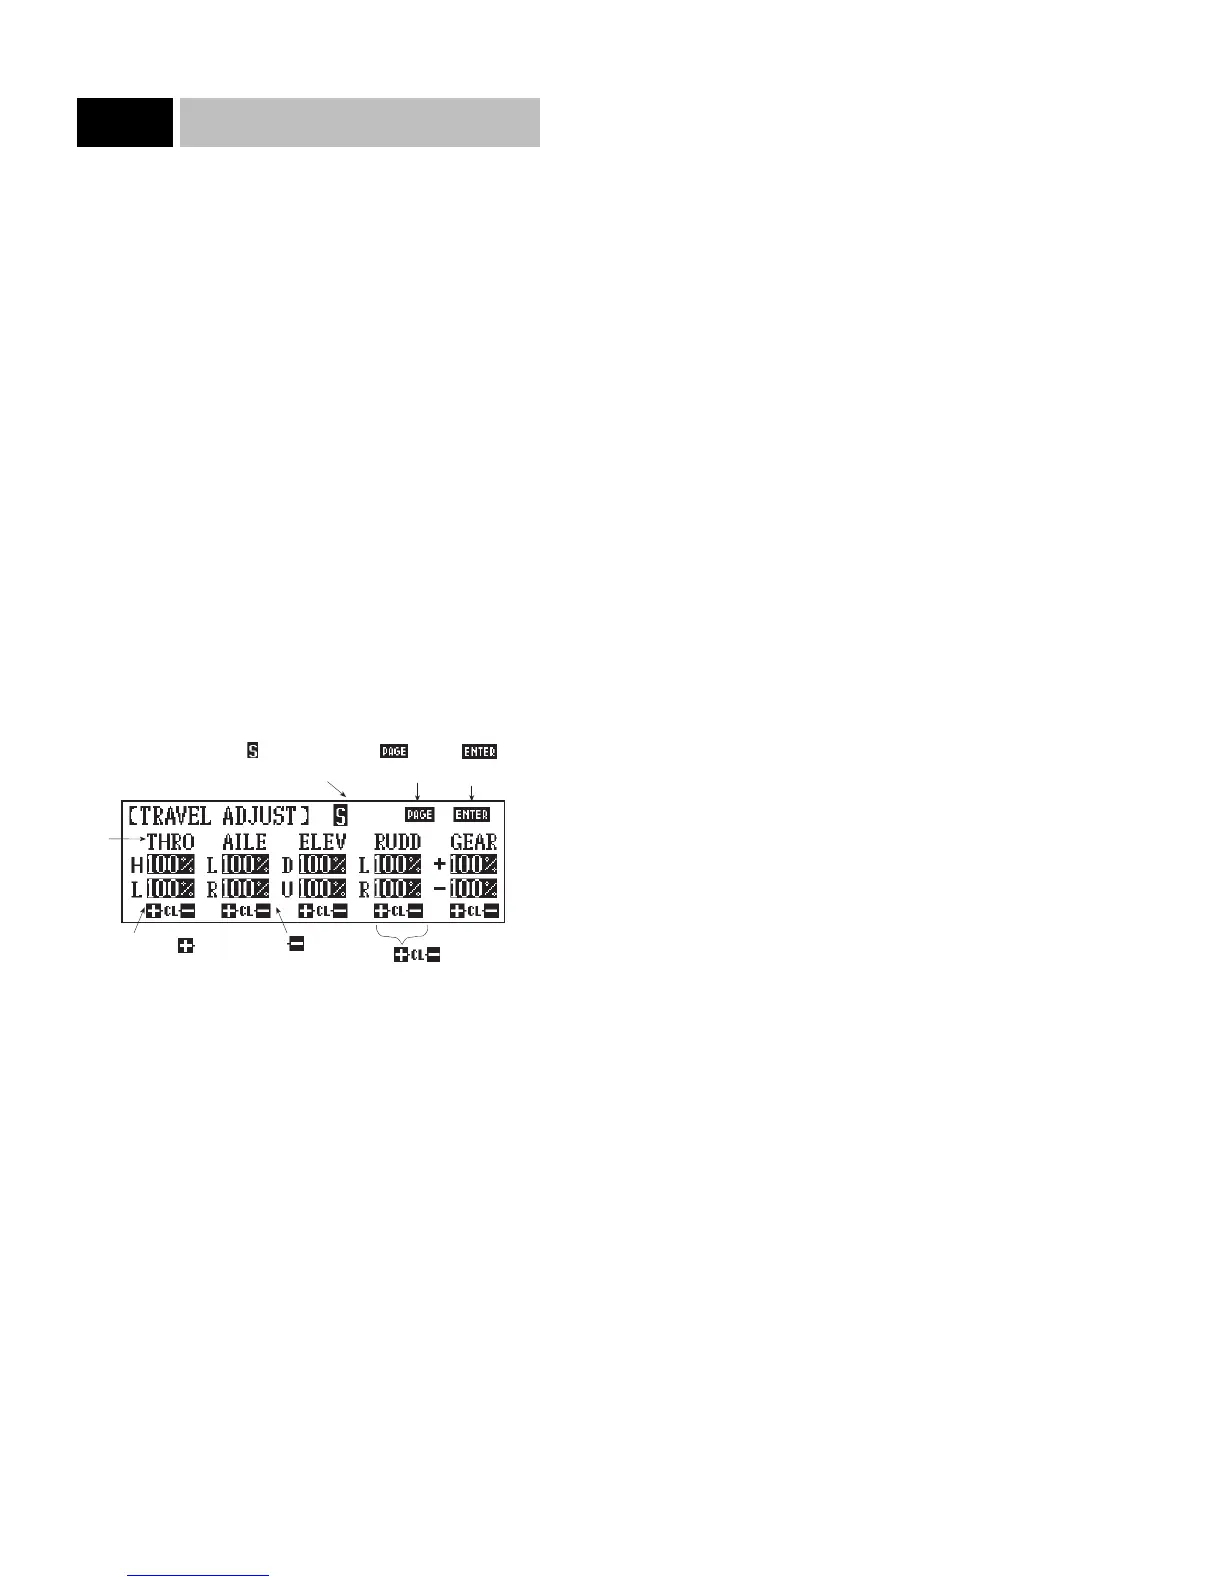
Travel Adjust/ATV/ End Point Adjust
The purpose of Travel Adjust, also known as adjustable travel
volume (ATV) or end point adjust, is to allow you to adjust the
total travel of a servo in both directions. The 10X offers travel
adjust for all ten (10) channels. The travel adjustment range is
from 0% to 150% and can be adjusted for each direction individ-
ually. Use this function to set the maximum control throws that
you’ll use to fly the aircraft. However, make sure that servo travel
is not so great that it causes binding by trying to move the surface
past its physical limitations. A servo that is stalled causes high
current drain and can cause radio drop outs, a condition where
receiver voltage drops below its operational minimum, causing
intermittent loss of control. A strong servo may also damage con-
trol surfaces and linkages if it travels too far.
Accessing and Utilizing the Travel Adjust/ATV
Function
To access the Travel Adjust function, enter Code 12 in the code
number access selection or use the direct mode method.
The screen will appear as follows:
The 10X has a new feature that makes setting up travel adjust
both quicker and easier. The 10X allows the option of both travel
adjustment directions (up/down, right/left) to be adjusted either
simultaneously or independently. From the factory default set-
tings, the 10X is set to simultaneously adjust both direction indi-
cated by the shaded area covers both direction values and an S
appears in the shaded box at the top of the screen (see above
screen). This is helpful in adjusting the overall rough travel val-
ues of the servos. To independently fine tune travel adjustment in
each direction, press the S button at the top of the screen. The
shaded area now only covers one of the values and only that
value will be adjusted.
Note: In this mode the shaded box follows whichever direction
you move the control. It is this value that you will be adjusting.
Press the + key to increase the amount of servo travel and the
- key to shorten the amount of servo throw. If you want to reset
the travel throw to the factory default, 100%, you can either press
the + and - keys simultaneously or press the CL key.
After adjusting the travel volume for all ten (10) channels, press
the ENTER key to exit this function and memorize these values.
Note: Any time you exit the Travel Adjust screen, the Travel
Adjust function will revert back to the simultaneous adjustment
mode.
14
10X MANUAL Airplane
 Loading...