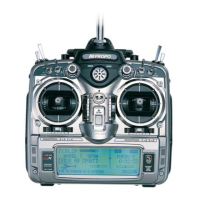
Servo Monitor
The Servo Monitor function allows you to visually examine each
of the 10 channel’s servo positions. This is extremely helpful
when setting up complicated mixing or checking to be sure that a
function is working properly in a flight mode. A servo test mode
is also available in this function.
To access the Servo Monitor function, enter Code 75 in the code
number access selection or use the direct mode method.
The screen will appear as follows:
Servo Test (Slow/Step)
The Servo Test function enables you to see if any of your servos
have developed any bad or worn spots on their potentiometers.
Note: Prior to accessing the servo test function, remove all
linkages from the servo. You do this because the servos travel
their full range regardless of the travel values selected in the
Travel Adjust function, Code 12.
Accessing and Utilizing the Servo Test
Function
First, as just mentioned, it is imperative that you remove all link-
ages from the servos in your airplane. This enables the servo to
travel its full range without any mechanical binding that could
harm the servo and/or airplane.
After this has been completed, access the Servo Test Function by
entering Code 75 at the code number access selection or using the
direct mode method.
Slow Servo Test
The servos immediately begin to slowly cycle through their travel
ranges.
Note: All servos move simultaneously. Your screen will appear
as follows:
Observe each respective servo in your airplane for signs of
unusual wear. Note that a servo with either a worn or bad poten-
tiometer will jump or “jitter” as it moves across the weak area.
Step Servo Test
You can access the Step Test at any time during the Servo Test
function. To do so, touch the SEL key in the lower left portion of
the LCD display.
Your screen will change to display the following:
Note: The servos now move one at a time through the Step Test
mode. The feature begins with channel 1 (the throttle channel)
and moves to channel 2, then channel 3 and so on. Each servo
moves through four steps before going to the next servo.
Note: The 10X tests all channels, not just the ones you are
using on your airplane. Therefore, you might notice a delay
between servo testing. If AUX1 is the last channel used, there will
be a delay of approximately 5–8 seconds before the throttle chan-
nel begins its step testing.
Touch ENTER at any time to exit the Servo Test function.
54
10X MANUAL Airplane
8.19
Code 75

 Loading...