46
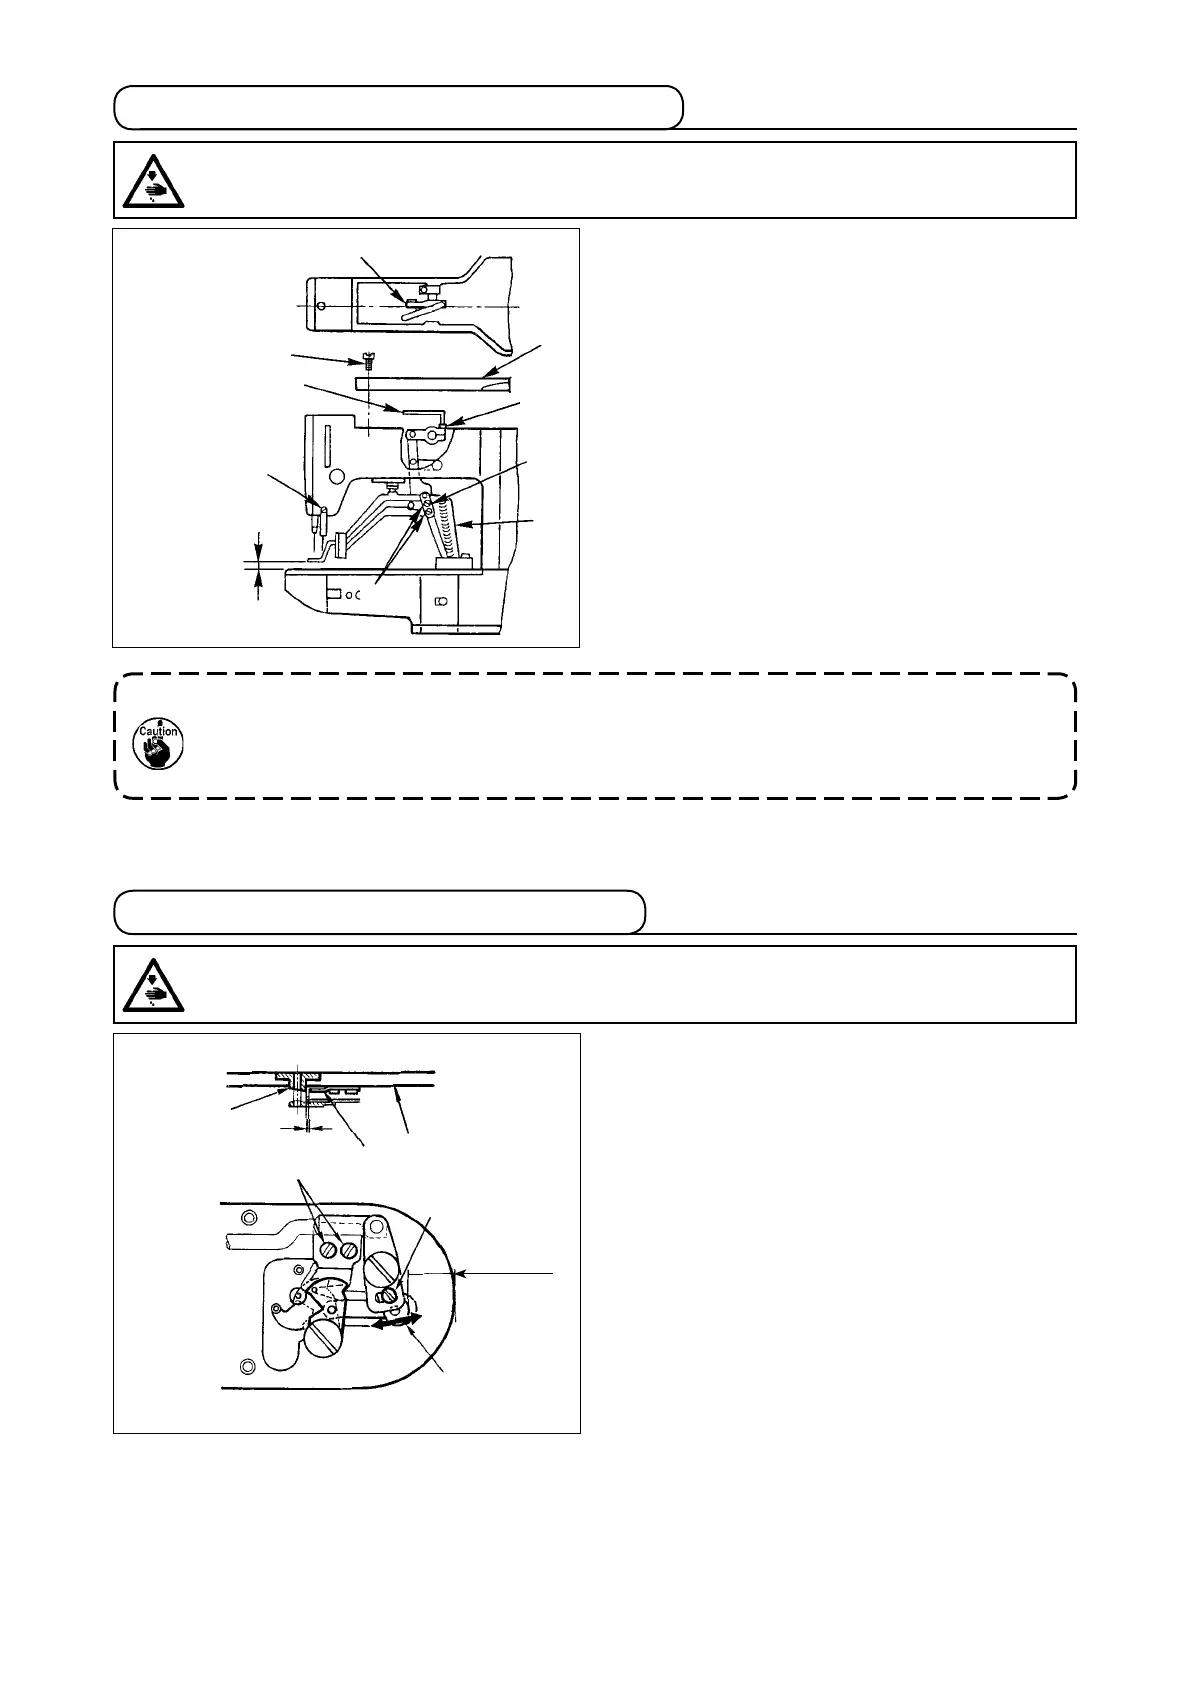
1) With the machine in stop mode, remove six set-
screws
of the top cover, and take off top cover
.
2) Apply L-shaped wrench
to socket bolt
of
clamp
, and loosen the socket bolt.
3) Push down L-shaped wrench
to increase
the lift of the work clamp foot, or pull it up to de-
crease the lift.
4) After the adjustment, securely tighten socket bolt
.
5) If the right and left work clamp feet are not lev-
elled, loosen xing screw
and adjust the posi-
tion of the work clamp foot lever support plate
to level them.
At this time, be careful not to cause work clamp foot lever support plate
to interfere with feed
bracket
.
If the work clamp foot lever support plate interferes with the wiper, readjust the height of the
wiper using setscrew
in the wiper installing base.
7-3. Adjusting the lift of the work clamp foot
WARNING :
As the work is performed while the power is ON, never touch the switches other than the necessary
one so as to prevent accidents caused by the malfunction of switches.
Max. 17 mm
7-4. The moving knife and counter knife
1) Loosen adjusting screw
so that a clearance of
18.5 mm is provided between the front end of the
throat plate and the top end of thread trimmer le-
ver, small
. To adjust, move the moving knife in
the direction of arrow.
2)
Loosen setscrew
so that a clearance of 0.5 mm
is provided between needle hole guide
and
counter knife
. To adjust, move the counter knife.
0.5 mm
Throat plate
18.5 mm
WARNING :
Turn OFF the power before starting the work so as to prevent accidents caused by abrupt start of the
sewing machine.

 Loading...


