6
Never use under the wrong voltage and
phase.
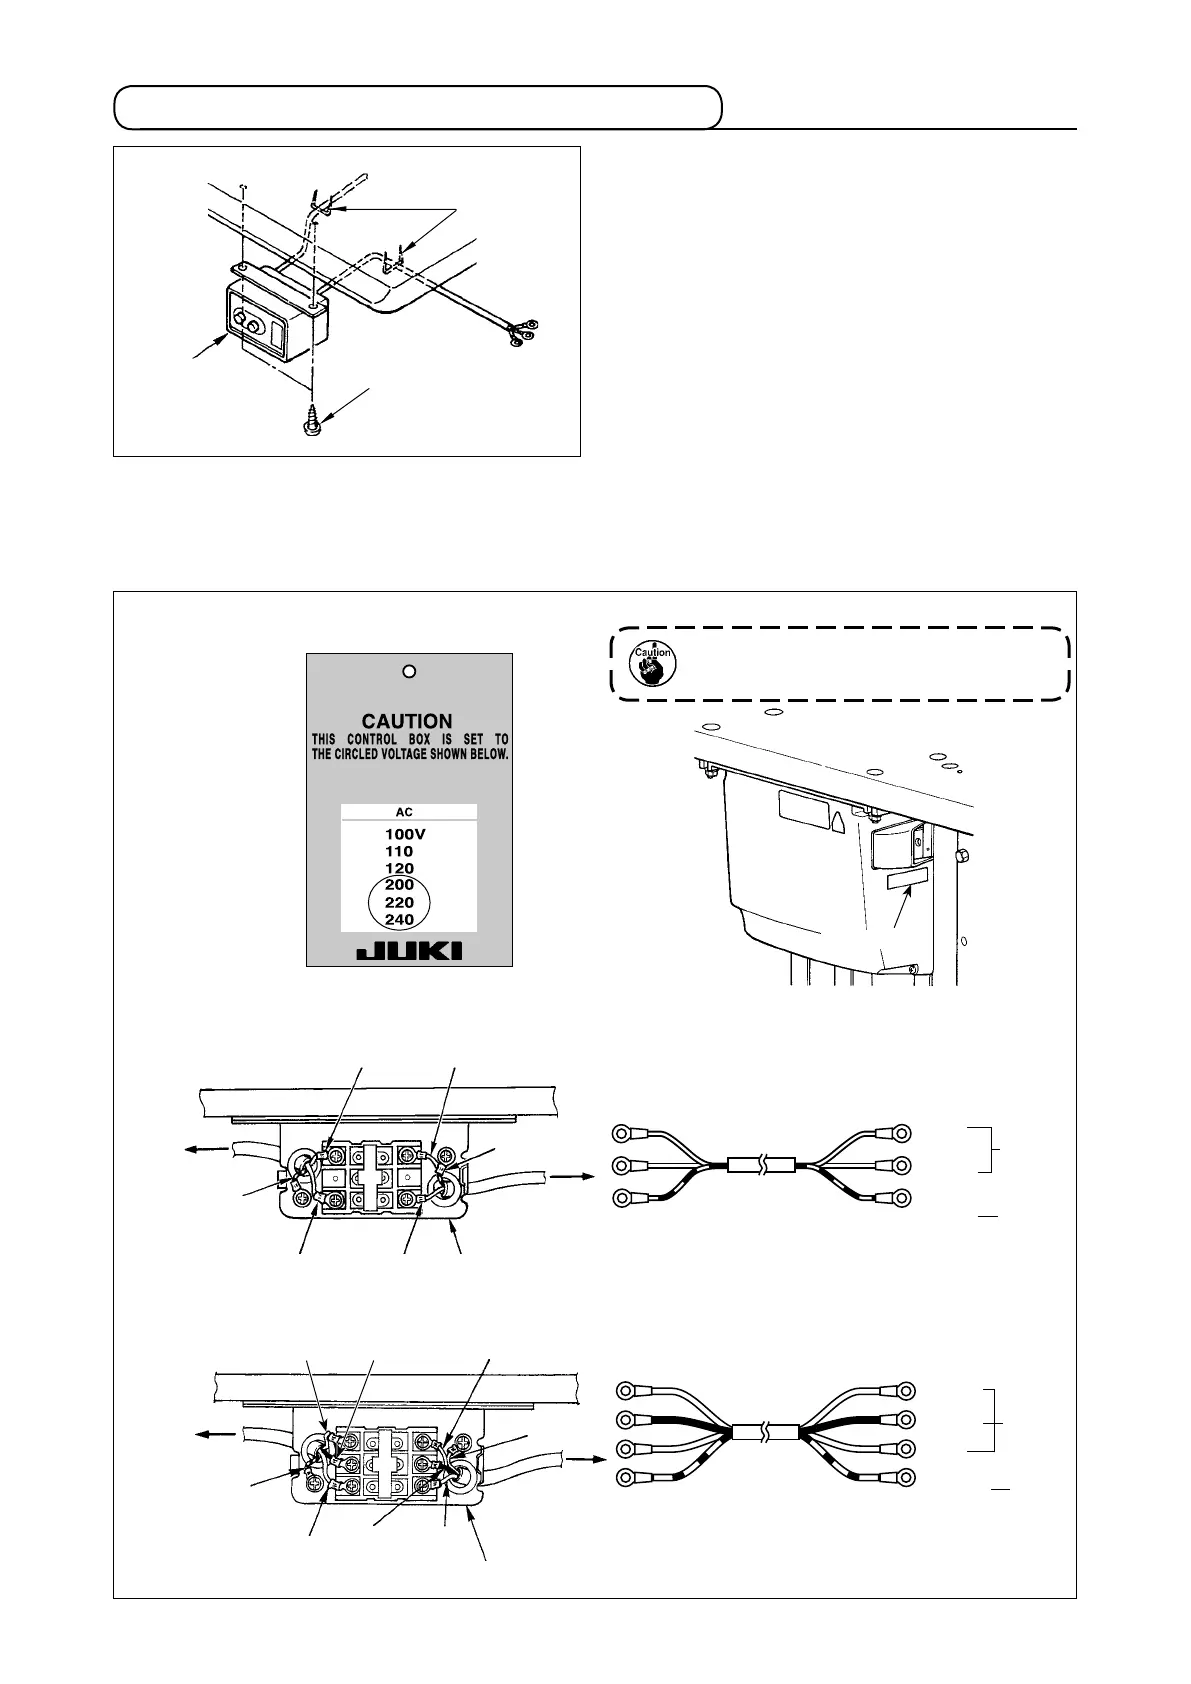
3-5. Installing and connecting the power switch
(1) Installing the power switch
Fix power switch
under the machine table with
wood screws
.
Fix the cable with staples
supplied with the machine
as accessories in accordance with the forms of use.
(2) Connecting the power source cord
Voltage specications at the time of delivery from the factry are indicated on the voltage indication seal. Con-
nect the cord in accordance with the specications.
Table
Brown
Brown
Light blue
Light blue
Light
blue
Green/Yellow
Green/
Yellow
Control box
Green/Yellow
Plug
Power source cord
Power switch
GND
AC
200 V
-240 V
AC
200 V
-240 V
• Connecting single phase 200V, 220V, 230V and 240V
Table
Red
Black
Green/Yellow
White
Control box
Power source cord
Plug
Power switch
GND
• Connecting three phase 200V, 220V, 230V and 240V
Green/Yellow
Red
White
Black
Green/
Yellow
Red
White Black
Rating plate
Power indication tag
(For example: In
the case of 200V)
Brown

 Loading...


