Equipment Rack Mounting 27
Chapter 2: Installing
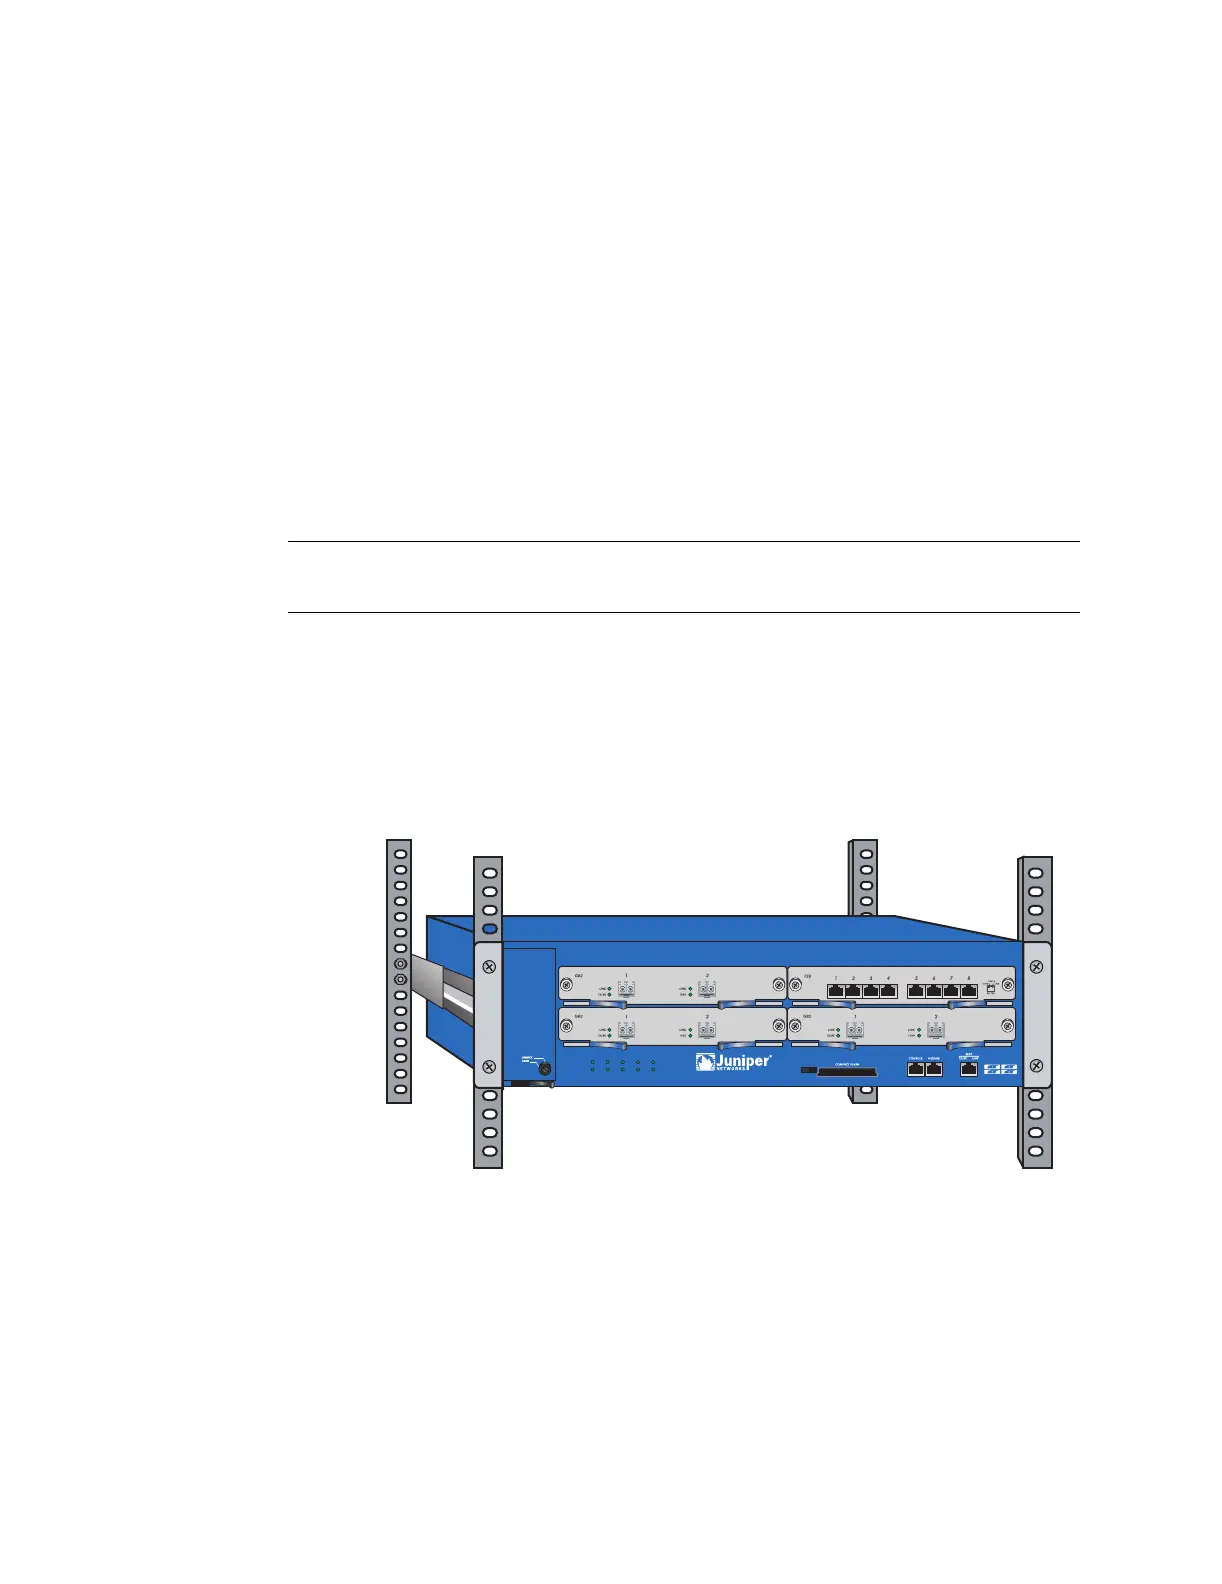
Rear-and-Front Mount
To mount the ISG 2000 with support from the rear and front, use the rear slide
mount kit.
1. Screw the left and right brackets to the front of each side of the
ISG 2000 chassis.
2. Screw the rear mount sleeves to the left and right rear posts of the rack.
3. With the indented groove that runs the length of each slide facing outward,
screw the slides to the middle of each side of the ISG 2000 chassis.
4. Slip the slides into the rear mount sleeves.
5. Push the ISG 2000 forward until the left and right brackets contact the front
rack posts.
6. Screw the front left and right brackets to the front posts of the rack.
Figure 13: Rear-and-Front Mounted ISG 2000
NOTE: Depending on the depth of your equipment rack, you can attach the slides along
the length of the sides or extend them over the rear of the chassis.
HA
FLASH
PWR
FAN
ALARM
MOD1
TEMP
MOD2
STATUS
MOD3
ISG 2000
 Loading...