13-22
140-3 SERIES
DISASSEMBLY AND ASSEMBLY GENERAL ASSEMBLY OF ENGINE
GENERAL ASSEMBLY OF ENGINE
★ The following assembly procedures are for
SA6D140E-3 of HD325-6 specification. The
shapes, quantity, locations, etc. of some parts of
a machine assembled actually may be different
from the following explanation. Take care.
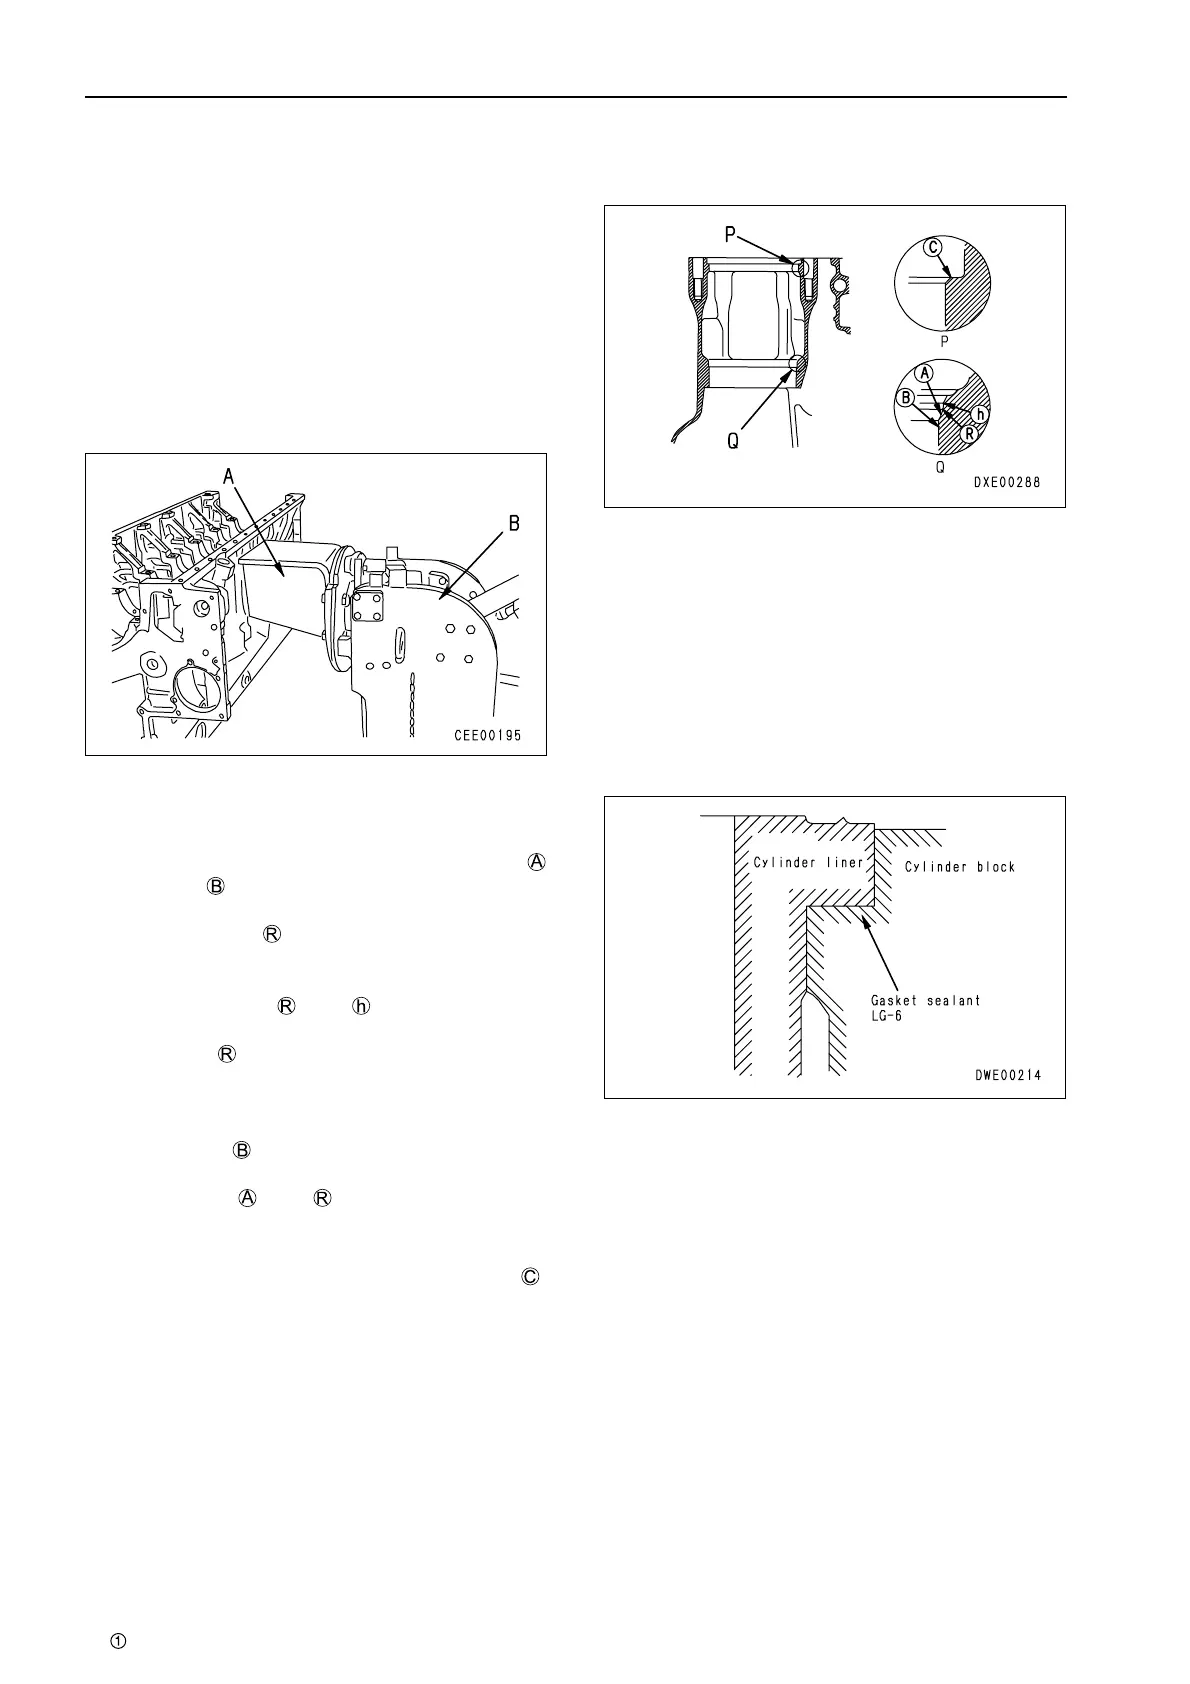
Preparation work
• Install adapter "
A
" to the cylinder block, then
sling the cylinder block and set it to engine over-
haul stand "
B
".
• Before inserting the cylinder liners, prepare the
cylinder block according to the following proce-
dure.
1) Remove the rust and scales from faces
and with sandpaper, etc. until the
machined surface is exposed.
2) Polish part with sandpaper of about No.
60 until it becomes a smooth rounded sur-
face.
3) Polish parts and with sandpaper of
about No. 60 until they become smooth.
If part is sharp or has burrs, finish it with
a scraper or sandpaper.
Finish this surface particularly smoothly so
that it will not damage the O-ring.
4) If face is so pitted that it cannot be
repaired, replace the cylinder block.
5) If faces and are pitted, finish them
smoothly.
6) Check the counterbored part and remove
burrs and fins. If chips or dust is on face ,
the liner does not fit and water may leak and
the liner does not project sufficiently.
★ If the counterbored part is drooping, cor-
roded, or pitted, repair it.
1. Cylinder liner
★ Replace the liner O-ring and clevis seal with new
ones just before installing the liner.
• Method of fitting liner O-ring and clevis seal
1) Make sure that the cylinder liner O-ring
groove and periphery of the liner are not
roughened because of rusting or pitting.
• If the above items are roughened be-
cause of rusting or pitting, water may
leak. Accordingly, replace the liner with
new one.
 Loading...