158
D
ATA
-TRANSFER MODE
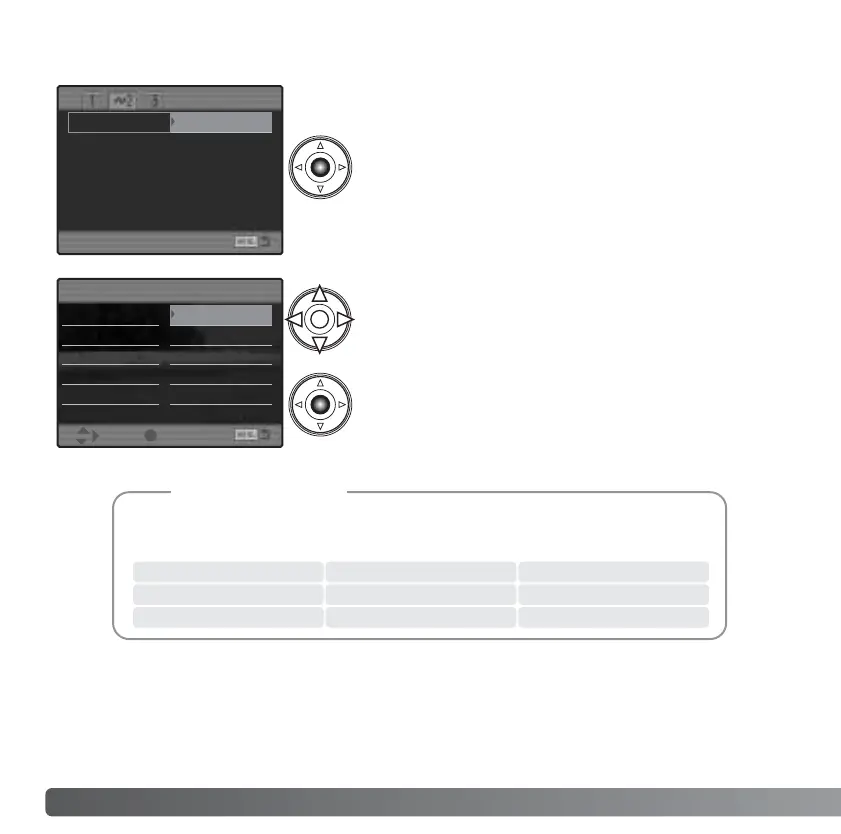
Paper size
The paper size of the print can be specified in
section 2 of the PictBridge menu. The printer-setup
option uses the size set with the printer.
Highlight the current size setting in the menu and
press the central button of the controller to open
the paper-size screen.
Use the four-way key of the controller to highlight
the new paper size. The options available depend
on the printer. The printer setup option uses the
size set with the printer.
Press the central button of the controller to set the
paper size.
Layout
The layout of the print can be set. The printer-setup option uses the layout parameters of
the printer. Borderless printing can be specified with the camera as well as the number
of images per page.
The following are the dimensions for postcard, L, and 2L paper sizes in both
millimeters and inches for your reference:
Printing Notes
L
Postcard
2L
89 X 127mm
100 X 148mm
127 X 178mm
3.5 X 5.0 in.
3.9 X 5.9 in.
5.0 X 7.0 in.
Paper size
Printer setup
Layout
Print quality
Data print
Printer setup 2” x 3” card
L 100mmx150mm
Postcard 4” x 6”
2L 8” x 10”
A4 Letter
Paper size
:sel. :enter

 Loading...