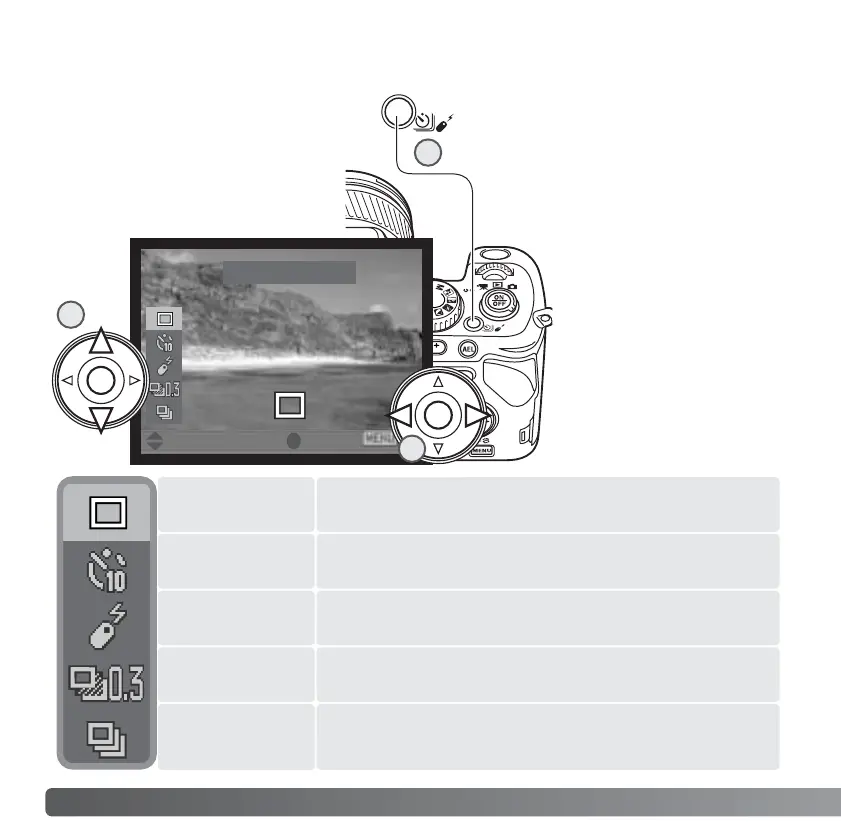
To take a single image each time the shutter-release
button is pressed (p. 30).
Use the up/down keys of
the controller to highlight
the the new drive mode (2).
Use the left/right keys to
select the drive mode
options (3). Press the
center of the controller or
press shutter-release
button partway down to
complete the operation.
Pressing the menu button
cancels the operation.
Also see the camera notes
on page 69.
Single
76
A
DVANCED RECORDING
The drive mode is set with the
drive-mode button. The drive
modes control the rate and
method images are captured.
Indicators showing the selected
drive mode appear on the
monitors.
USING THE DRIVE-MODE BUTTON
To take a series of three images when the shutter-
release button is pressed and held (p. 82).
To delay the release of the shutter by 2 or 10 seconds.
Used for self-portraits (p. 77).
To operate the camera with the remote control unit (p.
78).
To take a series of three images with differing exposure,
or white balance (p. 80).
Continuous
advance
Self-timer
Remote control
Bracketing
Single-frame
advance
Press the drive-mode button (1); the
drive-mode setting screen appears.
:move :enter
2
1
3

 Loading...