BRAKES 53
– Attach spring .
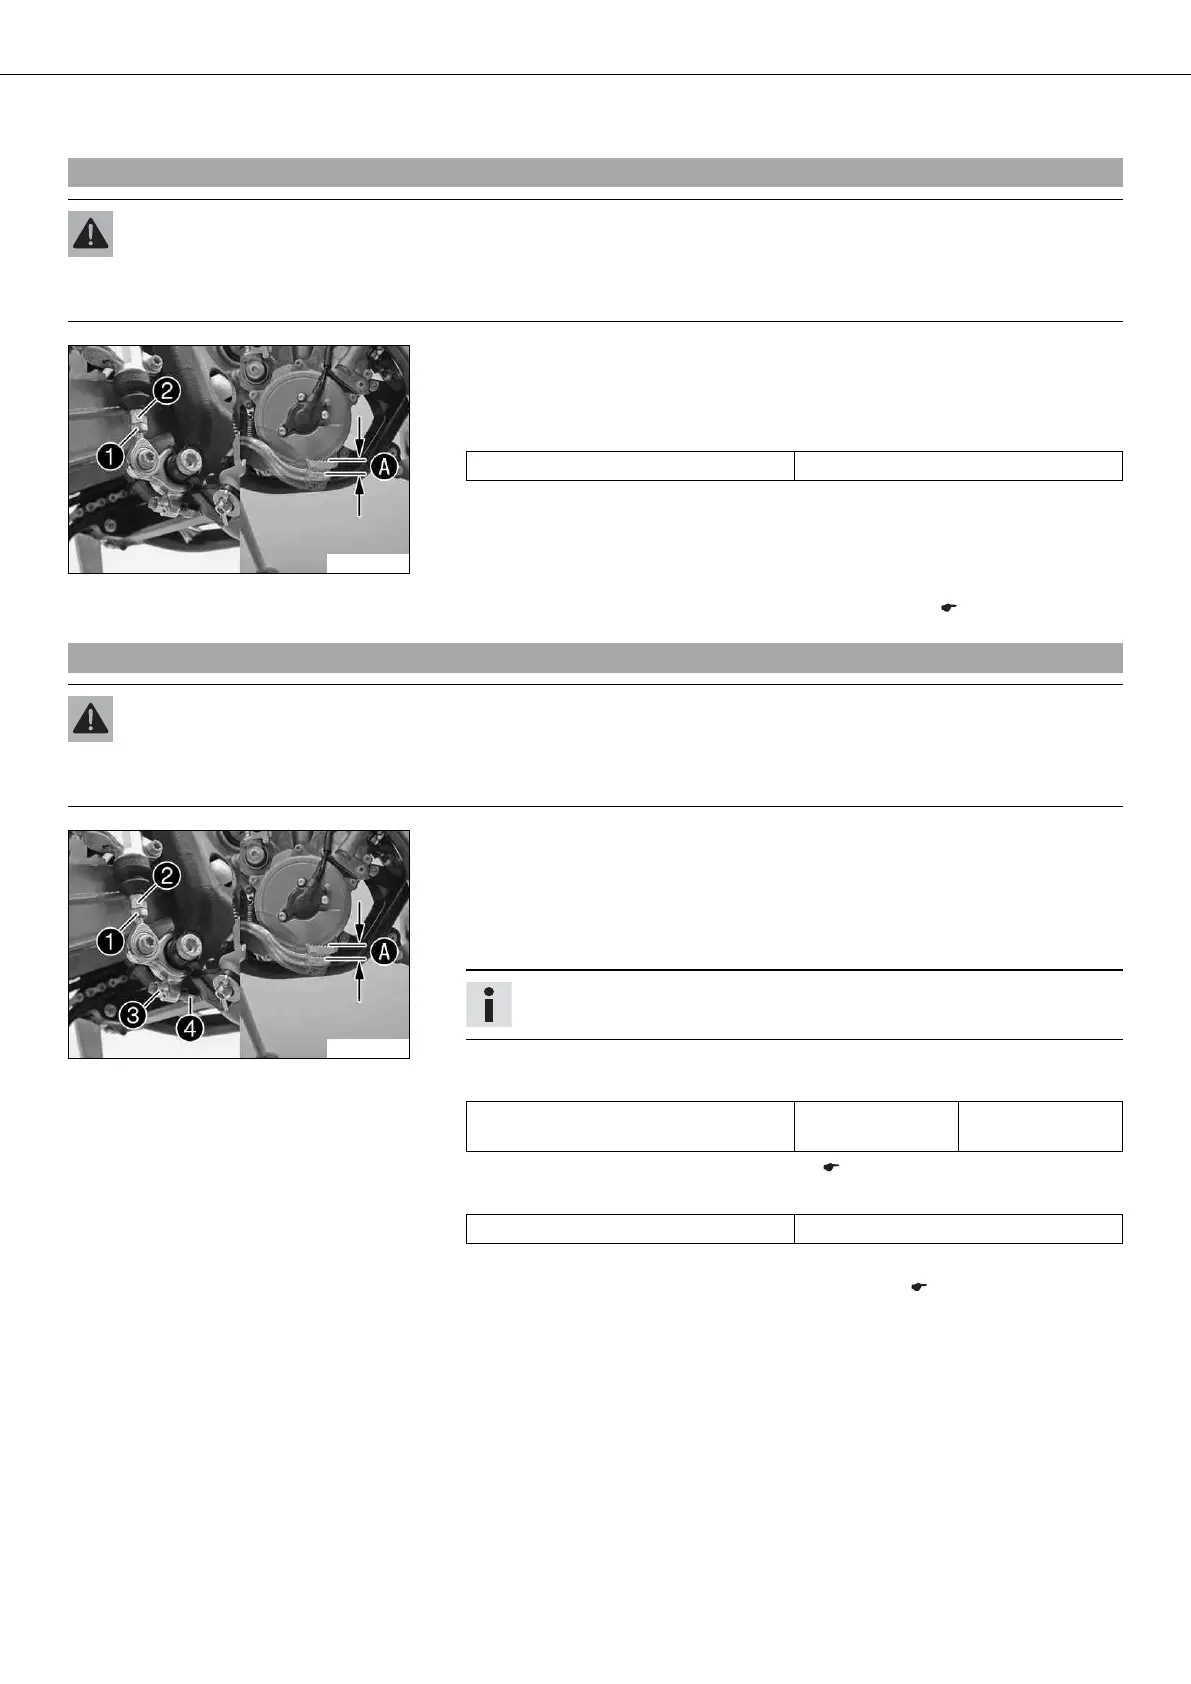
11.11Adjusting the free travel of the foot brake lever x
Warning
Danger of accidents Brake system failure.
– If there is no free travel on the foot brake lever, pressure builds up on the rear brake circuit. The rear brake can fail due to
overheating. Adjust free travel on foot brake lever according to specifications.
B00402-10
– Detach the spring.
– Loosen nut .
– Turn push rod until clearance is created.
Guideline
Free travel of foot brake lever 3… 5 mm (0.12… 0.2 in)
– Hold push rod and tighten nut .
– Attach the spring.
– Check whether the basic position of the foot brake lever is suitable for the rider.
» If the basic position of the foot brake lever needs to be adjusted:
–
Adjust the basic position of the foot brake lever. x ( p. 53)
11.12Adjusting the basic position of the foot brake lever x
Warning
Danger of accidents Brake system failure.
– If there is no free travel on the foot brake lever, pressure builds up on the rear brake circuit. The rear brake can fail due to
overheating. Adjust free travel on foot brake lever according to specifications.
B00402-11
– Detach the spring.
– Loosen nut .
– Turn back push rod .
– Loosen nut .
– To adjust the basic position of the foot brake lever, turn screw accordingly.
Info
The range of adjustment is limited.
– Hold screw and tighten nut .
Guideline
Remaining nuts, chassis M8 30 Nm
(22.1 lbf ft)
– Check the free travel of the foot brake lever. ( p. 52)
Guideline
Free travel of foot brake lever 3… 5 mm (0.12… 0.2 in)
» If the free travel at the foot brake lever does not meet specifications:
–
Adjust the free travel of the foot brake lever. x ( p. 53)
– Attach spring .
 Loading...