EasyManuals Logo
Home>Kyocera>All in One Printer>ECOSYS M3540dn

Kyocera ECOSYS M3540dn Service Manual

Kyocera ECOSYS M3540dn
483 pages
To Next Page IconTo Next Page
To Previous Page IconTo Previous Page
Page #375 background imageLoading...
Page #375 background image
2NM/2NX/2NY/2NZ/2P0/2P6-1
1-5-93
(14)Detaching and refitting the rear cover
Pocedure
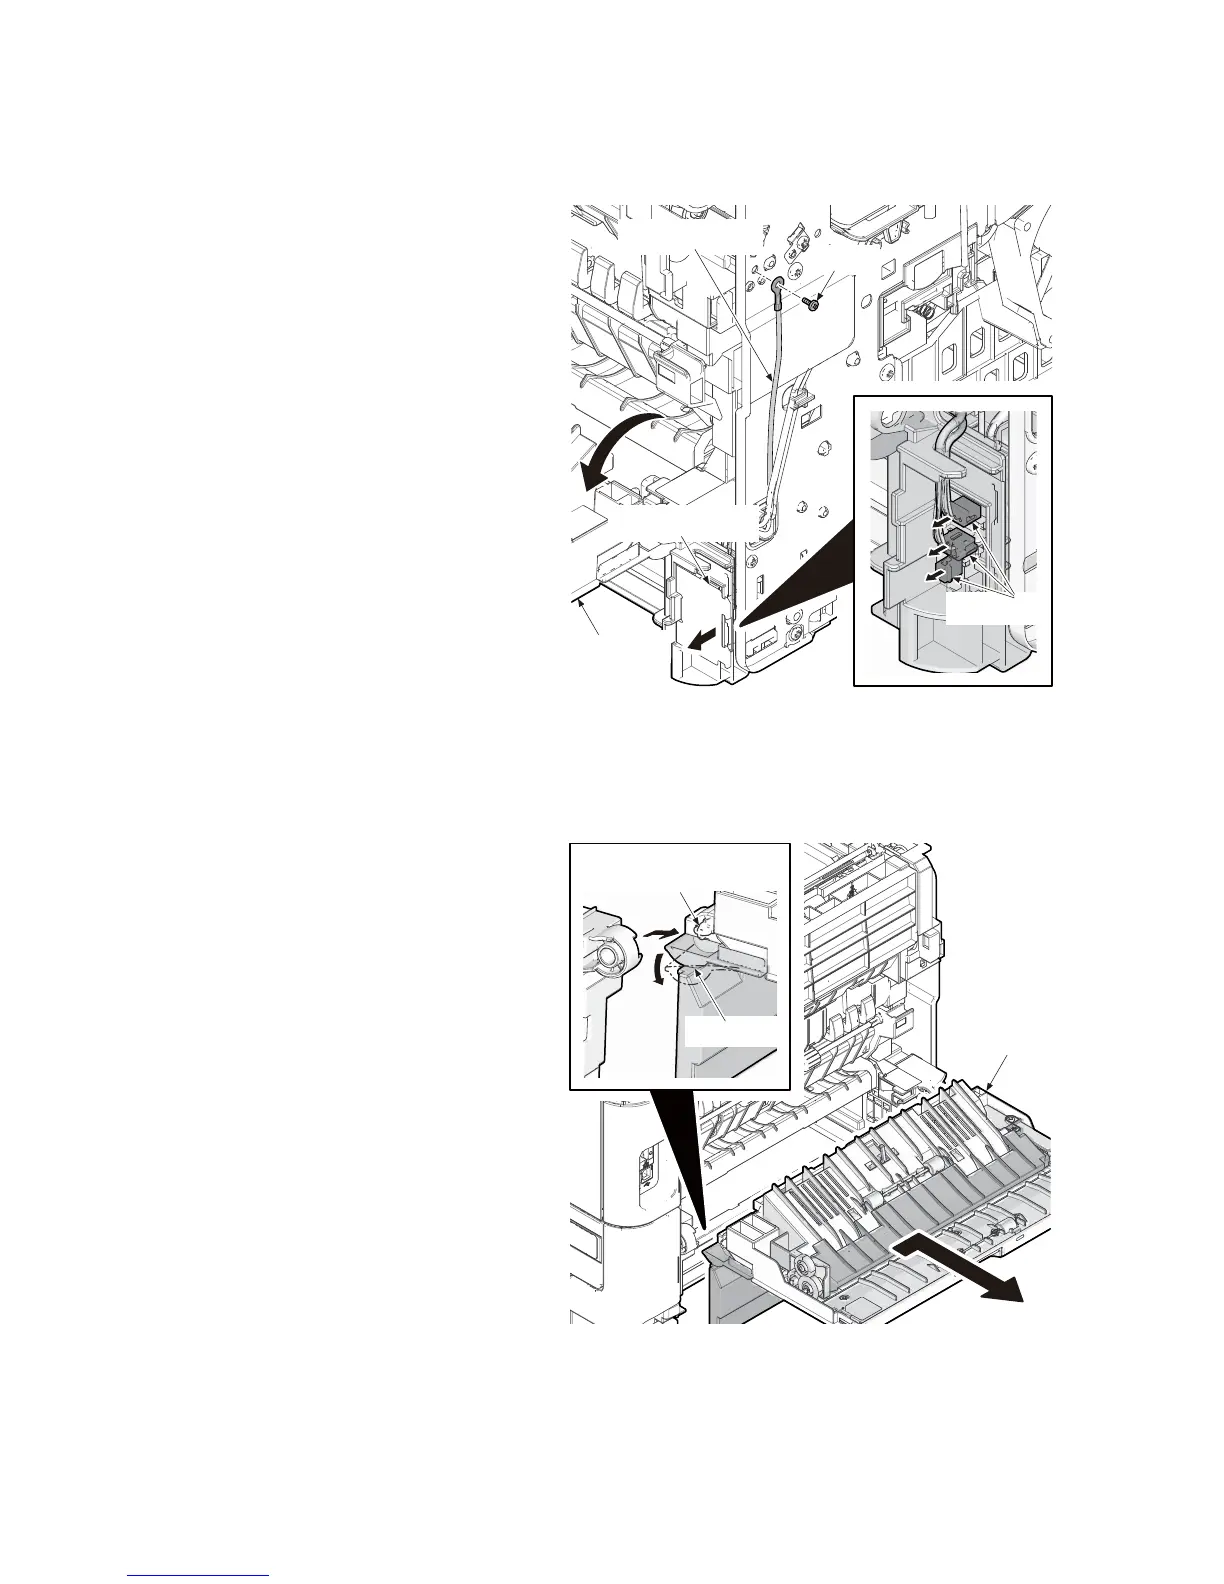
1. Open the rear cover.
(50/60 ppm model only)
(1)Remove the screw and then the ground-
ing wire.
(2)Open the connector cover and then
remove three connectors.
Figure 1-5-159
2. Remove the fulcrum axis by sliding the
rear cover assembly while avoiding rear
cover and then remove the rear cover
assembly.
Figure 1-5-160
Connector cover
Connectors
Rear cover
Screw
Grounding wire
Rear cover
assembly
Flucrum axis
(Rear cover assembly)
Rear cover

Table of Contents

Other manuals for Kyocera ECOSYS M3540dn

Questions and Answers:

Question and Answer IconNeed help?

Do you have a question about the Kyocera ECOSYS M3540dn and is the answer not in the manual?

Kyocera ECOSYS M3540dn Specifications

General IconGeneral
BrandKyocera
ModelECOSYS M3540dn
CategoryAll in One Printer
LanguageEnglish

Related product manuals