EasyManuals Logo
Home>Kyocera>All in One Printer>ECOSYS M3540dn

Kyocera ECOSYS M3540dn Service Manual

Kyocera ECOSYS M3540dn
483 pages
To Next Page IconTo Next Page
To Previous Page IconTo Previous Page
Page #409 background imageLoading...
Page #409 background image
2NM/2NX/2NY/2NZ/2P0/2P6
2-2-15
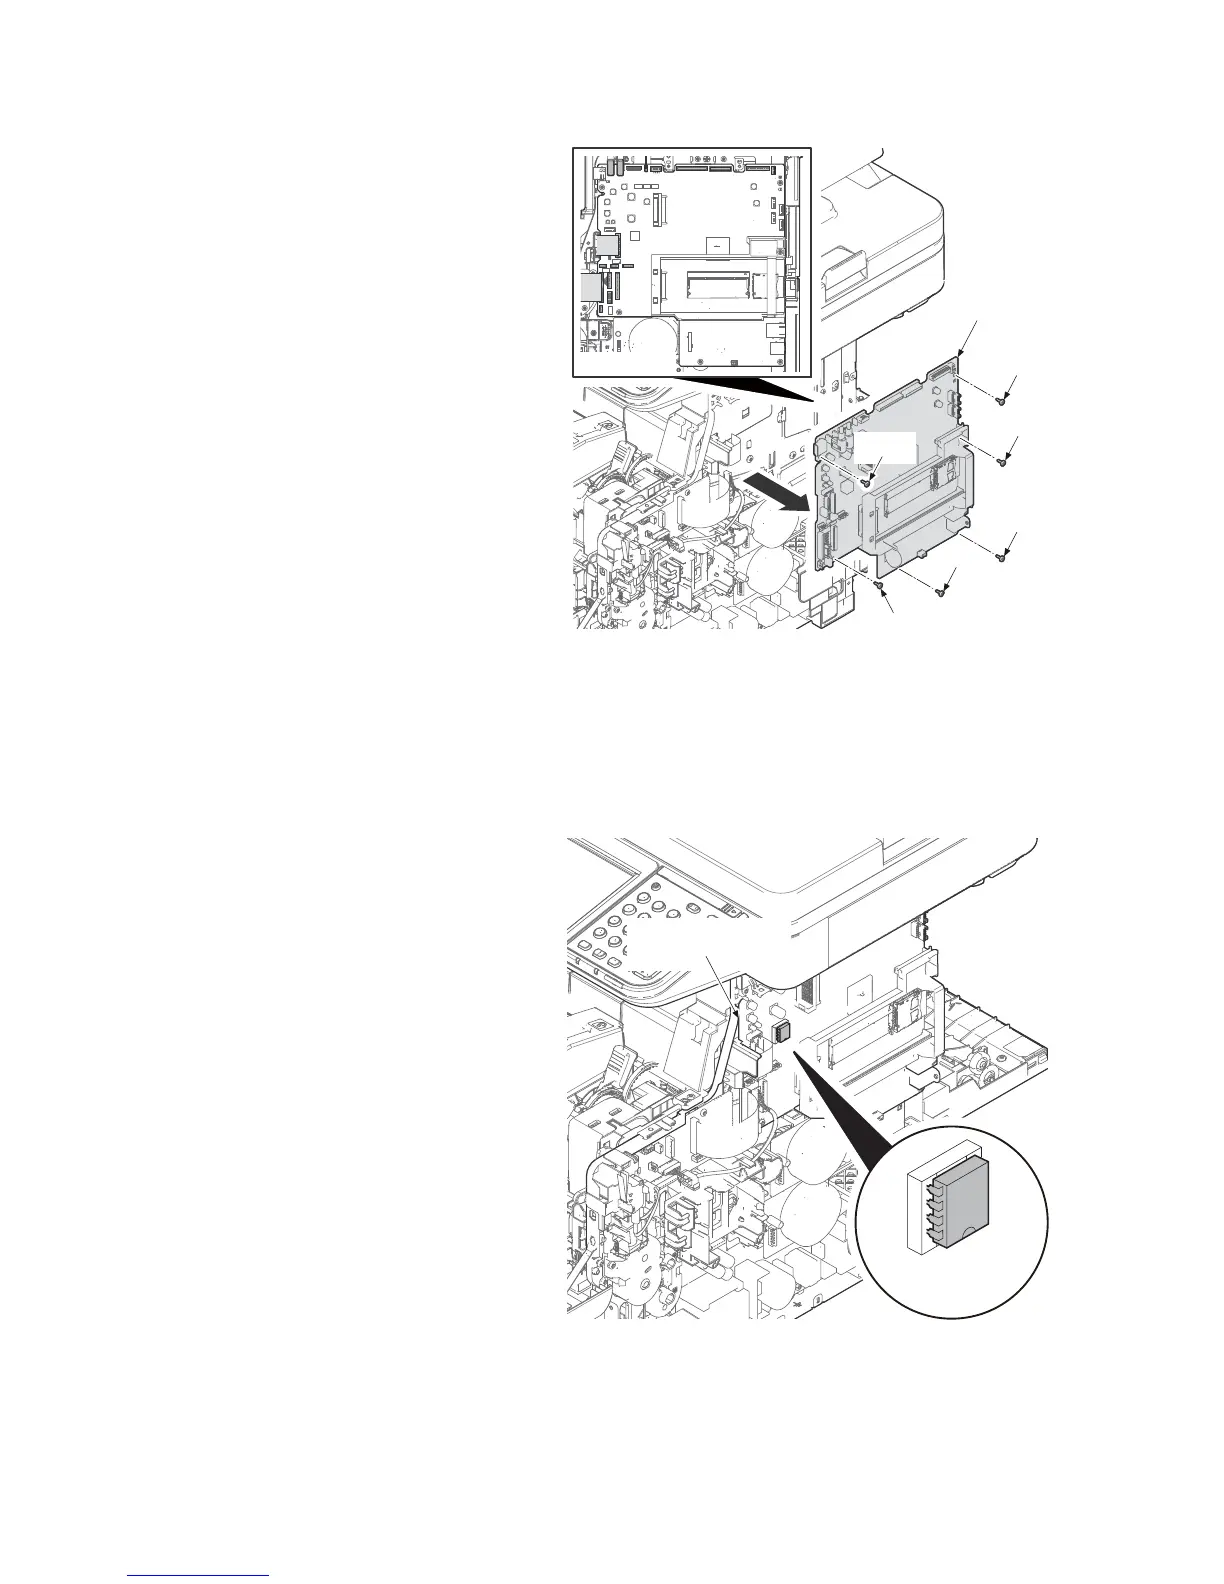
16. Remove all connectors and FFCs from
the control PWB.
17. Remove six screws and control PWB
from the main unit.
18. Check or replace the control PWB and
refit all the removed parts.
Figure 2-2-11
(5) Remarks on Control PWB replacement
NOTE: When replacing the PWB, remove the
EEPROM (U14) from the control PWB and
then reattach it to the new PWB.
Figure 2-2-12
Screw
Control PWB
Screw
Screw
Screw
Screw
Screw
Connector
EEPROM (U14)
Control PWB

Table of Contents

Other manuals for Kyocera ECOSYS M3540dn

Questions and Answers:

Question and Answer IconNeed help?

Do you have a question about the Kyocera ECOSYS M3540dn and is the answer not in the manual?

Kyocera ECOSYS M3540dn Specifications

General IconGeneral
BrandKyocera
ModelECOSYS M3540dn
CategoryAll in One Printer
LanguageEnglish

Related product manuals