5Maintenance and Inspection
Maintenance and inspection procedures
5-49
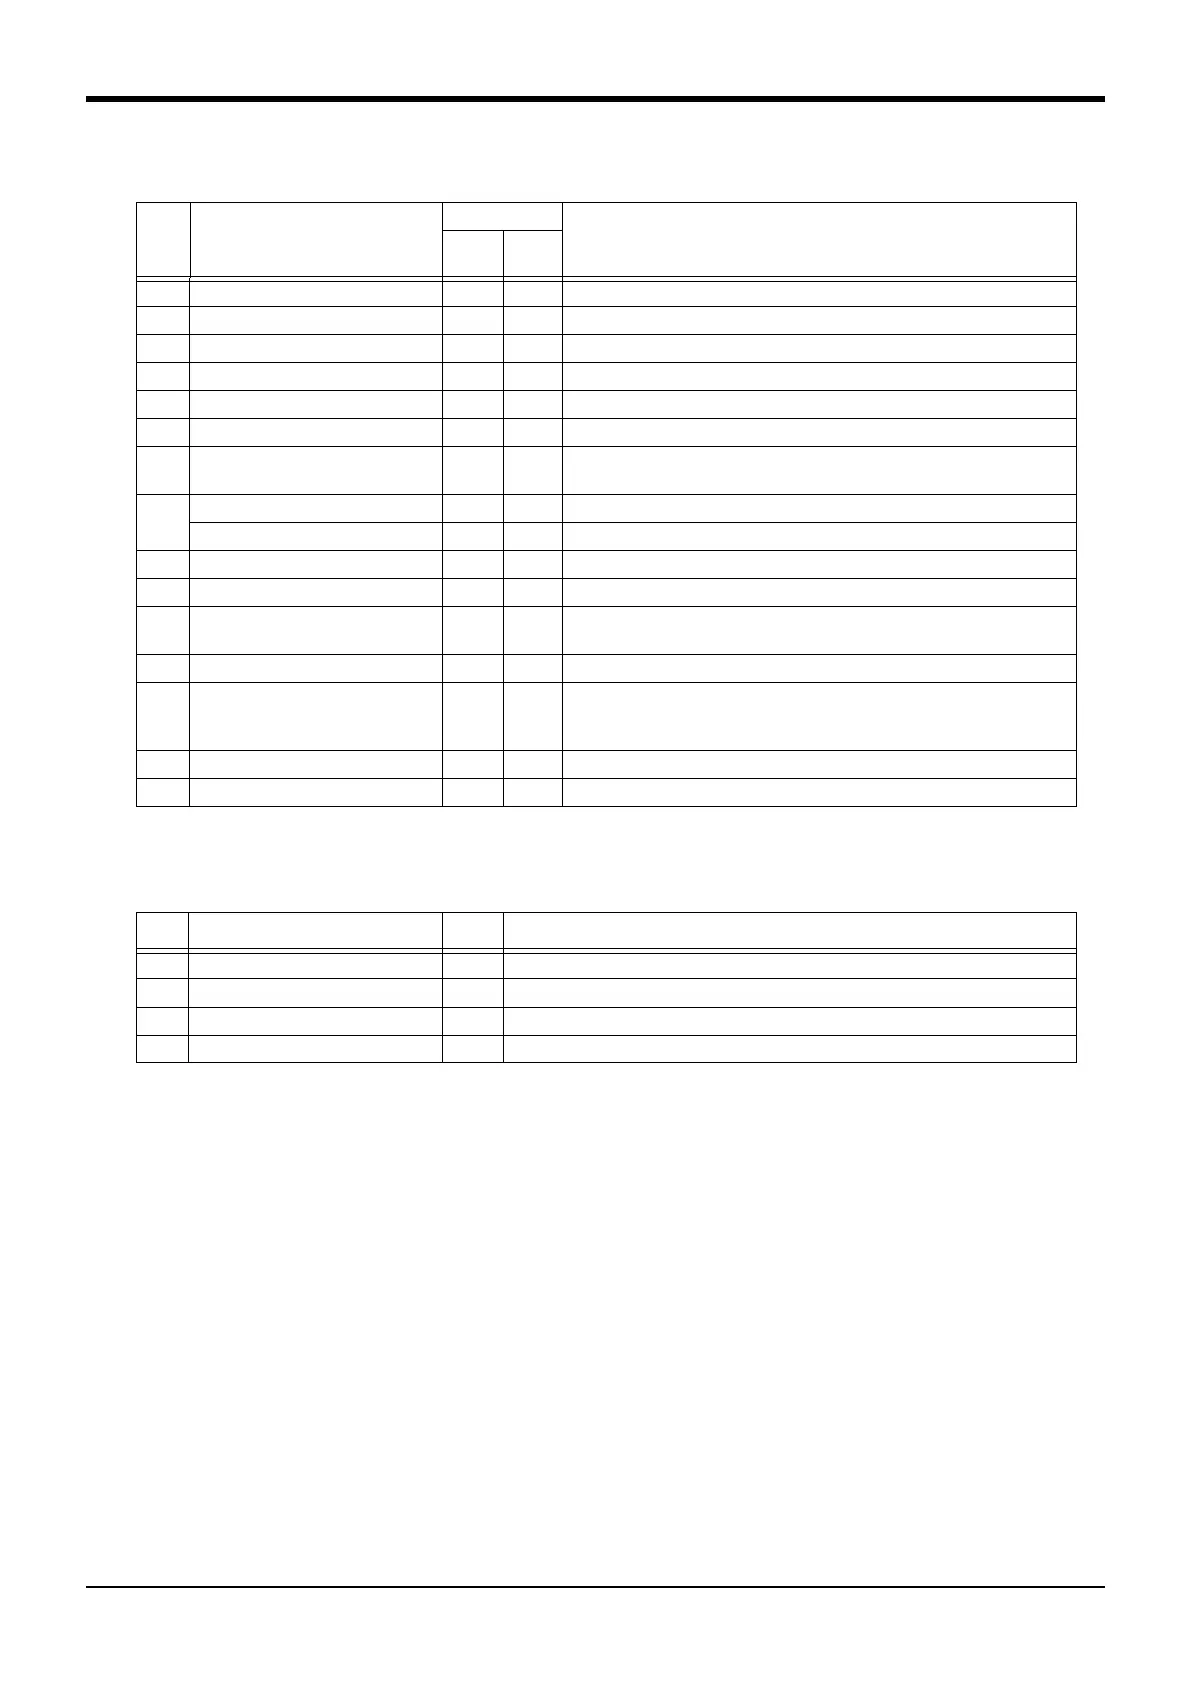
Table 5-3 : Cover names
Note)The packing which showed in remarks is attached to protection and clean specification. Refer to "Table 5-
7 : Spare parts list" on page 65 for type name of packing.
Table 5-4 : Cover installation screw list
The method of cover installation/removal are all model commonness basically.
However, to secure the cleanliness, the packing and sealing are attached to clean specification.
■ The elbow bushing <15> at the rear of the elbow cover
The elbow section is sealed with a sealing agent (silicon seal, refer to Table 5-7) around the elbow bushing.
When removing and reinstalling the elbow cover, apply silicon seal around the elbow bushing to seal it. Wipe
out the silicon seal which protruded after the installation.
■ The No.2 arm cover U/L <10>/<11>, elbow cover U/B/L <7>/<8>, wrist cover U/L <12>/<13>
Sponge packing is attached on the inner side of these covers.
So when removing/installing these covers make sure not to damage the packing.
The installing/removing the cover procedures are shown below.
(1) Refer to Fig. 5-4 when using the 5-axis type robot arm, and Fig. 5-5 when using the 6-axis type robot arm, and
remove the cover.
(2) The names of the covers are given in Table 5-3, and a list of the cover installation screws is given in Table 5-4.
(3) There are some covers that may be difficult to remove due to the robot posture. In this case, change the robot
posture with jog operation, and then remove the cover.
(4) When attaching the cover after maintenance and inspection, use the detaching procedure in reverse.
The part Nos. and symbols in Table 5-3 and Table 5-4 correspond to Fig. 5-4 and Fig. 5-5.
No Cover names
Qty.
Remarks
5-axis
type
6-axis
type
<1> Shoulder cover (L) 11
<2> Shoulder cover (R) 11
<3> Shoulder cover (F) 11
<4> Shoulder cover (B) 11
<5> No. 1 arm cover (R)11
<6> No. 1 arm cover (L)11
<7> Elbow cover (U) 11The packing (C) is attached to clean specification of 5-axis type.
The packing (D) is attached to clean specification of 6-axis type.
<8> Elbow cover (B) 0 1 The packing (A) and (D) are attached to clean specification.
Elbow cover (L) 1 0 The packing (C) is attached to clean specification.
<9> Elbow cover (F) 11
<10> No. 2 arm cover (U)11The packing (C) and (D) are attached to clean specification.
<11> No. 2 arm cover (L)11The packing (C) and (D) are attached to clean specification.
The rubber packing is attached to protection specification.
<12> Wrist cover (U) 11The packing (B) is attached to protection and clean specification.
<13> Wrist cover (L) 11The packing (B) and (C) are attached to clean specification.
The rubber packing and packing (B) are attached to protection specifica
-
tion.
<14> Wrist cover (S) 2 2
<15> Elbow bushing 11The silicone seal applies to clean specification.
No. Installation screw name
Qty.
Remarks
(a) Socket bolt M3 x 8 (nickel plated) 27
(b) Truss screw M3 x 6 (nickel plated) 10
(c) Truss screw M3 x 8 (nickel plated) 8
(d) Socket bolt M3 x 6 (nickel plated) 2 6-axis type only

 Loading...


