Maintenance: Disassembly and Reassembly
40 6881086C22-B
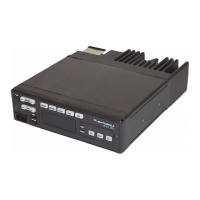
Replacing the Transceiver 1. Connect the interface cable to the connectors J5 and J6 on the front of the
ASTRO Transceiver. Be sure to tighten the four screws (two per
connector) so that the connectors do not inadvertently come loose.
2. Connect the Keyload cable to the microphone connector on the front panel
of the ASTRO Transceiver, if the cable is present.
3. Insert the right side of the transceiver at a 45-degree angle so the bracket
on the radio hooks under the retaining bosses in the center of the
Consolette housing.
4. Lower the left side of the transceiver into the snap retainers on the left side
of the Consolette housing, making sure that both retainers snap into place,
locking the transceiver down.
5. Insert the screw between the two retainer snaps.
6. Connect the coaxial cable to the antenna port at the rear of the ASTRO
Transceiver. (Make sure the connector is tightened down to where no
threads are exposed. If threads are exposed, then the connector is not
seated properly.)
7. Connect the DC power cable to the DC plug on the rear of the ASTRO
Transceiver.
AIB/TRC Interface
Board
NOTE: Follow the instructions for removing the ASTRO Transceiver
prior to attempting to remove or replace the AIB/TRC
interface board.
Removing the AIB/TRC
Board
The AIB/TRC board is located underneath the ASTRO transceiver. You must,
therefore, remove the transceiver before removing the interface board.
1. Disconnect the accessory cable from connector J3 of the AIB/TRC board.
2. Disconnect the transceiver cable from connector J1 of the AIB/TRC board.
3. Disconnect the power cable from connector J11 of the AIB/TRC board.
4. Disconnect the power LED cable from connector J5 of the AIB/TRC board.
5. Disconnect the fan cable from connector J8 (AIB) or J13 (TRC).
6. Disconnect the control head cable TRN7393 from connector J2 of the AIB/
TRC board. (This cable is present only on the Local Control (W7)
Consolettes.)
7. Disconnect the speaker cable from connector J4 of the AIB/TRC board.
(This cable is present only on the Local Control (W7) Consolettes.)
8. Disconnect the cables for the battery revert and clock VU meter from J7
and J6 of the AIB/TRC board, respectively, if those options are present.
NOTE: The emergency battery revert option is no longer supported
by Rev C and higher versions of the AIB and TRC boards
9. With everything disconnected from the AIB/TRC board, the board can be
removed by releasing the three retainer snaps on either side of the board
(six total). It is easier if you start from the front of the unit and work to the
back when releasing the retainers.
10.The AIB/TRC board should now be free from the Consolette housing.
 Loading...


