32
SCREENGUARD
™
INSTALLATION AND USER MANUAL
Flushing-nozzle replacement
Disassembly:
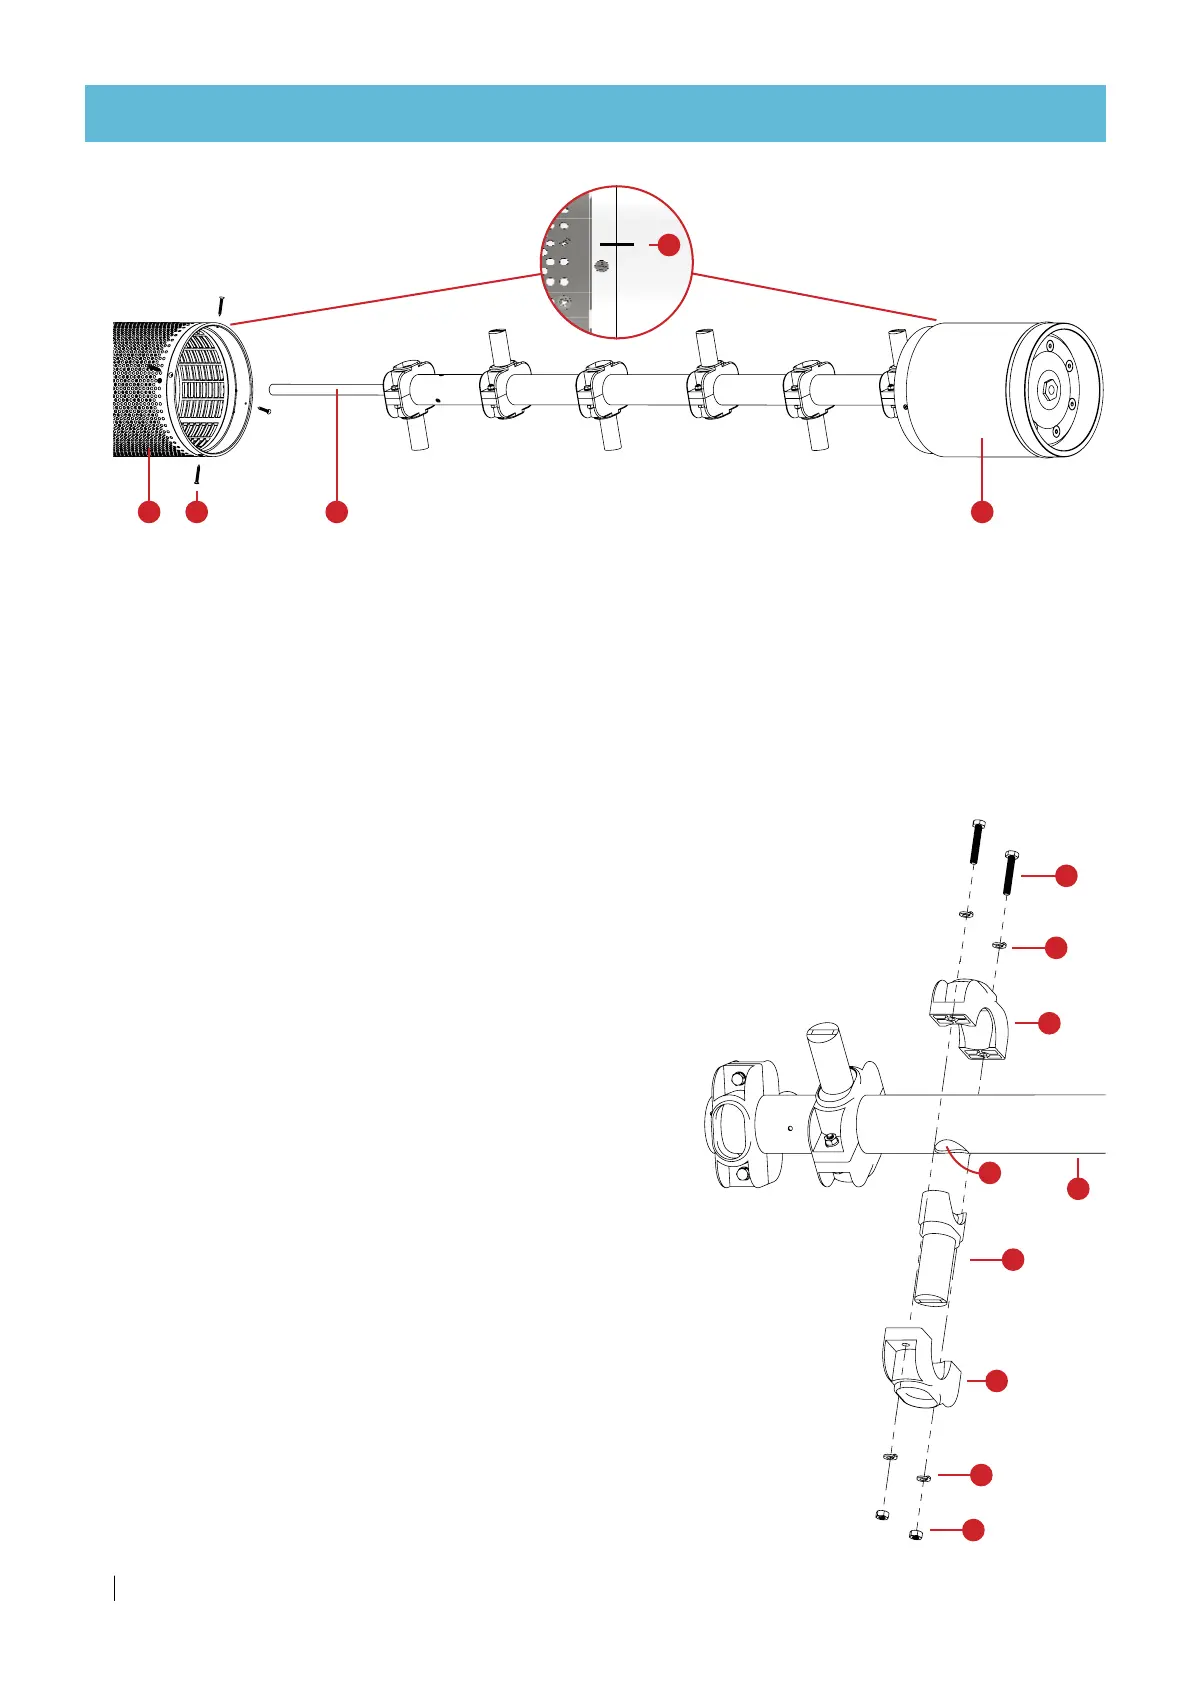
1.
Release the flushing assembly (C) from the
screen assembly (A) as described above.
2.
Unscrew 2 screws (F) with a 10mm wrench.
3.
Separate the nozzle clamp set from the collector pipe (K).
Assembly:
1.
Place the flushing nozzle (J) on top of the hole (L).
2.
Plage one clamp (I) onto the flushing nozzle (J).
3.
Place the second clamp (I) opposite the first one, clutching the collector pipe (K).
4.
Place a spring washer (G) on each screw (F) and insert
through the 2 clamps (I).
5.
Place a spring washer (G) and a nut (H) on the other end of each screw (F).
6.
Hand-tighten the 2 nuts (H) with a 10mm wrench -
do not use electric or impact tools.
7.
Reattach the flushing assembly (C) to the screen assembly (A),
as described above.
8.
Check that the suction element moves and rotates freely inside the
screen assembly.
F
G
I
I
K
L
J
G
H
TROUBLESHOOTING
Disassembly:
1.
Manually unscrew 4 screws (B) with a crosshead screwdriver.
2.
Release the flushing assembly (C) from the screen assembly (A).
TIP
To facilitate separation: First, gently push the main shaft (D) from the other side of the screen
assembly (A) until the two parts are separated.
3.
Pull the flushing assembly (C) from the screen assembly (A) holding the screen assembly (A)
[do not hold the main shaft (D)].
Assembly:
1.
Insert the flushing assembly (C) to the screen assembly (A).
Make sure the alignment mark (E) is aligned.
2.
Make sure the 4 screw-holes are aligned between the two assemblies (A and C).
3.
Hand tighten the 4 screws - do not use electric or impact tools.
4.
Check that the suction element (D) moves and rotates freely inside the
screen assembly.
Flushing-assembly release
A B C
E
D

 Loading...