34
SCREENGUARD
™
INSTALLATION AND USER MANUAL
TROUBLESHOOTING
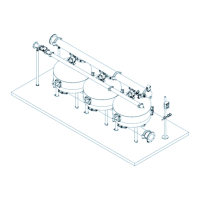
Centering Ring with Bearing replacement
Disassembly:
1.
Manually unscrew 4 screws (A) with a
crosshead screwdriver.
2. Pull the sentering ring with bearing (B) from
the screen assembly (C).
Assembly:
1. Insert a new centering ring with bearing (B)
into the screen assembly (C). Make sure the
suction sssembly shaft (D) is aligned and
properly inserted into the bearing (E).
2. Manualy rotate the suction sssembly.
It should rotate freely.
3. Hand-tighten 4 screws (A) with a crosshead screwdriver. Do not use electric or impact tools.
AB CD
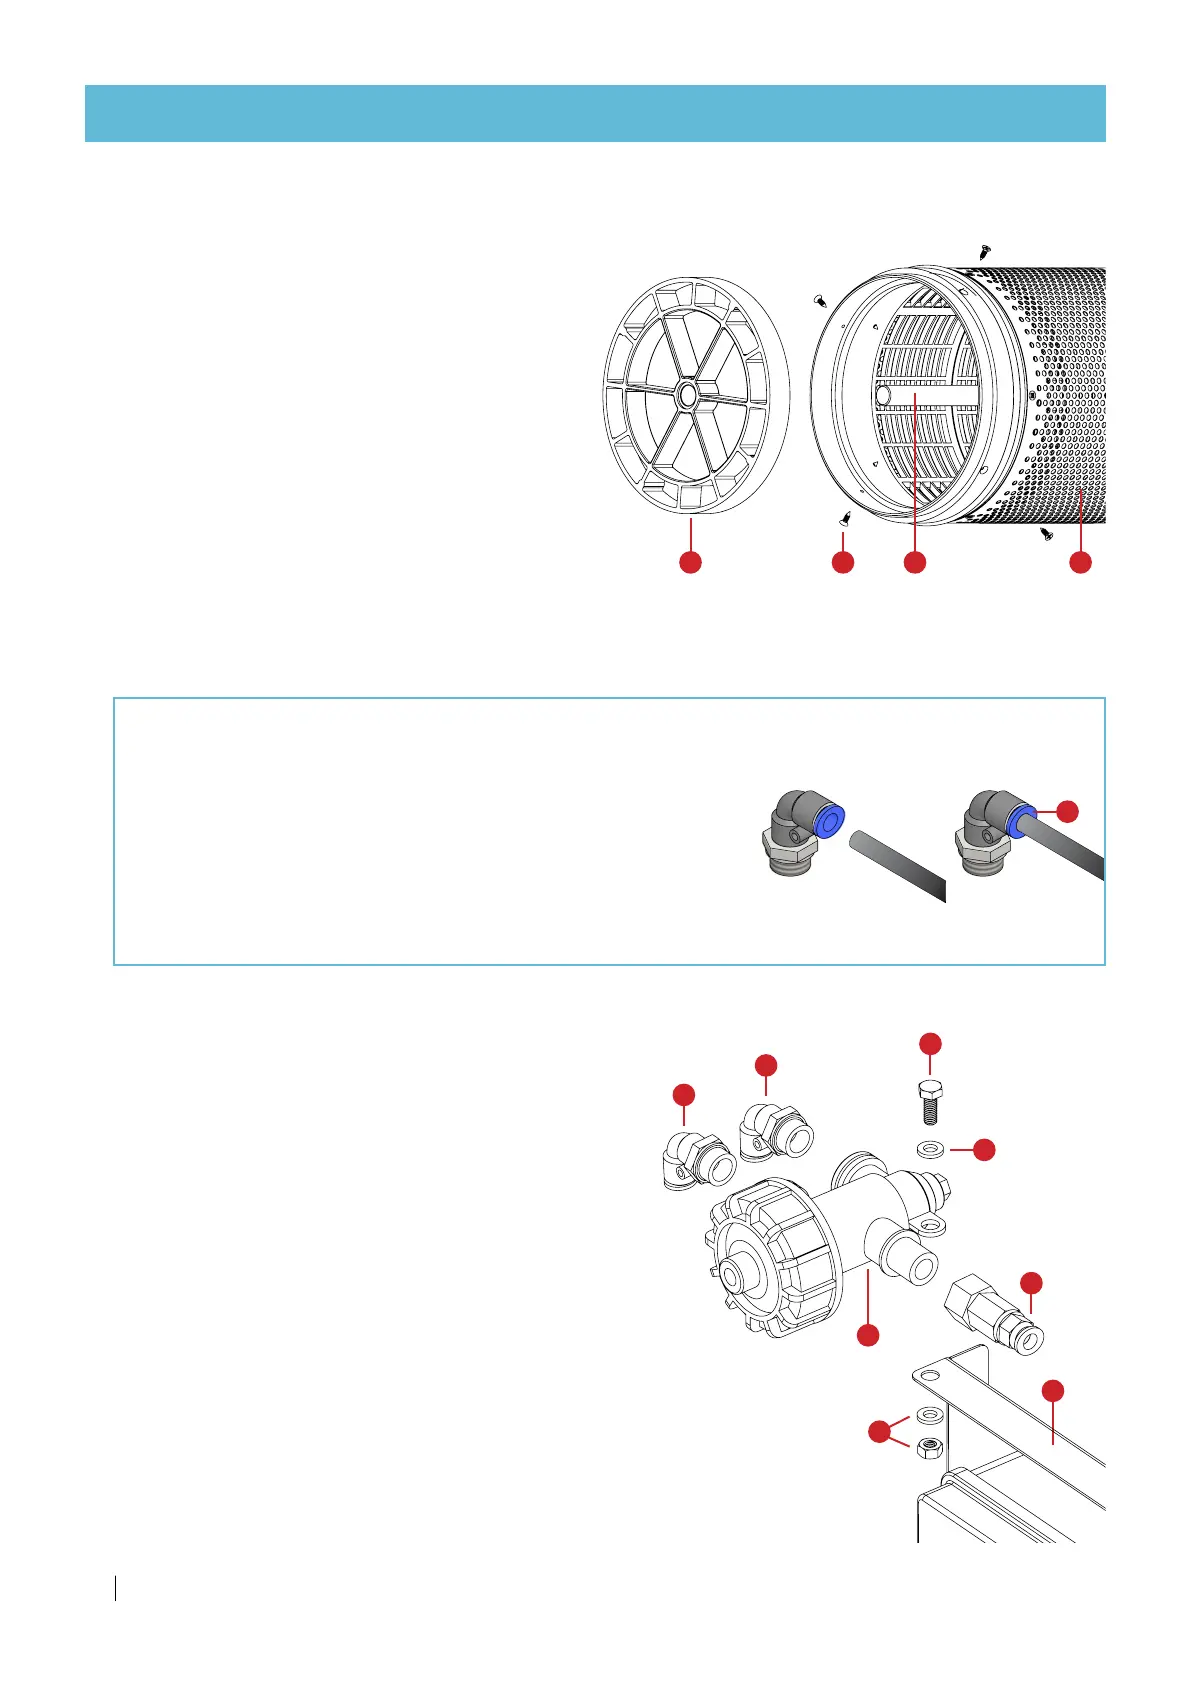
Hydraulic relay replacement
Disassembly:
1. Disconnect the control tubes from the 3 fast
connectors (A)
2. Unscrew the bolt (B) with a 10mm wrench to detach
the hydraulic relay (C)
from the Controller Support Bracket (D) (Keep the
bolt (B), the nut and washers (E)
3. Disconnect the 3 fast connectors (A) from the
hydraulic relay (C) with a 20mm wrench.
Assembly:
1. Connect the 3 fast connectors (A) to the new hydraulic relay (C)
with a 20mm wrench.
2. Attach the the hydraulic relay (C) on the Controller Support Bracket (D).
3. Gently fasten the bolt (B) with a 10mm wrench (Take care to use the bolt (B),
the nut and washers (E).
4. Connect the control tubes to the 3 fast connectors (A).
(Mind proper location, see control-tube connection scheme, page 12.)
A
A
A
C
B
D
E
E
A
Connection:
1.
Make sure the tip of the tube is cut neatly and straight.
2.
Simply insert the tube all the way into the fast connector.
3.
Slightly pull the tube back to make sure it is properly inserted.
Disconnection:
1.
Push back and hold the blue locking ring (A) and pull the tube out of the fast connector.
Control tube fast connector

 Loading...