Getting Started
9
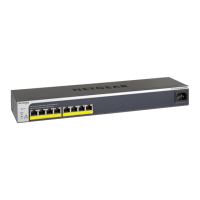
ProSAFE Easy-Mount 8-Port Gigabit Ethernet PoE+ Web Managed Switch
software, or temporarily disable the firewall, Internet security, antivirus
programs, or all of these on the computer that you use to configure the
switch. If you temporarily disable any security services, be sure to
reenable those services once configuration is complete.
5. Select the ProSAFE Easy-Mount Switch that you want to configure.
If you do not see the switch, click the REFRESH button.
6. When prompted, enter the password.
The default password is password.
The Switch Information page displays.
7. Use the utility to configure the switch settings.
8. When you are finished with the configuration, return the computer’s firewall, Internet security,
and antivirus programs to their usual settings.
For a description of Web Managed (Plus) features, see the ProSAFE Plus Switch Utility User
Guide. You can access the user guide through links on the Help tab of the utility and from the
resource CD.
Change the Password
The default password to access the switch is password. We recommend that you change
this password to a more secure password. The ideal password contains no dictionary words
from any language and contains uppercase and lowercase letters, numbers, and symbols. It
can be up to 20 characters.
To change the password:
1. Connect your computer to the same network as the switch.
You can use a WiFi or wired network connection, or connect directly to a switch that is
off-network using an Ethernet cable.
2. Launch a web browser.
3. In the address field of your web browser, enter the IP address of the switch.
If you do not know the IP address of the switch, see Access the Switch Using a Web
Browser on page 6.
The login window opens.
4. Enter the switch’s password in the password field.
The switch’s default password is password.
The Switch Information page displays.
5. Select Maintenance > Change Password.
The Change Password page displays.
 Loading...