12 – ENGLISH
6.2 PRE-SET FUNCTIONS
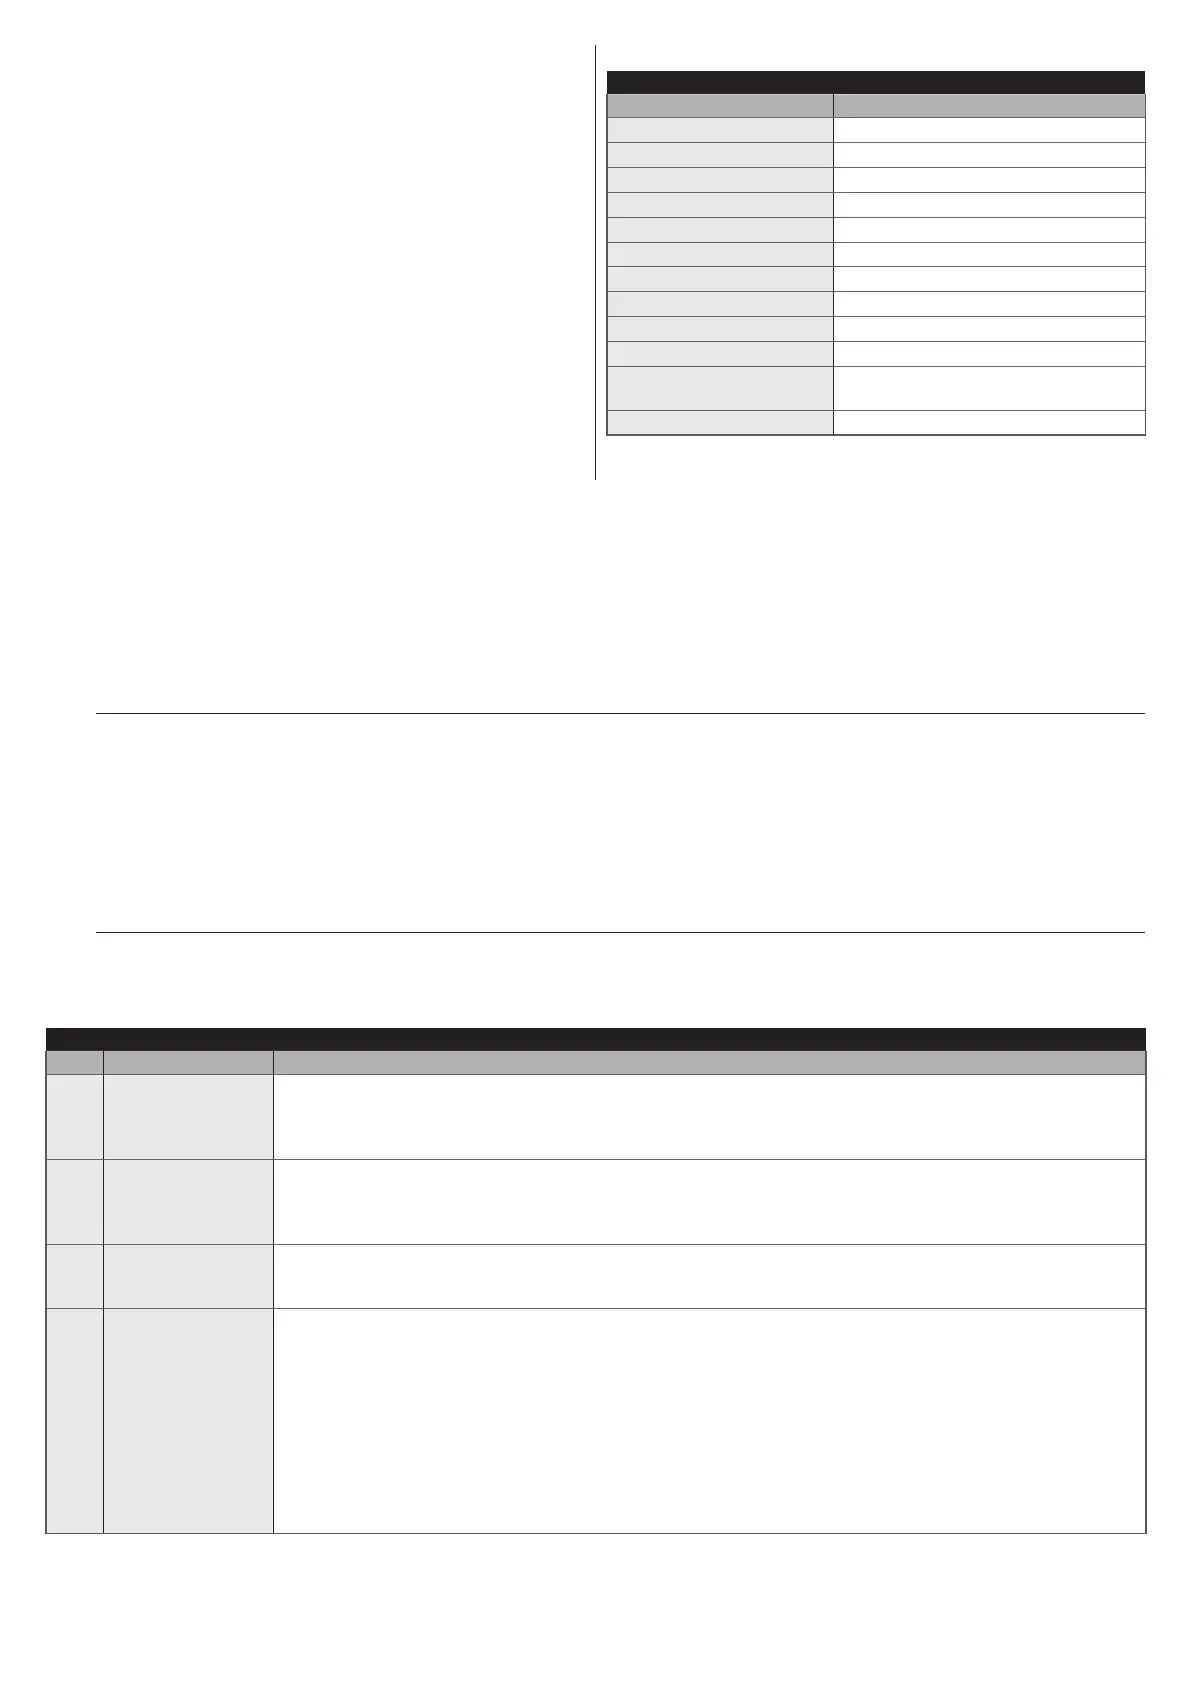
The control unit has a few programmable functions, which are
pre-set in a typical conguration that suits most automations (see
“Table 6”). The functions can be modied at any time, both be-
fore and after the automatic limit switch search phase, through
appropriate programming procedures described below.
Table 6
PRE-SET FUNCTIONS
Function Pre-set value
Automatic closing
active
Condominium
disabled
Pre-ashing
disabled
Close after photo
disabled
Opening delay
level 5 (20%)
Stand-by all / Phototest
Stand-by all
Electric lock / OGI
Electric lock
ALT (STOP) input
self-recognition NC / 8.2 kΩ
Heavy gates
disabled
Pause time
30 seconds
Auxiliary input
Type 1 partial opening (activates
upper leaf motor only)
Amperometric sensitivity
level 3
6.3 LEVEL 1 PROGRAMMING (ON-OFF)
All the Level 1 functions are set by default to “OFF” and can be modied at any time. Refer to “Table 7” to check the various func-
tions.
6.3.1 Level 1 programming procedure
m
The user has maximum 10 seconds to press the buttons consecutively during the programming procedure,
after which time the procedure terminates automatically and memorises the changes made up to then.
To perform Level 1 programming:
1. press and hold the [Stop/Set] button until LED “L1” starts ashing
2. press the [Open
p
] or [Close
q
] button to move the ashing LED to the LED associated with the function to be modied
3. press the [Stop/Set] button to change the status of the function:
– short ash = OFF
– long ash = ON
4. wait 10 seconds (maximum time) to exit the programming mode.
l
To set other functions to “ON” or “OFF”, while the procedure is running, repeat points 2 and 3 during the phase
itself.
Table 7
LEVEL 1 FUNCTIONS (ON-OFF)
LED Function Description
L1 Automatic closing
Function ENABLED: after an opening manoeuvre there is a pause (equal to the set pause time), after
which the control unit automatically starts a closing manoeuvre. The pause time is set by default to 30
seconds. Pressing the [Stop/Set] button or the intervention of the “STOP” input stop the cycle.
Function NOT ENABLED: the system works in “semi-automatic” mode.
L2 Close after photo
Function ENABLED: if the photocells intervene during the opening or closing manoeuvre, the pause
time drops to 4 seconds regardless of the set “pause time”. With “automatic closing” deactivated, if the
photocells intervene during the opening or closing manoeuvre, the “automatic closing” activates with a
4-second “pause time”.
L3 Always Close
Function ENABLED: in the event of a blackout, even of short duration, 10 seconds after the electricity
is restored the control unit detects that the gate is open and automatically starts a closing manoeuvre,
preceded by 5 seconds of pre-ashing.
L4
Stand-by /
Phototest
Function ENABLED: phototest.
Instead of the “Stand-by all” function, the user can activate the “Phototest” function, which veries
whether the photocells function properly at the start of a manoeuvre. To use this function, the connect the
photocells correctly (see “Figure 7 C”) then activate the function.
Function NOT ENABLED: stand-by.
The control unit has the “Stand-by all” function set by default; if it is active, 1 minute after the end of the
manoeuvre the control unit switches off the “Stand-by all” function (terminal 5), all the inputs and the other
outputs to limit consumption (see “Figure 7 A”). This function is mandatory if the control unit is powered
exclusively through Solemyo photovoltaic panels. It is recommended even if the control unit is powered
from the mains and the user wishes to increase the emergency mode operation with the PS124 back-up
battery.

 Loading...