ENGLISH – 11
4. LED “L2” ashes: position 0 of M2
– to command and move motor 2 to position “0” (“Fig-
ure 13”): press and hold the
f
or
h
button. Once the position is reached, release the button
to stop the manoeuvre
– to memorise the position, press and hold the
g
button for at least 3 seconds then release it (after 2 sec-
onds LED “L2” will remain lit and after the
g
button is released, LED “L3” will start ashing)
5. LED “L3” ashes: position SA of M2
– to command and move motor 2 to position “SA” (“Fig-
ure 13”): press and hold the
f
or
h
button. Once the position is reached, release the button
to stop the manoeuvre
– to memorise the position, press and hold the
g
button for at least 3 seconds then release it (after 2 sec-
onds LED “L3” will remain lit and after the
g
button is released, LED “L4” will start ashing)
6. LED “L4” ashes: position A of M1
– to command and move motor 1 to position “A” (“Fig-
ure 13”): press and hold the
f
or
h
button. Once the position is reached, release the button
to stop the manoeuvre
– to memorise the position, press and hold the
g
button for at least 3 seconds then release it (after 2 sec-
onds LED “L4” will remain lit and after the
g
button is released, LED “L5” will start ashing)
7. LED “L5” ashes: position A of M2
– to command and move motor 2 to position “A” (“Fig-
ure 13”): press and hold the
f
or
h
button. Once the position is reached, release the button
to stop the manoeuvre
– to memorise the position, press and hold the
g
button for at least 3 seconds then release it (after 2 sec-
onds LED “L5” will remain lit and after the
g
button is released, LED “L6” will start ashing)
8. LED “L6” ashes: position SC of M1
– to command and move motor 1 to position “SC” (“Fig-
ure 13”): press and hold the
f
or
h
button. Once the position is reached, release the button
to stop the manoeuvre
– to memorise the position, press and hold the
g
button for at least 3 seconds then release it (after 2 sec-
onds LED “L6” will remain lit and after the
g
button is released, LED “L7” will start ashing)
9. LED “L7” ashes: position 1 of M1
– to command and move motor 1 to position “1” (“Fig-
ure 13”): press and hold the
f
or
h
button. Once the position is reached, release the button
to stop the manoeuvre
– to memorise the position, press and hold the
g
button for at least 3 seconds then release it (after 2 sec-
onds LED “L7” will remain lit and after the
g
button is released, LED “L8” will start ashing)
10. LED “L8” ashes: position 1 of M2
– to command and move motor 2 to position “1” (“Fig-
ure 13”): press and hold the
f
or
h
button. Once the position is reached, release the button
to stop the manoeuvre
– to memorise the position, press and hold the
g
button for at least 3 seconds then release it (after 2 sec-
onds, LED “L8” will remain lit and after the
g
button is released).
a
If the system has a single motor only:
– proceed as described at points 1 and 2
– at points 3 and 9, press and hold the
g
button
for at least 3 seconds then release it
– after 2 seconds, the relative LED will remain lit until the
g
button is released. The next LED will then
start ashing.
Do not programme the positions relative to LEDs
L3 (SA of M2), L4 (A of M1) and L6 (SC of M1). To
shift between LEDs, simply press the
f
or
h
button briey (the LED will ash to signal
the current position).
4.8.3 Learning in mixed mode
m
The user has maximum 10 seconds to press the
buttons consecutively during the learning proce-
dure. After this time, the procedure terminates au-
tomatically and memorises the changes made up to
that time.
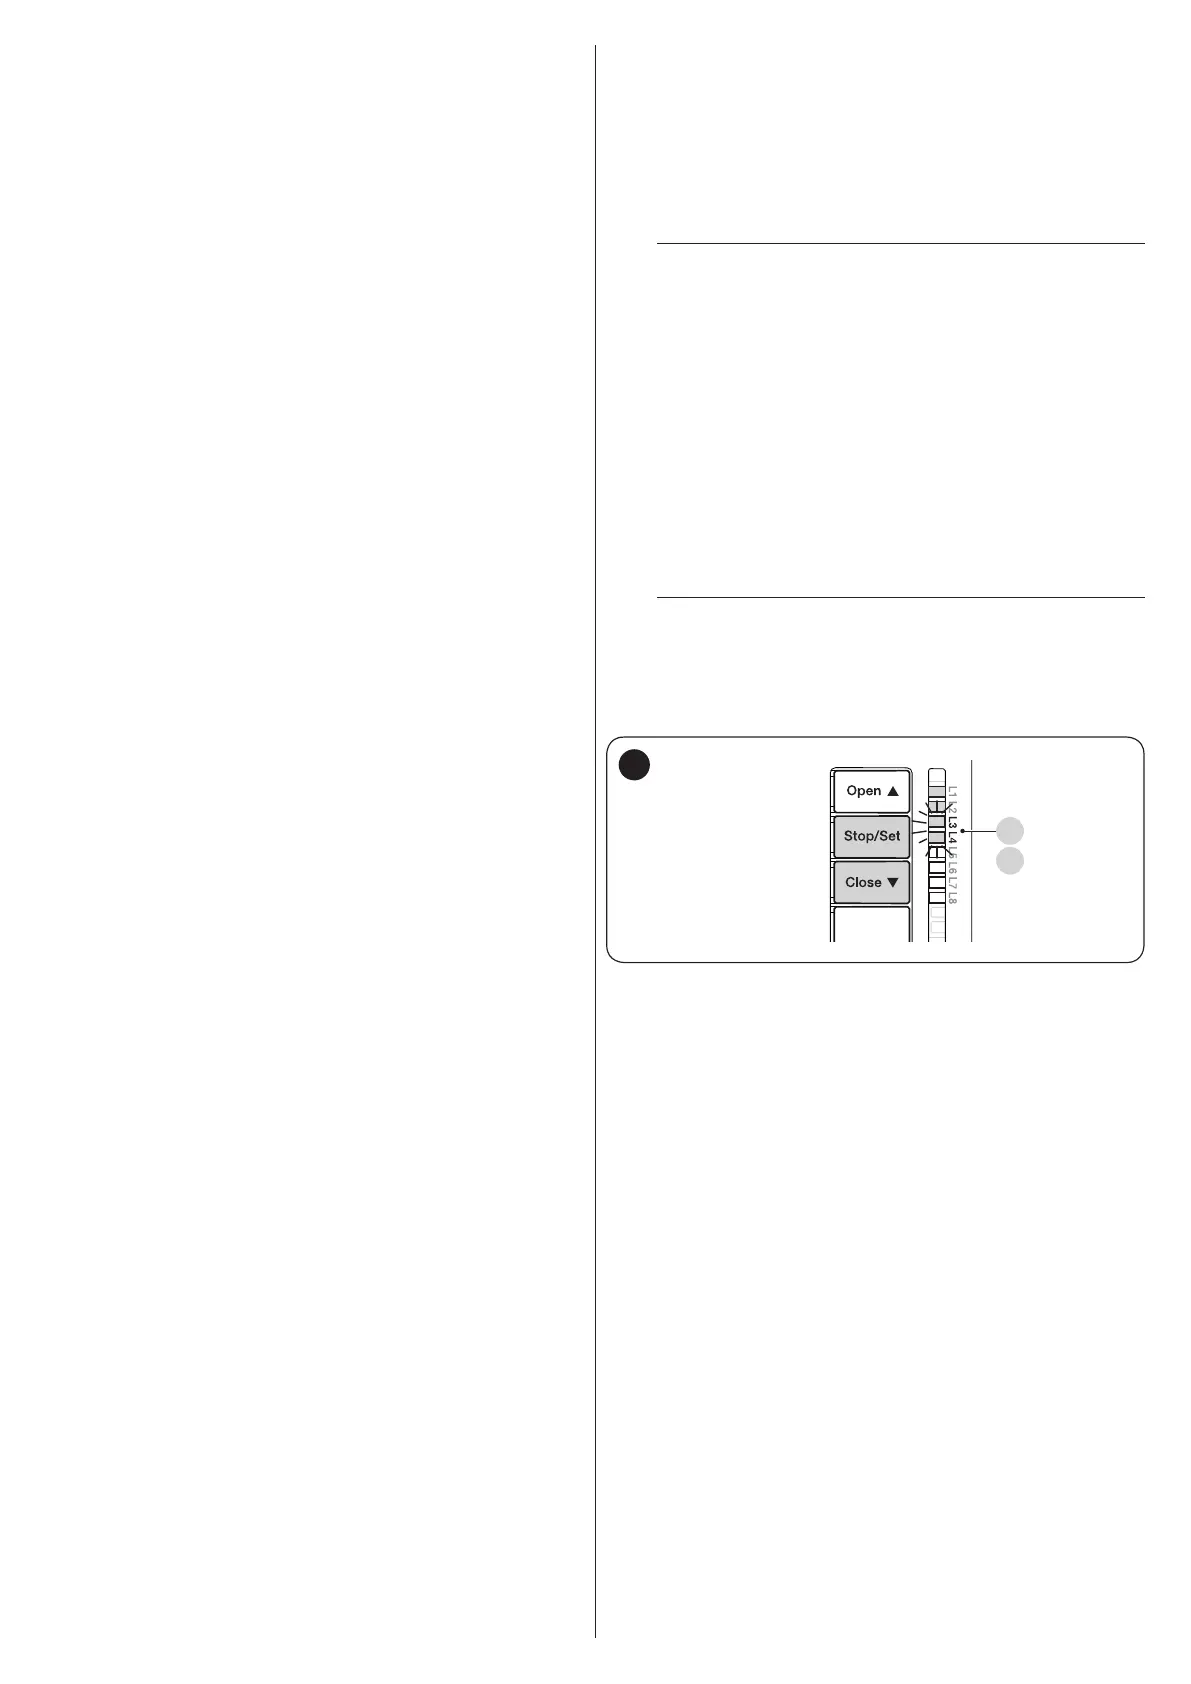
L3
L4
16
To effect the learning procedure in mixed mode:
1. run the self-learning procedure in automatic mode as de-
scribed under the “Learning in automatic mode” para-
graph
2. simultaneously press and hold the and
g
buttons
h
3. release the buttons when LED “L1” starts ashing
4. briey press the
f
o
h
button to shift the
ashing LED (L1…L8) to the position to be programmed
5. proceed for each individual position, as described in the “
Learning in manual mode” paragraph
6. repeat this last operation for all the other positions to be
modied.

 Loading...