Chapter 1 Microscopy Procedures
2
Chapter 1-1
Microscopy Procedures
Bright-field Microscopy
1.2
Bright-Field Microscopy Procedure
1. Turn on the power.
2. Lower condenser slightly from
uppermost position.
3. Fully open field and aperture
diaphragms.
4. Bring the 10x objective into the optical
path.
5. Bring specimen into optical path.
6. Focus on specimen.
7. Adjust diopter.
8. Adjust interpupillary.
9. Focus and center condenser.
10. Bring the desired objective into the
optical path.
11. Adjust the aperture diaphragm.
12. Focus on specimen.
13. Circumscribe field diaphragm to field
of view.
14. View specimen.
15. Turn off the power.
CLAMP
TORQUE
ND4
ND8
OUT
IN
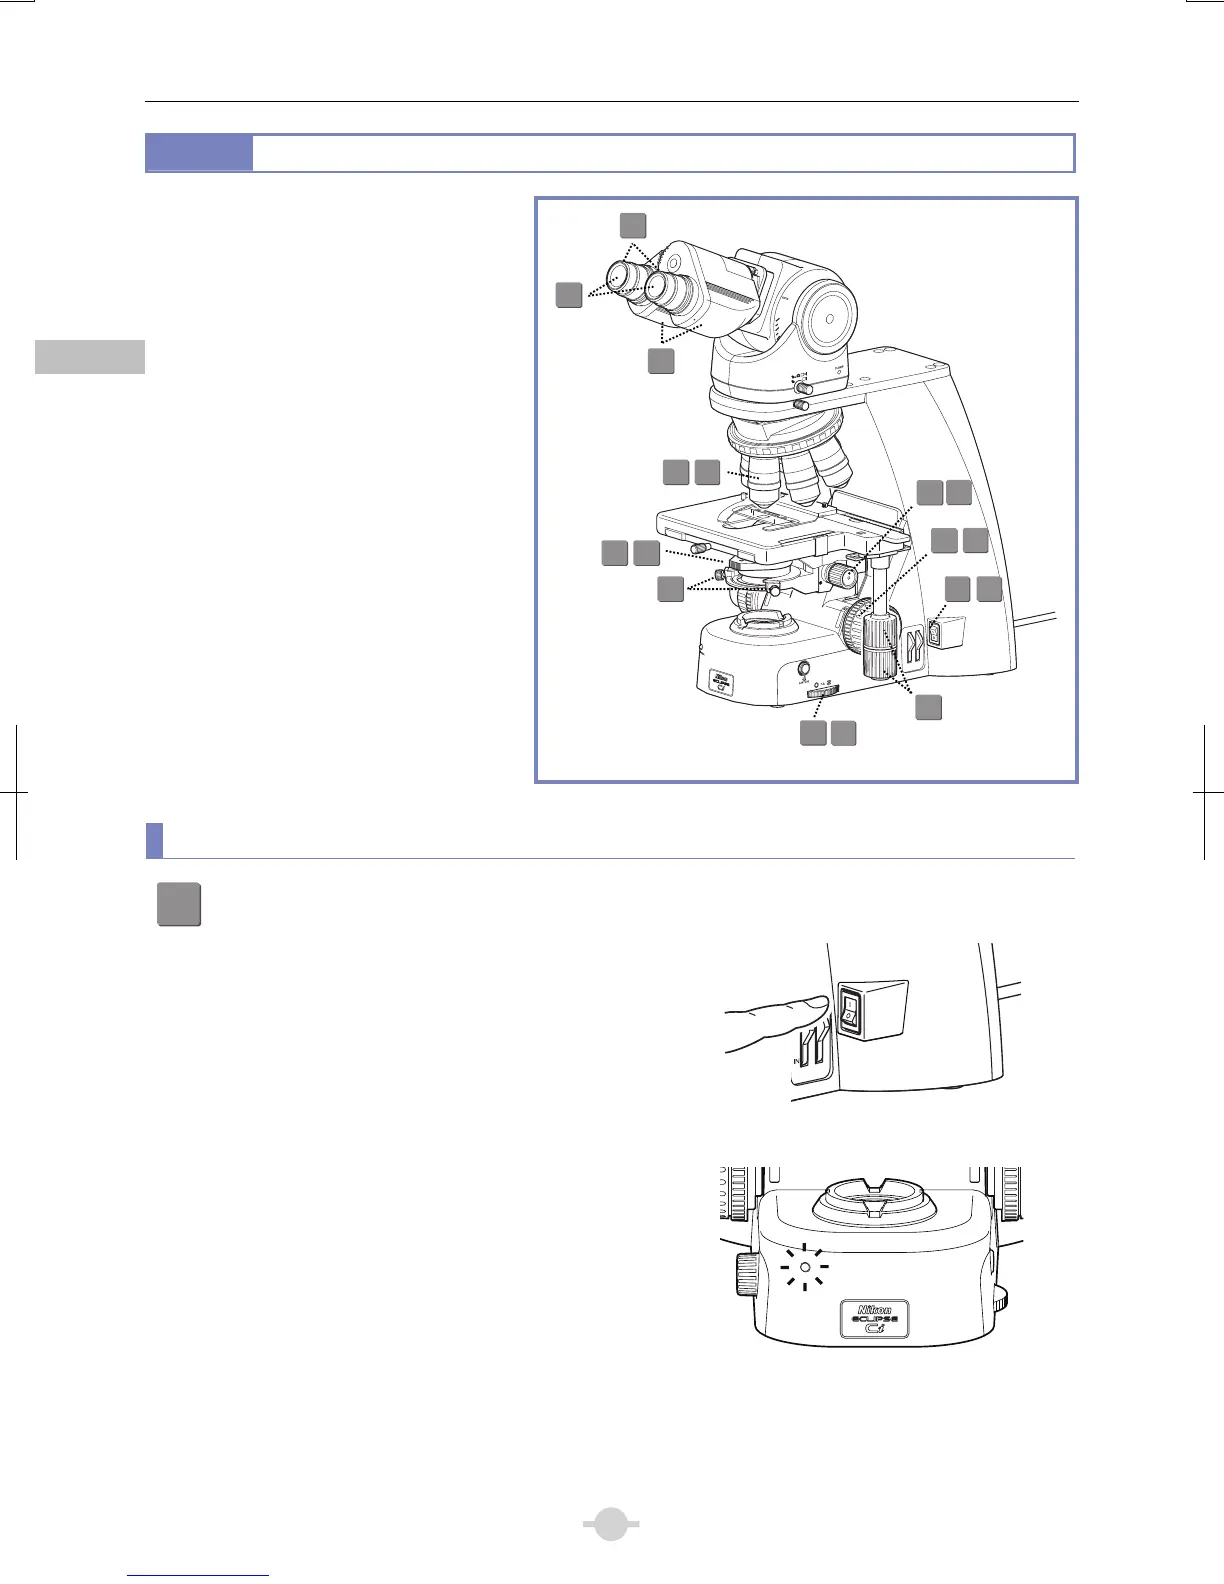
Preparation for microscopy
1
Turn on the power.
Press the switch to the “|” position to turn on the power to
the microscope (the power LED on the front of the main
body will light up to indicate that dia-illumination is turned
ON).
Power on
POWER
LED on
ON
5
7
8
9
4
10
6
12
3
13
14
1
15
3
11
2
9
 Loading...